
I remember the first time I tried to make something “pretty” in the kitchen. It was a disaster, honestly. But then one sunny afternoon, with a fridge full of yogurt and berries, I stumbled into these Swirl Yogurt Bites. My little niece was coming over, and I wanted something fun, something colorful, but also, you know, not just sugar. The kitchen turned into a berry-splattered art studio, and the smell of fresh fruit was just lovely. These bites have become our go-to for a quick, wholesome treat, and they always bring a smile.
The first time I added that tiny drop of black food coloring, I was so nervous! I thought it would just make everything murky. Oops! Instead, it created this amazing depth, making the berries really pop. My kitchen counter looked like a crime scene of berry juice and yogurt drips, but the result? Pure magic. These Swirl Yogurt Bites are a testament to embracing a little chaos.
Ingredients for Swirl Yogurt Bites
- Plain Greek Yogurt: This is your canvas! I always go for full-fat, because, to be real, it makes them creamier and less icy. Don’t use skim, just don’t. It’s too watery.
- Blueberries (fresh or frozen): The sweet, mellow star of one swirl. Fresh gives a brighter flavor, but frozen works perfectly fine if that’s what you’ve got. I’ve tried using only frozen before, and they can be a bit harder to mash smoothly.
Raspberries (fresh or frozen): Adds that lovely tart kick to balance the sweetness. I love how their little seeds add a bit of texture, but if you’re not a fan, you can strain them after mashing.
Honey or Maple Syrup: Just a touch to sweeten things up. Adjust to your taste, hon. I once added way too much honey and they became super sticky, learn from my mistakes!
Vanilla Extract: A secret weapon! Just a tiny splash elevates all the flavors. I swear by good quality vanilla, it makes a difference you can actually taste.
Black Food Coloring (gel): This is where the magic happens for that dark twist! Seriously, just a tiny speck is all you need to create a mysterious, deep hue. I once squeezed too much and had a truly black yogurt, oops!
Parchment Paper: Not an ingredient, but essential! Don’t skip this, otherwise, your bites will be stuck to the tray forever.
Crafting Your Swirl Yogurt Bites
- Prep Your Berries, Get Swirling:
- First things first, grab two separate bowls. In one, gently mash your blueberries with a fork until they’re mostly broken down but still a bit chunky you want some texture here, I think. In the other bowl, do the same with your raspberries. Honestly, sometimes I just use my hands for this, it’s a bit messy but feels more connected to the food, you know? The kitchen starts smelling so fresh and fruity!
- Flavor the Berries, Add the Dark Twist:
- To your mashed blueberries, stir in about a tablespoon of honey (or maple syrup) and a tiny splash of vanilla. Give it a good mix. Now, for the raspberries, do the same with another tablespoon of sweetener and vanilla. Here’s the fun part: add just a tiny dot of black gel food coloring to the raspberry mixture. Seriously, a speck! Stir it in until you get a deep, moody purple-black. It’s so cool how it transforms!
- Combine with Yogurt, Prepare the Tray:
- Grab a big bowl for your Greek yogurt. Divide it roughly in thirds. Stir your blueberry mixture into one third of the yogurt. Mix your raspberry-dark mixture into another third. Leave the last third of yogurt plain. Line a baking sheet with parchment paper this is crucial, I always forget this step and then regret it!
- Create Your Swirls:
- Now for the artistic part! Drop spoonfuls of each of the three yogurt mixtures (blueberry, dark raspberry, and plain) onto the parchment paper. Don’t be shy, let them touch and mingle a bit. I usually do blobs about 1-2 inches wide. This is where I often make a mess, but it’s part of the charm, right? Remember, these are your unique treats!
- Swirl and Chill:
- Take a skewer or a toothpick and gently swirl the different colors together. Don’t overmix, or you’ll lose that vibrant swirl! You want distinct lines of color. The smell of the berries and vanilla is just lovely here. Once you’re happy with your swirls, pop the whole tray into the freezer.
- Freeze Until Solid, Enjoy!
- Let your yogurt bites freeze for at least 2-3 hours, or until they’re completely solid. This is the hardest part, the waiting! Once they’re firm, you can easily peel them off the parchment paper. They should look like little frozen art pieces. Grab one and enjoy that cool, tangy, sweet burst of flavor!
One time, I was trying to make a huge batch for a picnic, and I completely ran out of freezer space. My tiny freezer was already packed with frozen veggies and who-knows-what. I ended up having to rearrange everything, balancing the tray precariously. It was a stressful 10 minutes, but those frozen treats were so worth the tetris challenge!
Swirl Yogurt Bites: Storage Tips
Okay, so once your bites are frozen solid, you’ll want to transfer them to an airtight container or a freezer-safe bag. I learned the hard way that just leaving them on the tray in the freezer makes them pick up all sorts of weird freezer smells not what you want, trust me! They’ll keep beautifully for about 2-3 weeks. I often make a big batch, then pull out a few whenever I need a quick, refreshing snack. They do get a little softer if left out for too long, so pop them back in the freezer if you’re not eating them right away. Don’t try to thaw and refreeze, the texture just isn’t the same.

Swirl Yogurt Bites: Ingredient Substitutions
Honestly, these bites are super flexible! If you don’t have blueberries or raspberries, pretty much any berry will work. Strawberries or blackberries would be lovely, though I tried mango once, and it was a bit too watery and didn’t freeze as nicely so stick to berries for the best swirl. No honey? Maple syrup or agave nectar are perfect swaps. I’ve even used a tiny bit of stevia before, and it worked, kinda, but the texture wasn’t quite as smooth. For the black food coloring, if you’re not into it, you can just skip it or use a tiny bit of spirulina powder for a natural green/blue hue, though it won’t give that dark, dramatic contrast.
Serving Your Swirl Yogurt Bites
These bites are perfect on their own, especially on a warm day. I love grabbing a handful for a quick breakfast when I’m rushing out the door. They’re also fantastic as a light dessert after dinner, maybe with a cup of herbal tea. My favorite way to enjoy them? A little bowl of these, a comfy blanket, and a good book. They’re like little frozen jewels that just make any moment feel a bit more special. Kids absolutely adore them too they’re a fun, healthy alternative to ice cream.
The Simple Joy of Swirl Yogurt Bites
While these don’t have a deep, ancient culinary history, they represent a modern “culture” of mindful, simple snacking that I adore. It’s about taking wholesome ingredients and transforming them into something visually appealing and utterly delicious without a fuss. For me, they harken back to childhood memories of raiding the freezer for homemade treats, a tradition of simple joys passed down through generations, even if the specific recipe is new. It’s about creating moments of connection through food, whether it’s with family, friends, or just a quiet moment for yourself.
Making these Swirl Yogurt Bites always feels like a little act of self-care. They’re so simple, yet so satisfying, and honestly, they always turn out so pretty. I love seeing the vibrant blues and reds peeking through the subtle dark swirls. It’s a little reminder that even the simplest things can bring so much joy. I hope you give these a whirl and find as much happiness in them as I do. Let me know your favorite berry combos!

Swirl Yogurt Bites: Frequently Asked Questions
- → Can I use non-dairy yogurt for these Swirl Yogurt Bites?
Yes, absolutely! I’ve tried it with coconut yogurt and almond-based yogurt, and they work really well. Just make sure it’s a thicker variety, like Greek-style non-dairy yogurt, so it freezes nicely and isn’t too icy. The taste will vary a bit, but the swirl effect is still gorgeous!
- → What if I don’t have black food coloring for my Swirl Yogurt Bites?
No worries at all! The black food coloring just adds a fun, dramatic contrast. You can totally skip it. Your treats will still be beautiful with just the blueberry and raspberry swirls. You could also try a tiny bit of purple food coloring for a similar effect, or even a deep blue.
- → My Swirl Yogurt Bites aren’t freezing solid enough. What did I do wrong?
This usually happens if your yogurt mixture is too thin or has too much liquid. Make sure you’re using thick Greek yogurt. Also, ensure your freezer is set cold enough, and give them ample time sometimes they need closer to 4 hours, especially if they’re thicker. Don’t give up, it happens!
- → How long can I store these Swirl Yogurt Bites in the freezer?
Once fully frozen, these treats can be stored in an airtight container in the freezer for up to 2-3 weeks. I often make a big batch on a Sunday and enjoy them throughout the week. Just remember to grab them out quickly, as they do start to soften at room temperature.
- → Can I add other fruits or mix-ins to the Swirl Yogurt Bites?
Absolutely! I’ve experimented with finely chopped kiwi (a bit tart but fun!) and even a tiny bit of lemon zest in the plain yogurt for extra zing. Just be careful with fruits that have high water content, as they can make the bites icier. Mini chocolate chips or a sprinkle of granola could be fun additions too, right before freezing!

Vibrant Swirl Yogurt Bites: Berry & Dark Twist
- Prep Time: 15 Minutes
- Cook Time: 0 Minutes
- Total Time: 3 Hours
- Yield: 24 Servings
- Category: Tasty Recipes
Description
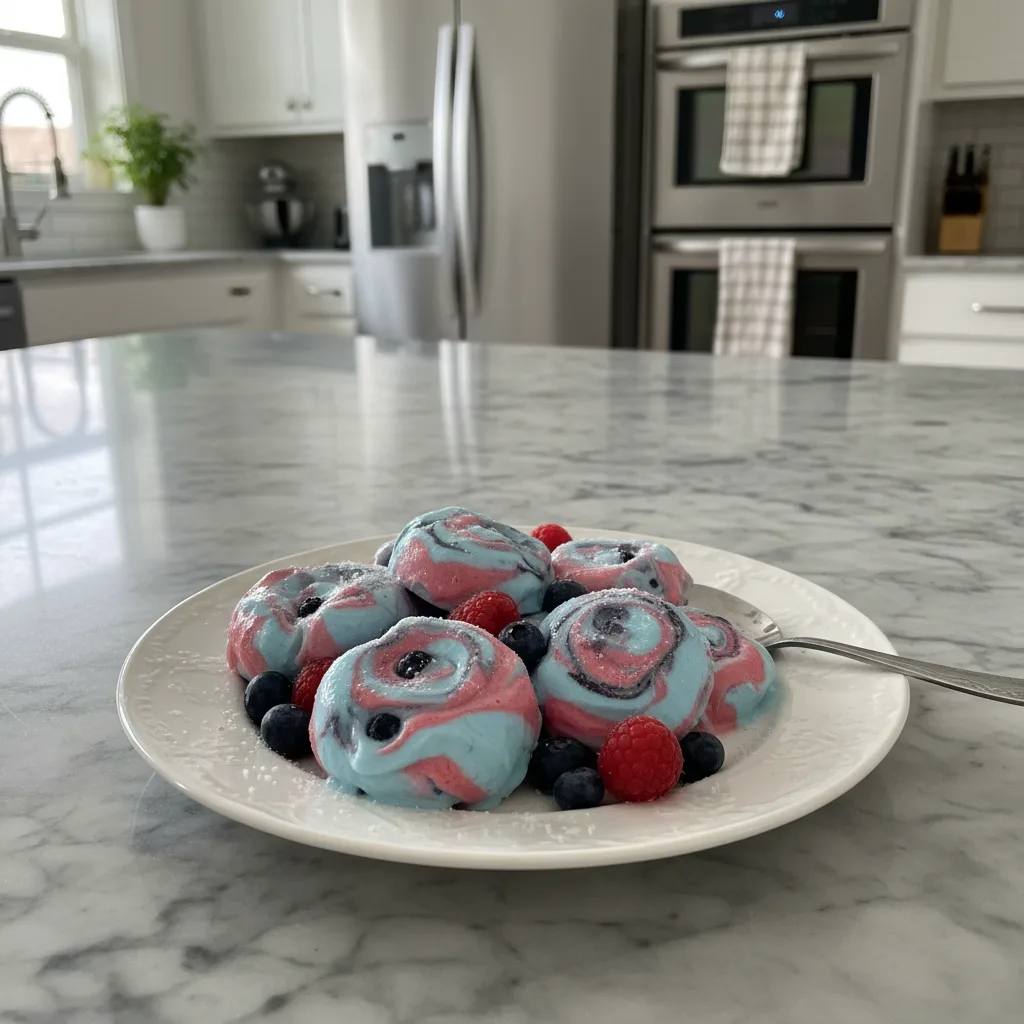
Make colorful Swirl Yogurt Bites with blueberry, raspberry, and a dark twist! An easy, fun, frozen treat for any time.
Ingredients
- Main Ingredients:
- Plain Greek Yogurt
- Blueberries (fresh or frozen)
- Raspberries (fresh or frozen)
- Honey or Maple Syrup
- Vanilla Extract
- Black Food Coloring (gel)
Instructions
- Prep Your Berries, Get Swirling: First things first, grab two separate bowls. In one, gently mash your blueberries with a fork until they’re mostly broken down but still a bit chunky – you want some texture here, I think. In the other bowl, do the same with your raspberries. Honestly, sometimes I just use my hands for this, it’s a bit messy but feels more connected to the food, you know? The kitchen starts smelling so fresh and fruity!
- Flavor the Berries, Add the Dark Twist: To your mashed blueberries, stir in about a tablespoon of honey (or maple syrup) and a tiny splash of vanilla. Give it a good mix. Now, for the raspberries, do the same with another tablespoon of sweetener and vanilla. Here’s the fun part: add just a *tiny* dot of black gel food coloring to the raspberry mixture. Seriously, a speck! Stir it in until you get a deep, moody purple-black. It’s so cool how it transforms!
- Combine with Yogurt, Prepare the Tray: Grab a big bowl for your Greek yogurt. Divide it roughly in thirds. Stir your blueberry mixture into one third of the yogurt. Mix your raspberry-dark mixture into another third. Leave the last third of yogurt plain. Line a baking sheet with parchment paper – this is crucial, I always forget this step and then regret it!
- Create Your Swirls: Now for the artistic part! Drop spoonfuls of each of the three yogurt mixtures (blueberry, dark raspberry, and plain) onto the parchment paper. Don’t be shy, let them touch and mingle a bit. I usually do blobs about 1-2 inches wide. This is where I often make a mess, but it’s part of the charm, right? Remember, these are your unique treats!
- Swirl and Chill: Take a skewer or a toothpick and gently swirl the different colors together. Don’t overmix, or you’ll lose that vibrant swirl! You want distinct lines of color. The smell of the berries and vanilla is just lovely here. Once you’re happy with your swirls, pop the whole tray into the freezer.
- Freeze Until Solid, Enjoy!: Let your yogurt bites freeze for at least 2-3 hours, or until they’re completely solid. This is the hardest part, the waiting! Once they’re firm, you can easily peel them off the parchment paper. They should look like little frozen art pieces. Grab one and enjoy that cool, tangy, sweet burst of flavor!


