I remember the first time I saw a candy apple that looked like it belonged on a mermaid’s picnic. It was at a small, quirky carnival by the coast, and honestly, it looked too pretty to eat. But then I took a bite, and that satisfying, sweet crunch? Game changer! I just knew I had to try making my own, even if my first attempts were… well, let’s just say they looked more like swamp monsters than ocean treasures. This recipe for Sweet Ocean Candy Apples is my journey to recreate that magic, with a little less chaos than my early kitchen experiments. It’s a bit of a project, but seeing those shimmering, jewel-toned apples emerge from the pot? Pure joy, every single time.
My very first batch of these candy apples was a disaster, to be real. I didn’t have a candy thermometer, because who needs one, right? Spoiler: you do! The candy either seized up into a gritty mess or stayed sticky forever. I had blue sugar stuck to everything, including the cat (oops, sorry, Mittens!). It was sticky, messy, and honestly, a lot of laughs. But that’s how we learn, isn’t it? Now, I swear by my candy thermometer and a very clean workspace.
Ingredients
Candy Base Essentials
- Granulated Sugar: This is the backbone of our candy shell. Don’t skimp on quality, it really makes a difference for that clear, crisp finish.
- Light Corn Syrup: The secret weapon against crystallization! It keeps our candy smooth and glassy. I tried making it without once, and let me tell you, it was a grainy, lumpy mess.
- Water: Just plain old tap water does the trick. It helps dissolve the sugar and corn syrup before boiling.
Flavor & Color Magic
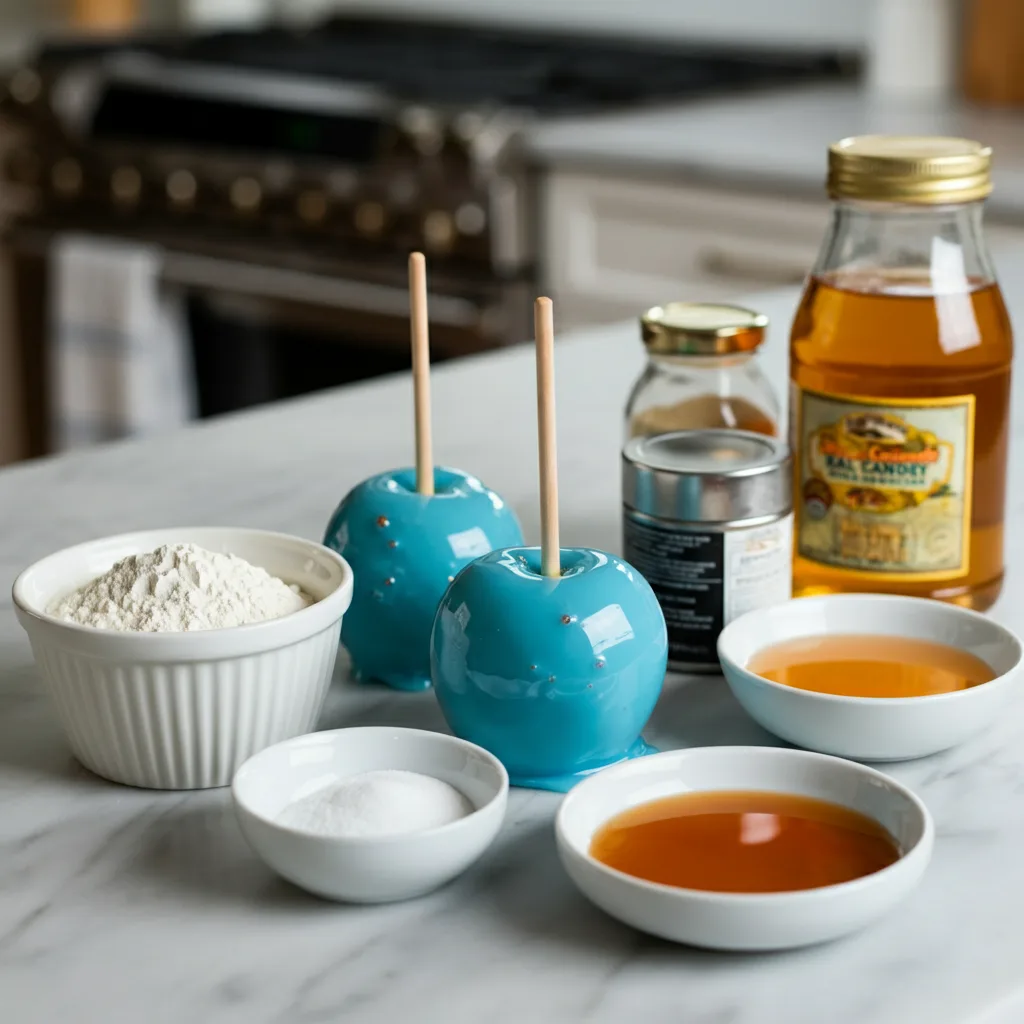
- Blue Food Gel Coloring: For that vibrant ocean hue! Gel coloring gives a much richer color without thinning out the candy. I always go for a deep teal, but you can adjust to your favorite shade of blue.
- Vanilla Extract: A splash of vanilla rounds out the sweetness beautifully. Use a good quality pure vanilla, the artificial stuff just doesn’t hit the same.
- Edible Glitter (Blue or Silver): This is where the magic happens! It gives these candy apples that shimmering, underwater sparkle. Don’t be shy with it, more glitter, more ocean magic!
The Apple Core
- Granny Smith Apples: Their tartness is essential to cut through the sweetness of the candy. Plus, they hold up so well to the hot candy. Make sure they’re super clean and dry, any wax or moisture will make the candy slide right off, and trust me, I’ve had that happen!
Finishing Touches
- Wooden Skewers or Sticks: Sturdy ones are a must. You don’t want your apple wobbling or falling off mid-dip.
Crafting Sweet Ocean Candy Apples
- Prep Your Apples:
- First things first, get those apples ready! Give them a really good wash under hot water to remove any waxy coating. I usually scrub them with a clean sponge. Then, and this is crucial, dry them completely. Seriously, bone-dry. Any moisture will cause the candy to slide off, and that’s a sad sight, believe me. Insert a sturdy wooden skewer into the stem end of each apple, pushing it about halfway through. This is where I always double-check they’re secure, a wobbly apple is an accident waiting to happen!
- Whip Up the Candy Base:
- In a heavy-bottomed saucepan, combine your granulated sugar, light corn syrup, and water. Stir gently just until the sugar is dissolved. This is important: once it starts boiling, don’t stir it! Stirring can cause sugar crystals to form, and then your beautiful candy will be grainy instead of glassy. Trust me, I learned that the hard way with a ruined batch. Attach your candy thermometer to the side of the pot, making sure it doesn’t touch the bottom.
- Boil to Perfection:
- Bring the mixture to a boil over medium-high heat. Let it bubble away without stirring until your candy thermometer reaches 300-310°F (149-154°C), which is the hard crack stage. This takes patience, hon. While it’s boiling, I sometimes use a wet pastry brush to wipe down the sides of the pot, just to prevent any stray sugar crystals from messing things up. This step smells so sweet and warm!
- Add Color and Sparkle to Sweet Ocean Candy Apples:
- Once the candy reaches temperature, immediately remove it from the heat. Stir in your blue food gel coloring and vanilla extract. Be quick but gentle. Then, sprinkle in your edible glitter and give it another swift stir. The candy will be hot, so be super careful here! This is where the magic really starts to happen, and you see that gorgeous ocean hue come to life. I always get a little giddy at this point.
- Dip and Dazzle:
- Working quickly, tilt your saucepan to one side to create a deeper pool of candy. Take an apple by its skewer and dip it into the candy, rotating it to coat evenly. Lift it out, let any excess drip off back into the pot, and then place it on a parchment-lined baking sheet to set. I usually give it a quick little twirl to make sure it’s not puddling too much at the bottom. This is where things can get a little messy, but that’s part of the fun!
- Cool and Enjoy These Candy Apples:
- Let the dipped apples cool completely on the parchment paper. This usually takes about 20-30 minutes, depending on your kitchen’s temperature. You’ll know they’re ready when the candy shell is completely hard and glassy. They should make a satisfying tap when you gently touch them. Once cool, they’re ready to be devoured! Honestly, the crunch is so satisfying, and that shimmer is just chef’s kiss.
I remember one time, I was trying to rush the cooling process and stuck a batch of these candy apples in the fridge. Big mistake! They got all sticky and condensation-y. It was a sad, melty scene. Now, I just let them patiently cool on the counter, embracing the natural pace of things. Sometimes, the kitchen chaos is a good teacher, even if it means sacrificing a few beautiful treats.
Storage Tips for Sweet Ocean Candy Apples
Storing Sweet Ocean Candy Apples properly is key to keeping that beautiful, crisp shell. From my experience, the fridge is a no-go, it makes them sticky and dull. Instead, once they’re completely cooled and hardened, store them individually wrapped in plastic wrap or in an airtight container at room temperature. Keep them away from any humidity, which is their arch-nemesis! They’ll stay fresh and crunchy for about 3-5 days. I usually make them a day or two before I plan to serve them, just to ensure they’re at peak crunchiness. I once left a batch uncovered on the counter for a day, and honestly, they started to get a bit tacky. Learn from my mistakes, friends!
Sweet Ocean Candy Apples: Ingredient Swaps
I’ve tried a few swaps in my journey to perfect these Sweet Ocean Candy Apples. For the food coloring, if blue isn’t your vibe, you could totally go for a shimmering green for a ‘seaweed’ look or even a deep purple for a ‘twilight ocean.’ I tried pink once for a ‘coral reef’ theme, and it worked, kinda, but the blue just feels more classic ocean to me. As for the apples, while Granny Smiths are my absolute favorite for their tartness, I’ve used Honeycrisp in a pinch. They’re a bit sweeter, so the overall apple is less tart, but still delicious. Just make sure whatever apple you choose is firm and not too small, or they’ll be hard to dip!
Serving These Candy Apples
These candy apples are a treat all on their own, but I’ve found a few ways to make them extra special. They’re just delightful served as a whimsical dessert at a summer party or a themed birthday. For a cozy night in, I sometimes pair them with a warm mug of spiced cider the contrast of the crisp, cold apple and warm drink is just lovely. If you’re feeling fancy, you could even crush some graham crackers to sprinkle around the base on a plate, giving it a ‘sandy beach’ look. Honestly, they’re so visually stunning, they don’t need much else, but a little imagination never hurts!
The Story Behind Sweet Ocean Candy Apples
Candy apples have this wonderful, nostalgic charm, don’t they? They’ve been a fairground staple for over a century, said to have been invented by a candymaker named William W. Kolb in New Jersey back in 1908. He was experimenting with cinnamon candy for Christmas and dipped an apple in it, and boom, a classic was born! For me, these Sweet Ocean Candy Apples are a modern twist on that tradition. They connect me to those simple, joyful moments of childhood, strolling through a fair with sticky fingers. It’s about taking something familiar and giving it a little sprinkle of personal magic, making it feel new and exciting again, like finding a hidden gem on the beach.
And there you have it, my shimmering candy apples! They might take a bit of patience, but honestly, the payoff is so worth it. That glassy, crunchy shell, the tart apple inside, and that magical sparkle? It’s truly something special. I hope you give them a try and maybe even have a few “oops” moments that turn into funny kitchen stories of your own. Share your creations with me, I’d love to see your ocean treasures!
Frequently Asked Questions About Sweet Ocean Candy Apples
- → Can I use other types of apples for these candy apples?
You sure can, hon! While Granny Smiths are my top pick for their tartness and firmness, I’ve used Honeycrisp and Fuji. Just make sure they’re firm and not too ripe, or they might get a bit mushy with the hot candy. Always clean and dry them meticulously!
- → My candy turned grainy. What went wrong?
Oh, I’ve been there! Usually, grainy candy means you stirred it too much after the sugar dissolved, or sugar crystals splattered from the sides of the pot back into the mixture. Next time, resist the urge to stir once it boils, and wipe down the pot sides with a wet pastry brush. It’s a common oops, don’t worry!
- → How do I know when the candy is at the hard crack stage?
A candy thermometer is your best friend here! You’re looking for 300-310°F (149-154°C). If you don’t have one, you can drop a tiny bit of candy into cold water, it should immediately form brittle threads that snap easily. Honestly, a thermometer saves a lot of guesswork and heartache!
- → Can I make these candy apples ahead of time?
Absolutely! They hold up pretty well. I usually make them a day or two in advance. Just make sure they’re completely cool and then wrap each one individually in plastic wrap. Store them at room temperature, away from any humidity, to keep that beautiful, crisp shell.
- → Can I use liquid food coloring instead of gel for these candy apples?
You can, but I wouldn’t recommend it for these candy apples. Liquid food coloring can thin out your candy mixture, making it harder to get that perfect, thick coating. Gel coloring gives you a much richer, more vibrant color without affecting the candy’s consistency. I learned that after a few pale, runny batches!
Sweet Ocean Candy Apples: A Glimmering Homemade Treat
- Prep Time: 30 Minutes
- Cook Time: 15 Minutes
- Total Time: 45 Minutes
- Yield: 8 Servings 1x
- Category: Desserts
Description
Sweet Ocean Candy Apples bring a splash of seaside magic to your kitchen. Learn my personal tips for making these shimmering, crunchy treats at home.
Ingredients
- Candy Base Essentials:
- 3 cups (600g) granulated sugar
- 1 cup (240ml) light corn syrup
- 1 cup (240ml) water
- Flavor & Color Magic:
- 1–2 teaspoons blue food gel coloring (adjust to desired shade)
- 1 teaspoon vanilla extract
- 1–2 tablespoons edible glitter (blue or silver)
- The Apple Core:
- 8 medium Granny Smith apples, thoroughly washed and dried
- Finishing Touches:
- 8 sturdy wooden skewers or candy apple sticks
Instructions
- Prep Your Apples:: First things first, get those apples ready! Give them a really good wash under hot water to remove any waxy coating. I usually scrub them with a clean sponge. Then, and this is crucial, dry them completely. Seriously, bone-dry. Any moisture will cause the candy to slide off, and that’s a sad sight, believe me. Insert a sturdy wooden skewer into the stem end of each apple, pushing it about halfway through. This is where I always double-check they’re secure; a wobbly apple is an accident waiting to happen!
- Whip Up the Candy Base:: In a heavy-bottomed saucepan, combine your granulated sugar, light corn syrup, and water. Stir gently just until the sugar is dissolved. This is important: once it starts boiling, don’t stir it! Stirring can cause sugar crystals to form, and then your beautiful candy will be grainy instead of glassy. Trust me, I learned that the hard way with a ruined batch. Attach your candy thermometer to the side of the pot, making sure it doesn’t touch the bottom.
- Boil to Perfection:: Bring the mixture to a boil over medium-high heat. Let it bubble away without stirring until your candy thermometer reaches 300-310°F (149-154°C), which is the hard crack stage. This takes patience, hon. While it’s boiling, I sometimes use a wet pastry brush to wipe down the sides of the pot, just to prevent any stray sugar crystals from messing things up. This step smells so sweet and warm!
- Add Color and Sparkle to Sweet Ocean Candy Apples:: Once the candy reaches temperature, immediately remove it from the heat. Stir in your blue food gel coloring and vanilla extract. Be quick but gentle. Then, sprinkle in your edible glitter and give it another swift stir. The candy will be hot, so be super careful here! This is where the magic really starts to happen, and you see that gorgeous ocean hue come to life. I always get a little giddy at this point.
- Dip and Dazzle:: Working quickly, tilt your saucepan to one side to create a deeper pool of candy. Take an apple by its skewer and dip it into the candy, rotating it to coat evenly. Lift it out, let any excess drip off back into the pot, and then place it on a parchment-lined baking sheet to set. I usually give it a quick little twirl to make sure it’s not puddling too much at the bottom. This is where things can get a little messy, but that’s part of the fun!
- Cool and Enjoy These Candy Apples:: Let the dipped apples cool completely on the parchment paper. This usually takes about 20-30 minutes, depending on your kitchen’s temperature. You’ll know they’re ready when the candy shell is completely hard and glassy. They should make a satisfying tap when you gently touch them. Once cool, they’re ready to be devoured! Honestly, the crunch is so satisfying, and that shimmer is just *chef’s kiss*.

