
I remember the first time I saw candy apples. It was at a small town fair, probably when I was no bigger than a bushel basket, and the vibrant, shiny red just screamed ‘eat me!’ Honestly, I was mesmerized. This recipe for Sunset Glow Candy Apples brings back that exact feeling, but with a twist that’s all sunshine and smiles. There’s something so wonderfully simple about a classic, but adding a splash of orange and yellow to mimic a beautiful sunset? That’s just pure magic in my book. It reminds me of those late summer evenings, sticky hands, and not a care in the world. It’s a little messy, sure, but the joy it brings is absolutely worth every bit of sticky cleanup!
My very first try at making candy apples, oh boy. I forgot the candy thermometer, thinking I could just ‘eyeball’ it. Rookie mistake! The sugar went from perfectly clear to burnt caramel in literally seconds, filling the kitchen with a smell that wasn’t exactly pleasant. My husband still teases me about the ‘smoke detector special’ that day. But you know what? I learned, I laughed, and I tried again. That’s the real beauty of home cooking, isn’t it? Embracing the little kitchen chaos and coming out with something delicious.
Ingredients
- Crisp Apples (Granny Smith or Honeycrisp): You want that tart crunch, hon! Granny Smiths cut through the sweetness of these Sunset Glow Candy Apples beautifully, and honestly, don’t skimp on quality here. I tried a softer apple once, and it just got mushy a total disappointment.
- Granulated Sugar: This is the backbone of our candy coating. Just plain old white sugar. No fancy stuff needed, trust me. I did try using brown sugar once for a deeper flavor, but the color wasn’t right for that sunset glow, so stick to white.
- Light Corn Syrup: This is your secret weapon against crystallization. Without it, your candy coating can turn grainy. I didn’t use it my first time, and let’s just say my apples had a rather ‘sugary sand’ texture. Not ideal!
- Water: Just enough to dissolve the sugar. Simple, right? Make sure it’s room temperature when you start, it helps everything blend smoothly.
- Gel Food Coloring (Red, Orange, Yellow): For that stunning sunset glow! Gel colors are more vibrant and don’t thin out your candy mixture like liquid drops can. I once used liquid, and the colors were so dull, it looked more like a cloudy day than a sunset.
- Vanilla Extract: A little splash of warmth and depth. It just rounds out the sweetness. Honestly, I always add a tiny bit more than the recipe calls for because I just love that cozy aroma.
- Popsicle Sticks or Skewers: Essential for dipping and holding. Make sure they’re sturdy. I’ve had flimsy ones break mid-dip, sending an apple plunging into hot sugar not fun, friends.
Instructions
- Prep Your Apples Right:
- First things first, wash and dry those apples like your life depends on it! Any wax or moisture means your candy won’t stick, and that’s a sad, sad sight. I usually give them a good scrub under hot water, then dry them individually with a paper towel, making sure they’re absolutely spotless. Then, firmly insert a popsicle stick into the stem end of each apple. This is where I always double-check, a wobbly stick is a recipe for disaster later on, trust me, I’ve had apples fall off mid-dip!
- Craft the Candy Base:
- In a heavy-bottomed saucepan, combine your granulated sugar, corn syrup, and water. Stir gently just until the sugar is moistened. Now, here’s the critical bit: bring it to a boil over medium-high heat WITHOUT stirring. Seriously, resist the urge! Stirring can cause crystallization, and we don’t want grainy Sunset Glow Candy Apples. Attach a candy thermometer to the side of the pot, making sure it doesn’t touch the bottom, and let it do its thing. I made the mistake of stirring once, and the whole batch turned into sugar crystals before I even got to the apples. Oops!
- Achieve Sunset Temperature:
- Continue to cook the syrup until it reaches exactly 300°F (150°C), which is the ‘hard crack’ stage. This is where the magic happens for that perfect, crisp candy shell. It’ll start to smell wonderfully sweet as it gets closer. Keep a close eye on that thermometer, because it can jump quickly once it gets going. Don’t rush it, but don’t walk away either! I’ve learned the hard way that a few degrees too high means burnt sugar, and too low means sticky, soft candy, neither of which is what we’re aiming for with these beautiful Sunset Glow Candy Apples.
- Infuse Color and Flavor:
- Once your syrup hits 300°F, immediately remove the pot from the heat. This is where you quickly, but carefully, stir in the vanilla extract and your gel food coloring. For that sunset glow, I like to do a couple of drops of red, a few of orange, and maybe one or two of yellow. Swirl them gently to create that beautiful gradient effect. Work fast, because the syrup cools quickly! I once got distracted, and the color just wouldn’t blend properly, leaving me with patchy apples. Learn from my mistakes, friends!
- Dip into the Glow:
- Now for the fun part! Carefully tilt your saucepan to one side. Holding an apple by its stick, dip it into the hot candy syrup, rotating and twirling it to get an even, smooth coating all around. Let any excess drip off back into the pot. You want a nice, thin, even layer. I always try to do this over a piece of parchment paper, because, let’s be real, drips happen, and cleanup is easier that way. Sometimes I’ll get a little extra on the bottom, but that’s just character, right?
- Set the Sunset Glow Candy Apples:
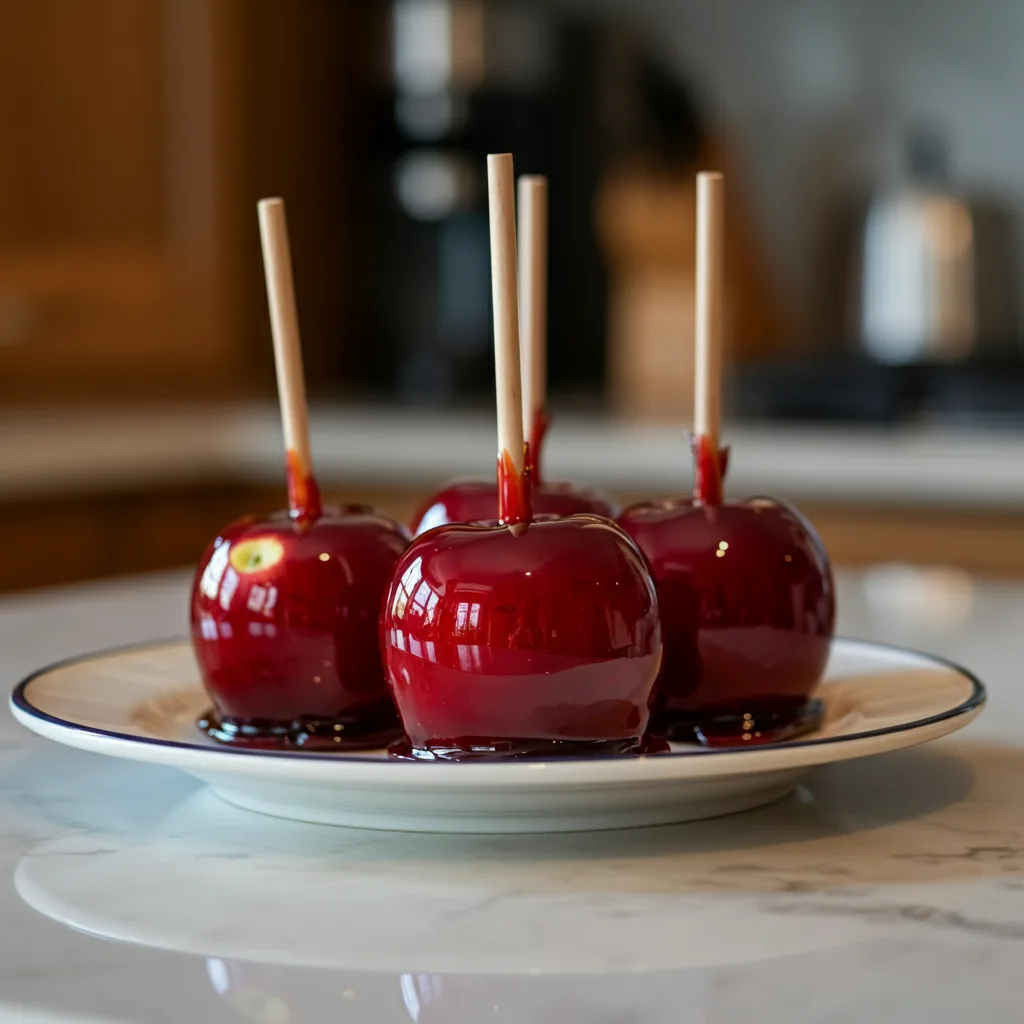
- Place your freshly coated Sunset Glow Candy Apples onto a sheet of parchment paper or a silicone mat to cool and harden completely. This usually takes about 15-20 minutes. Resist the urge to touch them while they’re setting, I’ve left many a fingerprint on a still-soft apple! Once they’re firm and shiny, they’re ready to be admired and, of course, devoured. They should look absolutely stunning, vibrant, and perfectly glossy, just like a little edible sunset!
Honestly, the kitchen gets a little sticky when I make these, but it’s a happy kind of mess. There’s something so satisfying about seeing those vibrant colors come to life as the candy sets. It reminds me of the simple joys, like making mud pies as a kid, but way tastier! I usually end up with a few extra drips on the counter, but that’s just part of the process, right? It’s a sweet, sticky memory in the making.
Sunset Glow Candy Apples Storage Tips
So, you’ve made these gorgeous Sunset Glow Candy Apples, and now you want them to last? Here’s the deal: store them at room temperature in an airtight container. I found out the hard way that refrigerating them is a big no-no, the humidity in the fridge makes the candy coating sticky and weep, which is just sad after all that effort! I once put a batch in the fridge for a party the next day, thinking it would keep them fresh, and they were a gooey mess. Learn from my mistake, lol. They’ll stay crisp and beautiful for about 2-3 days this way. If you stack them, put a small piece of parchment paper between each apple to prevent sticking. They really are best enjoyed within a day or two for that perfect crunch, but they’ll still be lovely for a bit longer.

Sunset Glow Candy Apples Ingredient Substitutions
While the classic recipe for Sunset Glow Candy Apples is wonderful, I’ve definitely played around a bit! If you can’t find Granny Smith, Honeycrisp apples work beautifully, they’re crisp and sweet-tart. I tried Red Delicious once, and it was just too soft for my liking, honestly. For the corn syrup, some folks use golden syrup, and I tried it once it worked, kinda, but the color was a bit different, and it had a slightly distinct flavor. It’s okay if you’re in a pinch, but corn syrup is truly ideal. As for flavorings, instead of vanilla, I’ve used a tiny bit of almond extract for a different twist, which was surprisingly good! You can also experiment with different food colorings to create your own unique shades, like a galaxy apple or even a spooky green for Halloween. Just remember, gel colors are always your friend for intensity!
Serving Sunset Glow Candy Apples
These Sunset Glow Candy Apples are a treat all on their own, but serving them up can be an event! They’re absolutely darling for dessert tables at parties just line them up, and watch everyone ooh and aah. For a cozy night in, I love pairing them with a simple cup of hot cocoa or even a mug of spiced cider, the tart apple and sweet candy just sing with those warm drinks. I’ve also served them alongside a scoop of vanilla bean ice cream for a little extra indulgence, which was a hit at a family gathering. They’re also fantastic for a movie night, much better than plain old popcorn sometimes! The vibrant colors make them a visual feast, so let them shine as the star of your spread.
The History of Candy Apples
You know, the history of candy apples is as sweet as the treat itself! They actually date back to 1908, when a candy maker named William W. Kolb in Newark, New Jersey, accidentally created them. He was experimenting with red cinnamon candy for Christmas and dipped some apples in the mixture, displaying them in his shop window. They were an instant hit, and the rest, as they say, is history! For me, they always evoke memories of carnivals, fairs, and simpler times. My grandma used to tell me stories about getting them as a kid, and it felt like a little piece of history in my hands. These Sunset Glow Candy Apples are a nod to that timeless tradition, adding a modern, colorful twist to a beloved classic that has brought joy for generations. It’s a truly comforting connection to the past.
These Sunset Glow Candy Apples truly make my heart happy. There’s something so rewarding about creating something so beautiful and delicious from scratch, even with a few sticky moments along the way. They always turn out so vibrant, just like a painting you can eat! It’s a little piece of childhood joy, bottled up in a shiny, sweet coating. I hope they bring as much sunshine to your kitchen as they do to mine. Don’t forget to share your colorful creations with me!

Frequently Asked Questions about Sunset Glow Candy Apples
- → Why are my Sunset Glow Candy Apples sticky?
Usually, this means your syrup didn’t reach the full hard-crack stage (300°F). Or, it could be humidity in the air. I always check my thermometer carefully, and try to make them on a dry day, it makes a big difference!
- → Can I use other types of apples for candy apples?
Absolutely! While tart apples like Granny Smith are my favorite, you can use Honeycrisp or Fuji. I tried Gala once, and it was a bit too sweet for my taste, but it still worked. Just make sure they’re firm!
- → How do I get an even coating on my candy apples?
Practice, practice! Tilting the pot helps, and a steady hand is key. I find twirling the apple slowly and letting excess drip off naturally gives the smoothest finish. Don’t be afraid if they’re not perfect mine rarely are!
- → How long do Sunset Glow Candy Apples last?
They’re best enjoyed within 2-3 days when stored at room temperature in an airtight container. I’ve found that any longer, and they start to get a bit soft and lose that crisp snap. Don’t refrigerate them, they’ll get watery!
- → Can I add sprinkles or other decorations to my candy apples?
Yes, totally! Add sprinkles or edible glitter immediately after dipping, while the candy is still wet. I love doing this for holidays, it adds a fun, festive touch. Just make sure to do it quickly before the candy sets!

Vibrant Sunset Glow Candy Apples: A Sweet Treat
- Prep Time: 20 Minutes
- Cook Time: 15 Minutes
- Total Time: 35 Minutes
- Yield: 6 Servings 1x
- Category: Dinners
Description
Make vibrant Sunset Glow Candy Apples at home! A nostalgic, fruity, and sweet treat perfect for any gathering. My easy recipe brings back childhood joy.
Ingredients
- Base Ingredients:
- 6 medium crisp apples (Granny Smith or Honeycrisp)
- 3 cups granulated sugar
- 1 cup light corn syrup
- 1 cup water
- Flavor & Color Boosters:
- 1 teaspoon vanilla extract
- Gel food coloring (red, orange, yellow)
- Tools & Finishing:
- 6 sturdy popsicle sticks or skewers
- Parchment paper or silicone mat (for cooling)
Instructions
- Prep Your Apples Right:: First things first, wash and dry those apples like your life depends on it! Any wax or moisture means your candy won’t stick, and that’s a sad, sad sight. I usually give them a good scrub under hot water, then dry them individually with a paper towel, making sure they’re absolutely spotless. Then, firmly insert a popsicle stick into the stem end of each apple. This is where I always double-check; a wobbly stick is a recipe for disaster later on, trust me, I’ve had apples fall off mid-dip!
- Craft the Candy Base:: In a heavy-bottomed saucepan, combine your granulated sugar, corn syrup, and water. Stir gently just until the sugar is moistened. Now, here’s the critical bit: bring it to a boil over medium-high heat WITHOUT stirring. Seriously, resist the urge! Stirring can cause crystallization, and we don’t want grainy Sunset Glow Candy Apples. Attach a candy thermometer to the side of the pot, making sure it doesn’t touch the bottom, and let it do its thing. I made the mistake of stirring once, and the whole batch turned into sugar crystals before I even got to the apples. Oops!
- Achieve Sunset Temperature:: Continue to cook the syrup until it reaches exactly 300°F (150°C), which is the ‘hard crack’ stage. This is where the magic happens for that perfect, crisp candy shell. It’ll start to smell wonderfully sweet as it gets closer. Keep a close eye on that thermometer, because it can jump quickly once it gets going. Don’t rush it, but don’t walk away either! I’ve learned the hard way that a few degrees too high means burnt sugar, and too low means sticky, soft candy, neither of which is what we’re aiming for with these beautiful Sunset Glow Candy Apples.
- Infuse Color and Flavor:: Once your syrup hits 300°F, immediately remove the pot from the heat. This is where you quickly, but carefully, stir in the vanilla extract and your gel food coloring. For that sunset glow, I like to do a couple of drops of red, a few of orange, and maybe one or two of yellow. Swirl them gently to create that beautiful gradient effect. Work fast, because the syrup cools quickly! I once got distracted, and the color just wouldn’t blend properly, leaving me with patchy apples. Learn from my mistakes, friends!
- Dip into the Glow:: Now for the fun part! Carefully tilt your saucepan to one side. Holding an apple by its stick, dip it into the hot candy syrup, rotating and twirling it to get an even, smooth coating all around. Let any excess drip off back into the pot. You want a nice, thin, even layer. I always try to do this over a piece of parchment paper, because, let’s be real, drips happen, and cleanup is easier that way. Sometimes I’ll get a little extra on the bottom, but that’s just character, right?
- Set the Sunset Glow Candy Apples:: Place your freshly coated Sunset Glow Candy Apples onto a sheet of parchment paper or a silicone mat to cool and harden completely. This usually takes about 15-20 minutes. Resist the urge to touch them while they’re setting; I’ve left many a fingerprint on a still-soft apple! Once they’re firm and shiny, they’re ready to be admired and, of course, devoured. They should look absolutely stunning, vibrant, and perfectly glossy, just like a little edible sunset!


