Description
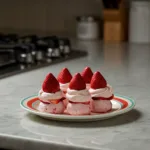
Strawberry Shortcake Candy Apples bring together classic flavors with a fun, crunchy twist. Discover how to make these delightful, personal treats!
Ingredients
- Crispy Apple Base:
- Granny Smith Apples (4-6 medium)
- Candy Apple Sticks (4-6)
- Candy Coating Essentials:
- Granulated Sugar (2 cups)
- Light Corn Syrup (1/2 cup)
- Water (1 cup)
- Red Food Coloring (1/2 – 1 tsp liquid or gel)
- Vanilla Extract (1 tsp)
- Shortcake Crumb Topping:
- Unsalted Butter (2 tbsp, melted)
- Shortbread Cookies (1 cup crushed, about 8-10 cookies)
- Freeze-Dried Strawberries (1/4 cup, crushed)
- Sweet Drizzle & Finish:
- White Chocolate (1/2 cup, melted)
Instructions
- Prep Your Apples:: First things first, get those apples sparkling clean. Wash them really well to remove any waxy residue, then – and this is critical – dry them *completely*. Water is the enemy of candy coating, seriously. Any moisture will make your candy slide right off. Once they’re bone-dry, carefully insert a candy apple stick into the stem end of each apple, pushing it about halfway down. I always give them a little wiggle to make sure they’re secure; nothing worse than an apple falling off its stick mid-dip!
- Whip Up the Candy Coating:: Grab a heavy-bottomed saucepan and combine the granulated sugar, light corn syrup, and water. Stir gently over medium heat until the sugar dissolves completely. Once it’s clear, stop stirring! Bring the mixture to a rolling boil. Now, this is where you need a candy thermometer; it’s honestly your best friend here. Let it boil until it reaches 300-310°F (149-154°C), which is the ‘hard crack’ stage. The smell of boiling sugar is strangely comforting, but keep your distance—it’s super hot! I’ve burned myself before, oops.
- Add Color and Flavor:: Once your sugar mixture hits the hard crack stage, immediately remove it from the heat. This is important! Stir in the red food coloring and vanilla extract. Swirl it gently until the color is even and vibrant. I always feel like a mad scientist at this point, watching the clear syrup transform into this gorgeous, glossy pink. Work quickly here, because the candy will start to cool and thicken pretty fast, and you want it nice and fluid for dipping.
- Dip Your Strawberry Shortcake Candy Apples:: Time for the fun part! Tilt your saucepan to gather the candy mixture in one area. Holding an apple by its stick, dip it into the candy, twisting and rotating it to ensure an even, thin coat. Lift the apple, letting any excess candy drip back into the pot. You want a nice, smooth layer, not too thick. I always have a moment of panic here, wondering if it’ll be too drippy, but just let gravity do its job. Place the dipped apple on a parchment-lined baking sheet.
- Roll in Shortcake Crumb Topping:: Now, this step needs to happen *immediately* after dipping, while the candy coating is still warm and tacky. In a shallow dish, combine your melted butter, crushed shortbread cookies, and crushed freeze-dried strawberries. Roll each freshly dipped apple in this crumb mixture, pressing gently to ensure a good coating. Don’t be shy with the crumbs! I once waited too long, and the candy set up, and the crumbs just wouldn’t stick, oops. Learn from my mistakes, work fast!
- Drizzle and Set Your Strawberry Shortcake Candy Apples:: Melt your white chocolate (I usually do this in the microwave in 30-second intervals, stirring in between). Drizzle the melted white chocolate over your crumb-coated Strawberry Shortcake Candy Apples in a pretty zigzag pattern. This adds another layer of flavor and makes them look extra special. Let your beautiful creations set completely at room temperature, which can take about 30-60 minutes. The anticipation is honestly the hardest part, but it’s so worth it for that satisfying crunch!
