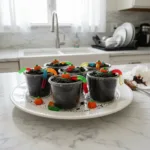
Description
Spooky Rainbow Worm Halloween Dirt Cups are a fun, easy treat! Layer crushed cookies, creamy pudding, and gummy worms for a delightful, kid-friendly dessert.
Ingredients
Scale
- The Dirt Base:
- 1 (14.3 oz) package Oreo Cookies (or similar chocolate sandwich cookies)
- Creamy Layers:
- 2 (3.9 oz) packages instant chocolate pudding mix
- 3 cups cold whole milk
- 1 (8 oz) container whipped topping (like Cool Whip), thawed
- Gummy Garden:
- 1 (8 oz) bag gummy worms (assorted colors)
- Optional Spooky Extras:
- Green food coloring
Instructions
- Get Crushing!: Okay, first things first, let’s make that dirt. Grab your chocolate sandwich cookies – the whole pack! You can get fancy with a food processor if you want, but honestly, my favorite way (and the least messy, usually) is to just put them in a large Ziploc bag and smash them with a rolling pin. Or a heavy can. Or your frustrations from the day! Just make sure they’re finely crushed, like real dirt. You want about 4 cups of crumbs, give or take. Don’t worry if there are a few bigger chunks, it adds character, right?
- Whip Up the Muddy Pudding.: Now for the creamy, chocolatey mud! In a large bowl, whisk together your instant chocolate pudding mix and the cold whole milk. Whisk it good, hon, for about two minutes straight. You want it nice and smooth, with no lumps hiding in there. It’ll start to thicken up pretty quickly, which is what we want. I usually let it sit for another minute or two while I’m getting the whipped topping ready, just to make sure it’s really setting up.
- Fold in the Fluff.: Once your pudding is looking thick and glorious, gently fold in about half of your thawed whipped topping. This step is where the magic happens, giving our “mud” a lighter, airier texture. Don’t overmix it, or you’ll lose all that lovely fluffiness! Just fold until it’s just combined, with a few streaks of white still visible. It’s okay if it’s not perfectly uniform, that just makes it look more… organic, like real dirt and mud, I swear!
- Layering the Spooky Goodness.: Time to assemble your spooky masterpieces! Grab your individual serving cups – clear ones are best so you can see all those fun layers. Start with a generous spoonful of your cookie “dirt” at the bottom. Then, spoon a layer of your chocolate pudding mixture over the crumbs. Don’t be afraid to get a little messy here; it’s dirt cups, after all! Repeat these layers: dirt, then pudding, until your cups are nearly full. I usually aim for two layers of each.
- Add Your Wriggly Friends.: This is the best part! Take your gummy worms and start placing them strategically. Have some peeking out of the “dirt” on top, maybe one or two diving into the pudding layer below. I like to make them look like they’re just emerging from the ground. Don’t be shy with the worms; the more, the merrier, honestly. The kids always get a kick out of seeing them. This is where you can let your inner artist (or mischievous kid) shine!
- Chill Out and Enjoy!: Once all your dirt cups are assembled and looking perfectly creepy-crawly, pop them into the fridge. They need at least 30 minutes to an hour to chill completely and let those flavors meld and the pudding firm up even more. I know, waiting is the hardest part, but it’s worth it! When you pull them out, they’ll be cool, creamy, and ready for all your little goblins (and big ones too!) to devour.