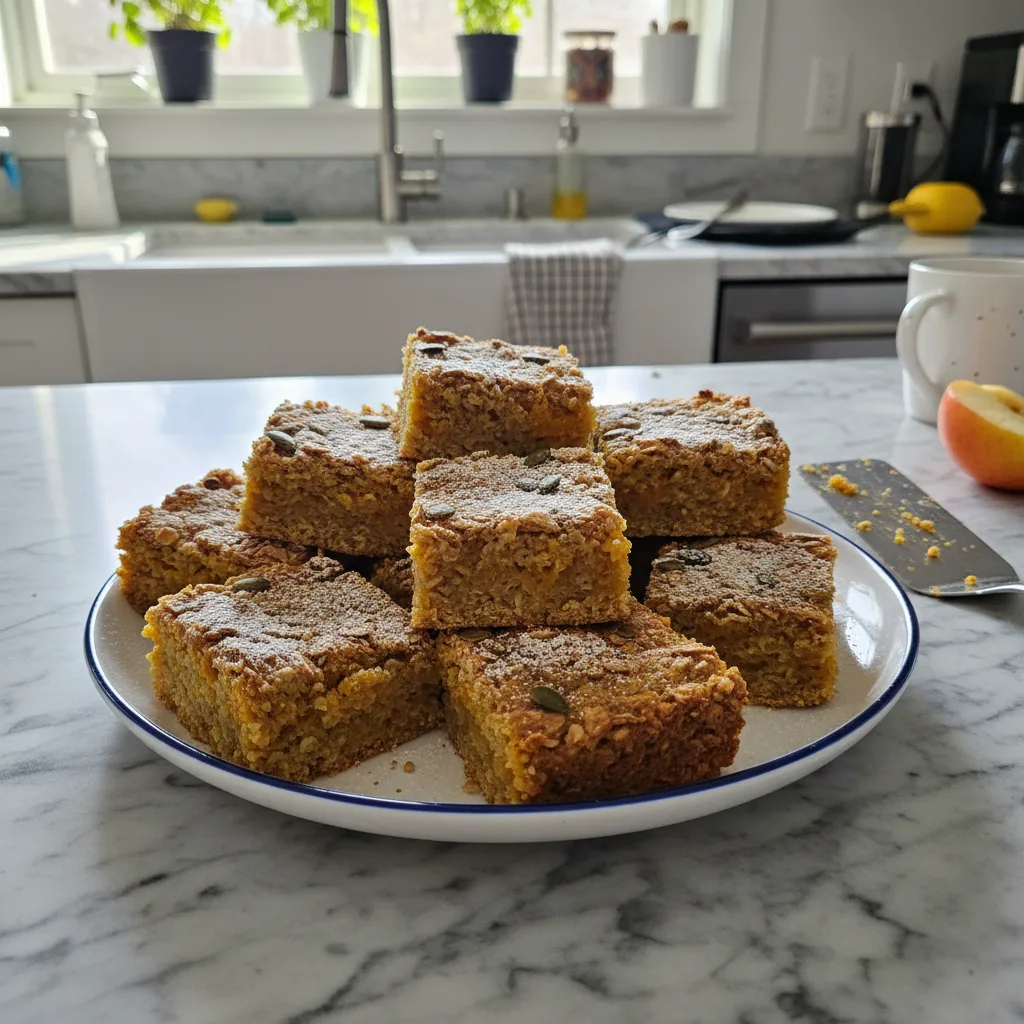
I remember this one autumn morning, years ago, when the first chill hit the air. My kitchen was a disaster, honestly, piled high with dishes from a failed sourdough attempt. I needed something quick, something that felt like a hug but didn’t require me to wrestle with yeast. That’s when the idea for these Oatmeal Pumpkin Breakfast Bars clicked. I had a lonely can of pumpkin puree staring at me, and a big bag of oats. What if I just… combined them? My first batch was a little crumbly, a total oops moment, but the flavor! It was warm, spicy, and just what my soul needed. Now, these bars are a regular, especially when life gets a bit too hectic.
One time, I was so distracted by a squirrel trying to steal my garden tomatoes (true story!) that I almost forgot the cinnamon. The bars came out… fine, but they lacked that essential warmth, you know? It taught me to slow down, even for a “quick” recipe. Now, I always make sure the spice drawer is fully stocked before I even think about preheating the oven. My kitchen might still be chaotic, but at least the spices are in order.
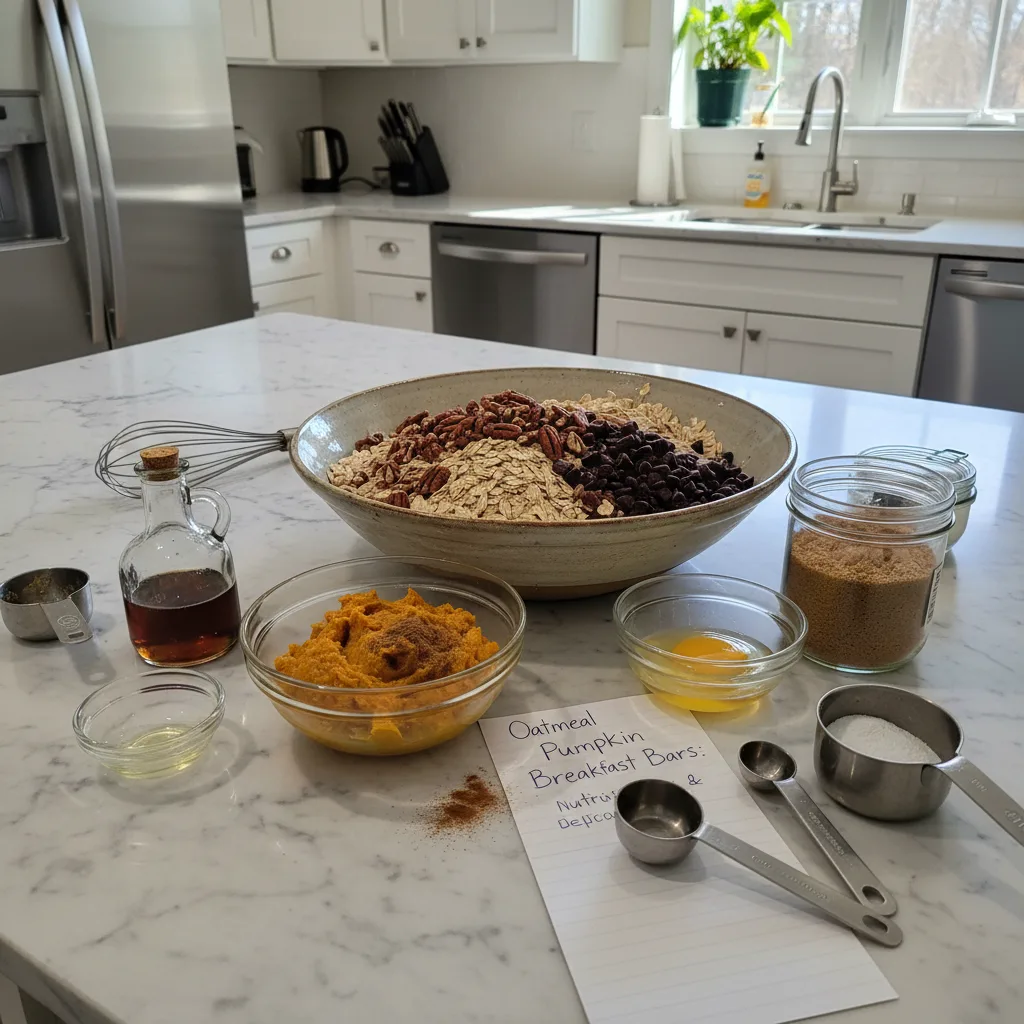
Ingredients for Oatmeal Pumpkin Breakfast Bars
- Old-Fashioned Rolled Oats: These are the backbone of our bars! Don’t use instant oats, they’ll turn to mush, and honestly, nobody wants mushy bars. I swear by a good quality rolled oat for that perfect chewy texture.
- Canned Pumpkin Puree: Make sure it’s 100% pumpkin, not pumpkin pie filling. I made that mistake once, thinking “more spice, less work,” and the bars were way too sweet and weirdly spiced. Just pure pumpkin for that earthy, comforting flavor.
- Brown Sugar (lightly packed): This gives our bars a lovely molasses note and helps keep them moist. I’ve tried maple syrup for a healthier swap, and it works, kinda, but sometimes I just crave that classic brown sugar sweetness.
- Milk (any kind): I usually grab whatever’s in the fridge almond, oat, or regular dairy. Just don’t use skim milk, it makes everything taste a bit watery. I once ran out and used leftover coffee creamer, oops, that was a disaster!
- Ground Cinnamon & Pumpkin Pie Spice: These are your flavor powerhouses! Don’t skimp on them. I always add a little extra cinnamon because, to me, more spice equals more happy. Freshly ground makes a difference if you’re feeling fancy.
- Large Eggs: These are our binders, holding everything together. I once used small eggs, and my bars were a bit crumbly. Now I always crack them into a separate bowl first, just to make sure they’re good to go.
- Vanilla Extract: A little splash of vanilla just rounds out all the flavors. I swear by pure vanilla extract, the imitation stuff just doesn’t hit the same. It’s like a secret hug for your taste buds.
- Baking Powder: This gives our bars a little lift, making them less dense. I once confused it with baking soda, and let’s just say the texture was… unexpected. Always double-check your leavening agents!
- Salt: Just a pinch! It might seem small, but salt is a flavor enhancer, making all those pumpkin and spice notes pop. I always forget it, honestly, and then I taste the difference.
- Optional: Chocolate Chips or Chopped Nuts: A little extra something for fun! I love dark chocolate chips, but pecans or walnuts are also fantastic. I usually eyeball this part, adding as much as my heart desires that day.
How to Make Oatmeal Pumpkin Breakfast Bars
- Prep Your Pan:
- First things first, grab a 9×13 inch baking pan. Line it with parchment paper, leaving a bit of an overhang on the sides. This is your secret weapon for easy removal, trust me. I skipped this once, and spent an embarrassing amount of time scraping bits of bar from the pan. Then, give that parchment paper a light spray with cooking oil. You want these bars to slide out beautifully, not stick!
- Mix Wet Ingredients:
- In a large bowl, whisk together the pumpkin puree, brown sugar, milk, eggs, and vanilla extract. You’re looking for a smooth, well-combined mixture. This is where all those warm, sweet scents start to mingle. Don’t worry if it looks a little lumpy at first, just keep whisking until it’s mostly uniform. I always take a moment here to just breathe in the pumpkin aroma, it’s so comforting.
- Combine Dry Ingredients:
- In a separate, medium-sized bowl, whisk together the rolled oats, cinnamon, pumpkin pie spice, baking powder, and salt. Make sure everything is evenly distributed. This step is crucial for flavor consistency in your bars. I once just dumped everything in together and ended up with pockets of intense spice, which was… interesting, but not what we’re going for.
- Bring It All Together:
- Now, pour the dry oat mixture into the wet pumpkin mixture. Stir gently until just combined. You don’t want to overmix here, overmixing can lead to tough bars, and we’re aiming for tender, chewy bars. If you’re adding chocolate chips or nuts, fold them in now. I always get a little messy at this stage, but it’s part of the fun!
- Bake to Golden Perfection:
- Pour the batter into your prepared 9×13 inch baking pan and spread it out evenly with a spatula. Pop it into a preheated oven at 350°F (175°C) for about 25-30 minutes. You’re looking for the edges to be lightly golden and a toothpick inserted into the center to come out mostly clean. The smell filling your kitchen right now? That’s pure autumn magic, honestly.
- Cool and Slice:
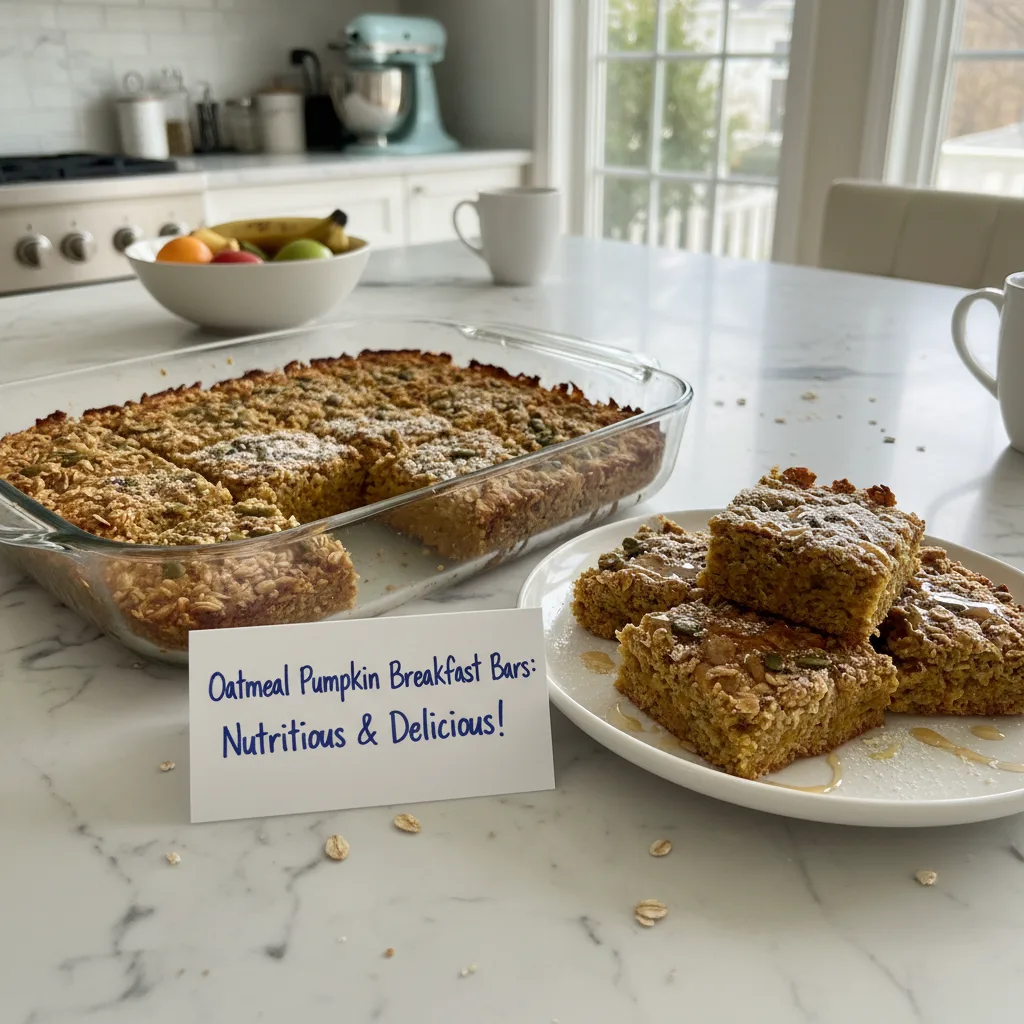
- Once baked, pull those gorgeous bars out of the oven. Let them cool in the pan on a wire rack for at least 30 minutes. This is the hardest part, I know! Cooling completely helps them firm up and makes them much easier to slice. When they’re totally cool, use the parchment paper overhang to lift the whole slab out and cut into bars. Enjoy your delicious creation!
I remember one morning, rushing to get these bars ready for a potluck. I pulled them out of the oven, they smelled incredible, and I just had to sneak a warm corner. Big mistake, hon! It was delicious, yes, but totally fell apart. My kitchen looked like a pumpkin-oat explosion. Now, I always preach patience, let them cool, it’s worth it, I promise.
Storage Tips for Oatmeal Pumpkin Breakfast Bars
These bars are fantastic for meal prep, which is why I make them so often! Once they’re completely cooled (and I mean completely), you can store them in an airtight container at room temperature for up to 3-4 days. If you want them to last longer, pop them in the fridge for up to a week. I’ve even frozen them before! Just wrap individual bars in plastic wrap, then place them in a freezer-safe bag or container. They’ll keep for about a month. To thaw, just grab one out and let it come to room temp, or give it a quick zap in the microwave. I tried reheating a whole batch in the oven once, and they dried out a bit, so individual reheating is the way to go.
Oatmeal Pumpkin Breakfast Bars: Ingredient Substitutions
Life happens, and sometimes you don’t have exactly what the recipe calls for. For the brown sugar, you can swap it for maple syrup or honey, though you might need to slightly reduce the liquid elsewhere (like milk) to maintain texture, or just accept a slightly softer bar. I tried using all maple syrup once, and while tasty, they were a bit more delicate. If you’re out of pumpkin pie spice, you can make your own with a mix of cinnamon, nutmeg, ginger, and a tiny pinch of cloves. I’ve done that in a pinch, and it worked, kinda, but store-bought is usually more balanced. For a dairy-free option, any plant-based milk works beautifully. I’ve had success with almond and oat milk, no problem!
Serving Suggestions for Oatmeal Pumpkin Breakfast Bars
Honestly, these bars are a meal in themselves, but they also play well with others! I love grabbing one with my morning coffee, especially if it’s a chilly day. A warm cup of chai tea or a simple glass of milk also makes a lovely pairing. For a heartier breakfast, serve a bar alongside some Greek yogurt and a sprinkle of granola for extra crunch. They’re also fantastic as an afternoon pick-me-up with a dollop of whipped cream (if you’re feeling fancy) or a drizzle of maple syrup. Sometimes, I even crumble a bit over a bowl of vanilla ice cream for a quick dessert, don’t tell anyone!
The Story Behind Oatmeal Pumpkin Breakfast Bars
Pumpkin and oats have been staples in kitchens for centuries, celebrated for their comforting qualities and versatility. My personal journey with these bars started with a desire to make my mornings less frantic and more nourishing. Growing up, breakfast was often a quick piece of toast or cold cereal. As I started cooking more, I realized the power of a homemade breakfast that could be grabbed on the go. This recipe is my ode to those busy mornings, a way to bring warmth and goodness into the day without needing to stand over a stove. It’s a blend of traditional wholesome ingredients with a modern, convenient twist, inspired by the simple joy of autumn flavors.
These Oatmeal Pumpkin Breakfast Bars have become a real comfort in my home. They smell like autumn, taste like a warm hug, and honestly, they’ve saved so many frantic mornings. There’s just something so satisfying about pulling a batch out of the oven, knowing you’ve got a week of delicious, wholesome breakfasts sorted. I hope you give them a try and find them as delightful as I do. Please, let me know how your batch turns out!
Frequently Asked Questions About Oatmeal Pumpkin Breakfast Bars
- → Can I make these bars gluten-free?
Absolutely! Just make sure to use certified gluten-free rolled oats. The rest of the ingredients are naturally gluten-free. I’ve made them this way for friends, and they were just as delicious, honestly, no one could tell the difference!
- → What if I don’t have pumpkin pie spice for my bars?
No worries! You can whip up your own. Mix 1 teaspoon ground cinnamon, 1/4 teaspoon ground nutmeg, 1/4 teaspoon ground ginger, and a tiny pinch of ground cloves. I’ve done this many times when my spice jar was empty, and it works pretty well, kinda, but adjust to your taste!
- → How do I know when my bars are fully baked?
Look for lightly golden edges and a toothpick inserted into the center should come out mostly clean. If it’s still very wet, give it a few more minutes. I once pulled them out too early, and they were a bit too soft in the middle, oops!
- → Can I add other mix-ins to these bars?
Oh, for sure! Get creative! Raisins, dried cranberries, chopped nuts like pecans or walnuts, or even a different type of chip like white chocolate. I often throw in whatever I have on hand, it’s fun to experiment and see what works best for your family!
- → Are these bars suitable for toddlers?
Yes, they can be! They’re soft and packed with good-for-you ingredients. Just be mindful of any choking hazards like large nuts or chocolate chips if your little one is very young. My niece loves them, and they’re a great way to sneak in some pumpkin!

Nutritious Oatmeal Pumpkin Breakfast Bars: Easy Mornings
- Prep Time: 15 Minutes
- Cook Time: 30 Minutes
- Total Time: 1 Hour 15 Minutes
- Yield: 12 Servings 1x
- Category: Tasty Recipes
Description
Oatmeal Pumpkin Breakfast Bars are a wholesome way to start your day. My recipe is packed with flavor and perfect for meal prep. Grab a bar and go!
Ingredients
- Wholesome Base:
- 2 cups old-fashioned rolled oats
- 1 (15 oz) can pumpkin puree (100% pumpkin, not pie filling)
- Sweeteners & Binders:
- 1/2 cup lightly packed brown sugar
- 1/2 cup milk (any kind: dairy, almond, oat)
- 2 large eggs
- 1 teaspoon vanilla extract
- Flavor Boosters:
- 1 teaspoon ground cinnamon
- 1/2 teaspoon pumpkin pie spice
- 1 teaspoon baking powder
- 1/4 teaspoon salt
- Optional Mix-ins:
- 1/2 cup chocolate chips
- 1/2 cup chopped nuts (pecans or walnuts)
Instructions
- Prep Your Pan:: First things first, grab a 9×13 inch baking pan. Line it with parchment paper, leaving a bit of an overhang on the sides. This is your secret weapon for easy removal, trust me. I skipped this once, and spent an embarrassing amount of time scraping bits of bar from the pan. Then, give that parchment paper a light spray with cooking oil. You want these bars to slide out beautifully, not stick!
- Mix Wet Ingredients:: In a large bowl, whisk together the pumpkin puree, brown sugar, milk, eggs, and vanilla extract. You’re looking for a smooth, well-combined mixture. This is where all those warm, sweet scents start to mingle. Don’t worry if it looks a little lumpy at first; just keep whisking until it’s mostly uniform. I always take a moment here to just breathe in the pumpkin aroma, it’s so comforting.
- Combine Dry Ingredients:: In a separate, medium-sized bowl, whisk together the rolled oats, cinnamon, pumpkin pie spice, baking powder, and salt. Make sure everything is evenly distributed. This step is crucial for flavor consistency in your bars. I once just dumped everything in together and ended up with pockets of intense spice, which was… interesting, but not what we’re going for.
- Bring It All Together:: Now, pour the dry oat mixture into the wet pumpkin mixture. Stir gently until just combined. You don’t want to overmix here; overmixing can lead to tough bars, and we’re aiming for tender, chewy bars. If you’re adding chocolate chips or nuts, fold them in now. I always get a little messy at this stage, but it’s part of the fun!
- Bake to Golden Perfection:: Pour the batter into your prepared 9×13 inch baking pan and spread it out evenly with a spatula. Pop it into a preheated oven at 350°F (175°C) for about 25-30 minutes. You’re looking for the edges to be lightly golden and a toothpick inserted into the center to come out mostly clean. The smell filling your kitchen right now? That’s pure autumn magic, honestly.
- Cool and Slice:: Once baked, pull those gorgeous bars out of the oven. Let them cool in the pan on a wire rack for at least 30 minutes. This is the hardest part, I know! Cooling completely helps them firm up and makes them much easier to slice. When they’re totally cool, use the parchment paper overhang to lift the whole slab out and cut into bars. Enjoy your delicious creation!

