Description
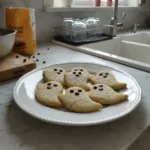
Whip up our easy ghost cookies recipe this Halloween! These soft, sweet treats with royal icing are a fun project, even with a little kitchen chaos.
Ingredients
- Cookie Base:
- Unsalted Butter (1 cup, softened)
- Granulated Sugar (1 cup)
- Large Egg (1)
- Vanilla Extract (1 tsp)
- Dry Mix & Leavening:
- All-Purpose Flour (2 ¾ cups)
- Baking Powder (1 tsp)
- Salt (½ tsp)
- Icing Essentials & Decoration:
- Powdered Sugar (3 cups)
- Meringue Powder (3 tbsp)
- Warm Water (6-8 tbsp)
- Black Food Gel (a few drops)
Instructions
- Cream It Good:: First things first, grab that softened butter and granulated sugar. I always use my stand mixer for this because my arm gets tired, honestly! Cream them together until they’re light and fluffy, almost pale in color. This usually takes about 3-5 minutes, and you’ll really see the texture change. It’s where the magic starts to happen for a tender ghost cookies recipe. I once rushed this step, and my cookies weren’t as airy as I wanted, so take your time here. You’ll smell that sweet, buttery aroma filling your kitchen, and it’s just the best start!
- Wet Ingredients In:: Next, crack in that large egg and pour in the vanilla extract. Beat them into the creamed butter and sugar until everything is just combined. Be careful not to overmix here; we’re just aiming for a smooth, homogenous mixture. Sometimes I get a little overzealous with the mixer, and the batter separates a bit, but a quick scrape down of the bowl usually fixes it. This step is crucial for the overall texture of our ghost cookies, ensuring they’re soft and chewy, not tough.
- Combine the Dry:: In a separate bowl, whisk together your all-purpose flour, baking powder, and salt. This ensures all the leavening and seasoning are evenly distributed throughout the dry mix. Then, gradually add the dry ingredients to the wet ingredients, mixing on low speed until just combined. Stop as soon as you see no more streaks of flour. Overmixing develops gluten, and we want tender ghost cookies, not hockey pucks! The dough will be soft but shouldn’t be too sticky.
- Chill & Roll for Perfect Ghost Cookies:: Divide your dough in half, wrap each half in plastic wrap, and chill for at least 30 minutes. Honestly, don’t skip this part! It makes the dough much easier to handle and prevents your ghosts from spreading too much in the oven. Once chilled, flour your surface lightly and roll out one portion of the dough to about ¼-inch thickness. Use your ghost-shaped cookie cutter to cut out as many spooky shapes as you can. Gather the scraps, re-roll, and cut more! I always manage to get flour everywhere during this step, it’s just part of the fun.
- Bake Your Spooky Shapes:: Carefully transfer your cut-out ghost cookies to baking sheets lined with parchment paper. Leave a little space between them, just in case they decide to expand a bit. Bake in a preheated oven at 375°F (190°C) for 7-9 minutes, or until the edges are lightly golden. You want them soft, so don’t let them get too brown! When you pull them out, they’ll smell heavenly, like pure vanilla and butter. Let them cool on the baking sheet for a few minutes before moving them to a wire rack to cool completely. Patience is key here for decorating later!
- Icing the Ghost Cookies:: Now for the fun part: the decorating! In a large bowl, whisk together the powdered sugar and meringue powder. Gradually add the warm water, a tablespoon at a time, until you reach a smooth, pipeable consistency. It should be thick enough to hold its shape but thin enough to flow smoothly. Transfer about two-thirds of the icing to a piping bag with a small round tip. Outline and flood your cooled ghost cookies, letting the white base dry completely. Then, with a tiny bit of black food gel mixed into a small portion of icing, pipe on those adorable little eyes and mouths. It’s so satisfying seeing those blank white shapes transform into cute little ghosts!