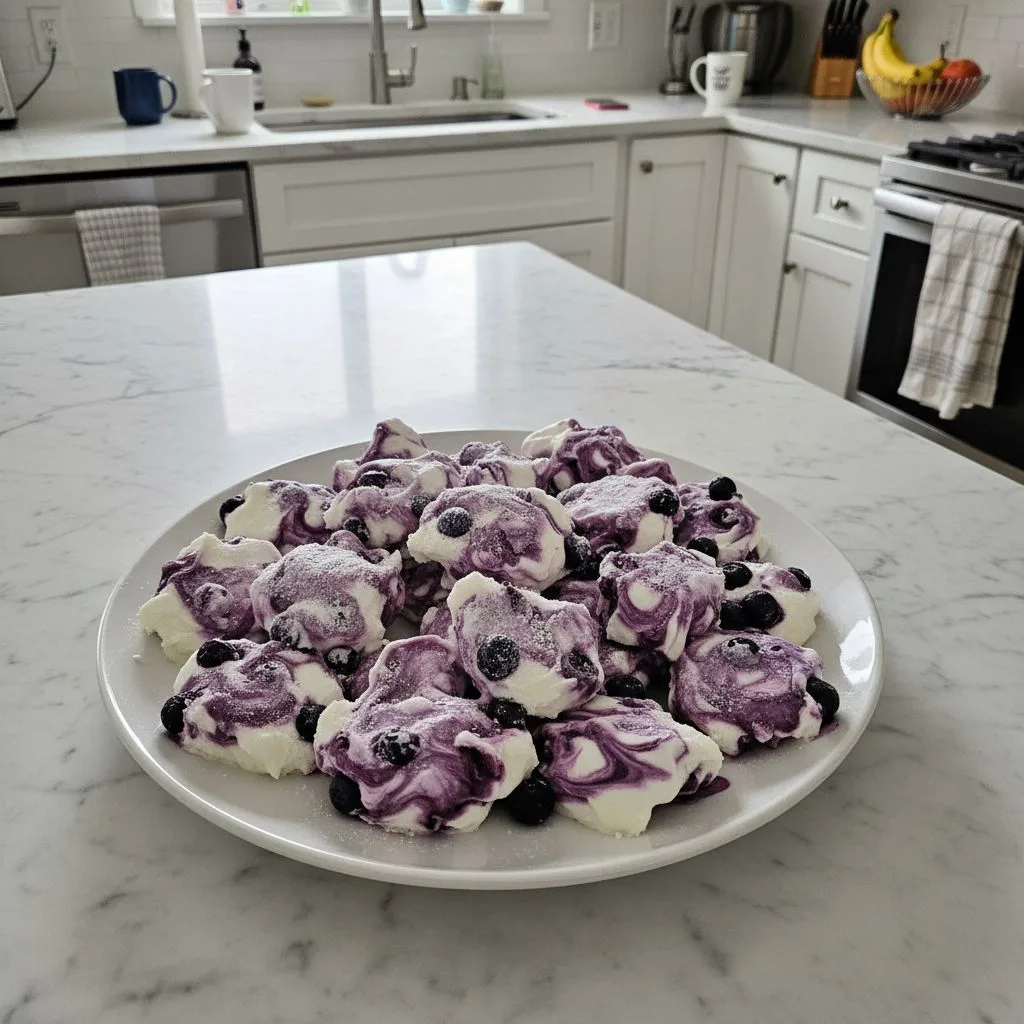
Honestly, these creamy blueberry swirl yogurt bites came into my life during one of those “what do I even have in the fridge?” moments. It was a scorching summer afternoon, and my little one was begging for something cold and sweet, but I was out of popsicles. I remember staring into the abyss of my fridge, seeing a tub of Greek yogurt, some slightly sad blueberries, and a half-empty bottle of maple syrup. “Could this work?” I wondered, skeptical but desperate. Turns out, it was a revelation! The kitchen was a bit of a mess, with blueberry smudges everywhere oops but the result? Pure magic. These bites are now a staple, a little burst of sunshine that feels like a hug on a plate, especially when you need a quick, wholesome treat that doesn’t feel like a compromise.
I remember one time, I got a little too enthusiastic with the blueberry swirling. It ended up looking less like a gentle swirl and more like a purple abstract painting a delicious one, mind you, but definitely not Pinterest-perfect. My husband just laughed, asking if I was trying for a new modern art piece. Lesson learned: less is more when it comes to the swirl! But hey, even my “oops” moments taste pretty darn good, especially when it comes to these creamy blueberry swirl yogurt bites.
Ingredients for Creamy Blueberry Swirl Yogurt Bites
These delightful treats rely on just a few simple things you probably already have. Don’t overthink it, but don’t skimp on quality either!
Base Bites
- Greek Yogurt: Use full-fat, please! Honestly, don’t use skim milk yogurt, it just won’t give you that wonderfully creamy, rich texture we’re going for. I’ve tried, and it just doesn’t hit the same.
- Maple Syrup: This is our natural sweetener. I swear by pure maple syrup, none of that corn syrup stuff. You can adjust the amount to your sweet tooth, but start with the recommended you can always add more.
Vanilla Extract: A splash of good quality vanilla makes all the difference, adding that warm, comforting note. I’m a bit heavy-handed with it, but that’s just me!
Blueberry Swirl
- Blueberries: Fresh or frozen, both work wonderfully. If using frozen, let them thaw a bit first. I once tried to mash frozen solid berries and nearly broke my fork live and learn, right?
Lemon Juice: Just a tiny squeeze brightens up the blueberries and really makes their flavor pop. It’s like a secret weapon! I tried without it once, and the blueberries felt a little flat, so don’t skip this.
Chia Seeds: These are my little thickening trick for the blueberry swirl. They absorb liquid and help create that jammy texture without any cooking. Plus, a little extra fiber never hurt anyone!
Optional Toppings
- Granola: A sprinkle of your favorite granola adds a lovely crunch. I love a little texture contrast with the creamy yogurt.
- Shredded Coconut: Toasted or untoasted, it brings a tropical vibe. I always have a bag in the pantry for those “I need a little something extra” moments.
Making Creamy Blueberry Swirl Yogurt Bites: Instructions
- Step 1: Prep Your Tray
- First things first, grab a baking sheet and line it with parchment paper. This is where your delicious bites will get their chill on. Honestly, don’t skip the parchment, I once used foil and the bites stuck a bit, leading to some frustrating peeling. Make sure it’s nice and flat, a crinkled surface means wonky bites, and we want beautiful swirls, right? It’s a small step, but a crucial one for easy removal later.
- Step 2: Mix the Yogurt Base
- In a medium bowl, combine your full-fat Greek yogurt, maple syrup, and vanilla extract. Give it a good whisk until everything is super smooth and well-combined. You want it to be creamy and luscious. This is the foundation of our treat, so make sure it’s perfect. I sometimes taste it here and add a tiny bit more maple syrup if I’m feeling extra sweet you do you!
- Step 3: Craft the Blueberry Swirl
- Now for the star of the show! In a separate small bowl, gently mash your blueberries with the lemon juice and chia seeds. You’re not looking for a completely smooth puree, some chunky bits are totally welcome, adding great texture to the finished bites. Let it sit for about 5 minutes, those chia seeds need a moment to work their magic and thicken things up. You’ll see it transform!
- Step 4: Swirl and Dollop
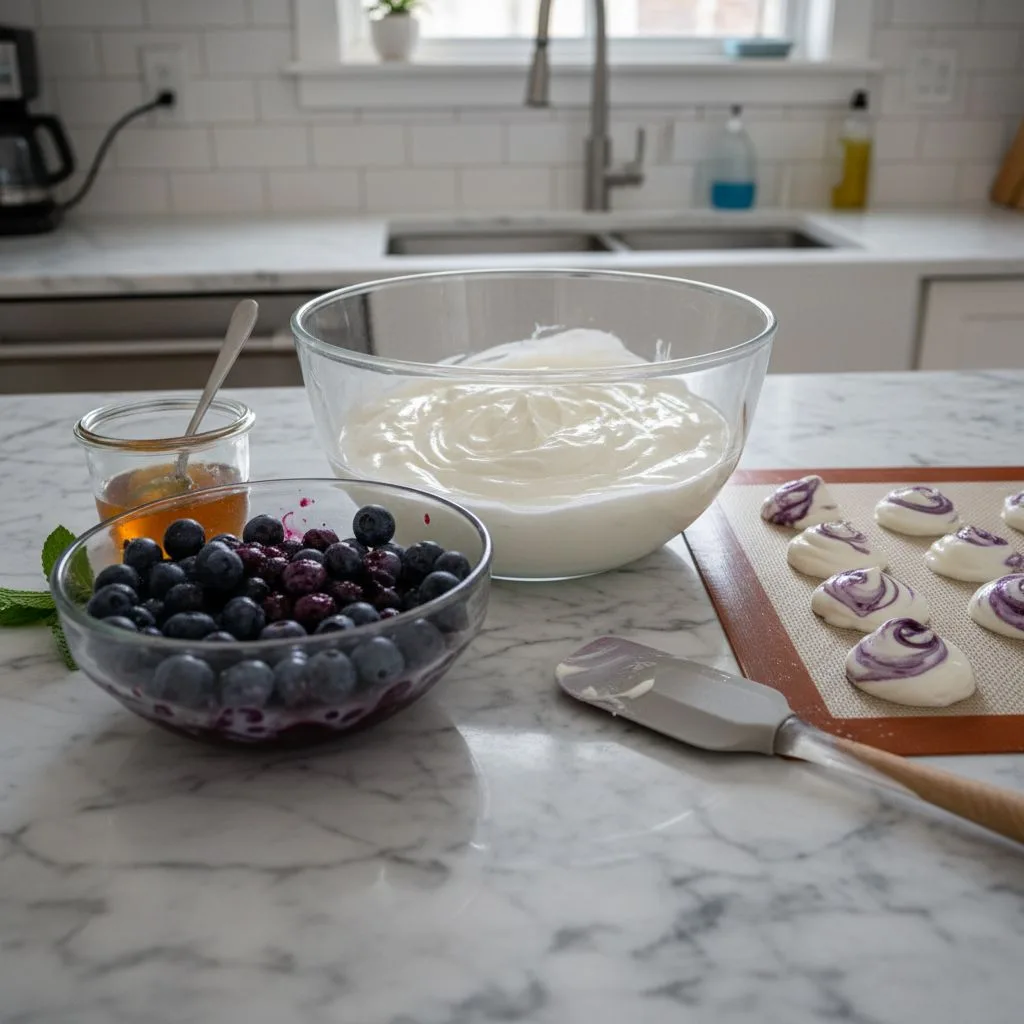
- Dollop spoonfuls of the yogurt mixture onto your prepared baking sheet. Don’t worry too much about perfect circles, rustic is charming! Then, take small spoonfuls of the blueberry mixture and dollop them onto the yogurt. Now, with a toothpick or a small knife, gently swirl the blueberry into the yogurt. Remember my “abstract painting” story? Go easy! We’re aiming for pretty ribbons, not a purple blob.
- Step 5: Add Optional Toppings
- This is where you can get creative! If you’re using granola, shredded coconut, or chopped nuts, sprinkle them over your swirled bites now. I love adding a little crunch, and it makes each bite feel a bit more special. Don’t be shy, but also don’t bury the beautiful swirl! These little additions really elevate the overall experience.
- Step 6: Chill Out!
- Carefully transfer your baking sheet to the freezer. Let your delicious bites chill for at least 2-3 hours, or until they’re firm enough to easily peel off the parchment paper. Patience is key here, hon! I know it’s tempting to peek, but they need that time to set up properly. Once firm, peel them off and get ready to enjoy your vibrant, creamy, and oh-so-delicious treats!
There was this one time I was making a big batch for a brunch, and I completely forgot the vanilla extract. I only realized it after they were frozen solid! They were still good, but they lacked that comforting depth. It taught me that even small ingredients play a huge role. Now, I double-check my ingredients list every single time, especially for these little gems. It’s those small details that truly make these bites sing, turning a simple snack into something truly special.
Storage Tips for Creamy Blueberry Swirl Yogurt Bites
Okay, so you’ve made a glorious batch of creamy blueberry swirl yogurt bites, and now you’re wondering how to keep them fresh. Once they’re completely frozen and peeled off the parchment, store them in an airtight container in the freezer. I usually layer them with a piece of parchment paper between layers to prevent sticking because trust me, trying to pry frozen bites apart is a struggle! They’ll keep beautifully for up to 2-3 weeks. I tried keeping them in the fridge once, thinking they’d be a quick grab, but they just get soft and a bit watery after a day or so. So, freezer it is! They’re best enjoyed straight from the freezer, offering that delightful cold, creamy texture. No thawing needed, just grab and enjoy!
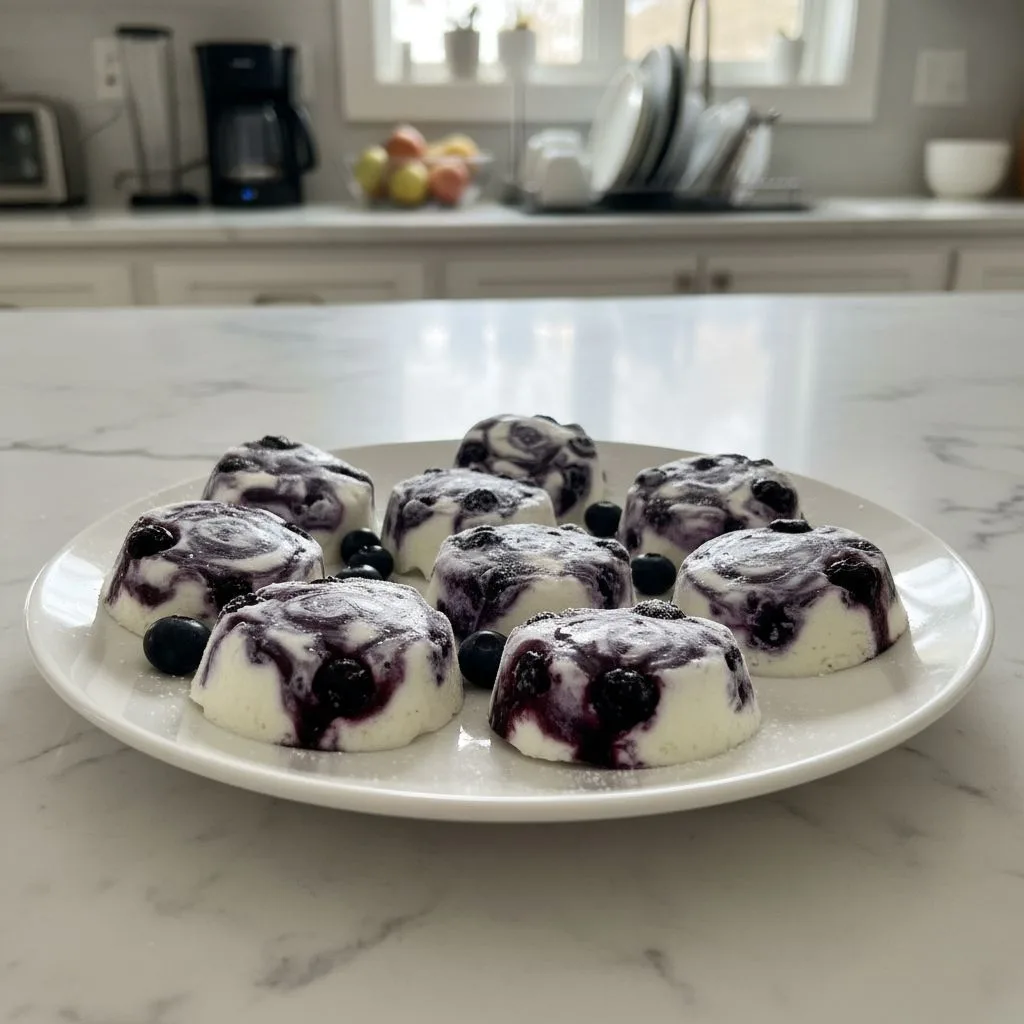
Ingredient Substitutions for Creamy Blueberry Swirl Yogurt Bites
Life happens, and sometimes you don’t have exactly what the recipe calls for. Don’t fret! For the Greek yogurt, you could try a thick, plain coconut yogurt for a dairy-free version I’ve done it, and it worked, kinda, but the texture was a bit different. As for the sweetener, honey or agave nectar can step in for maple syrup, just adjust to taste. I’ve also swapped blueberries for raspberries or blackberries, and they create a beautiful, tart swirl. Just be aware that some berries might have more seeds. And if you’re out of chia seeds, a tiny pinch of cornstarch mixed with a tablespoon of cold water could thicken the fruit, but it’s not quite the same texture. Experiment, but know results vary!
Serving Suggestions for Creamy Blueberry Swirl Yogurt Bites
These creamy blueberry swirl yogurt bites are pretty versatile, honestly. I love them as a refreshing breakfast on a hot morning, alongside a strong cup of coffee. They’re also fantastic as a guilt-free afternoon pick-me-up when you’re craving something sweet but want to keep it light. For a simple dessert, I sometimes serve them in a small bowl with a few fresh mint leaves and maybe a tiny drizzle of extra maple syrup feels fancy without any effort! And for a truly cozy night in, I’ll grab a few of these, put on my favorite rom-com, and just relax. They’re that kind of comforting treat, perfect for any mood or moment.
The Simple Origins of Creamy Blueberry Swirl Yogurt Bites
While these creamy blueberry swirl yogurt bites don’t have a deep, ancient cultural backstory, they really speak to a modern desire for wholesome, quick, and satisfying snacks. They’re part of that wonderful wave of “yogurt bark” and “frozen yogurt dots” that popped up on social media, driven by busy folks wanting healthier alternatives to processed treats. For me, they connect to my own journey of trying to feed my family delicious food that also feels good. It’s about taking simple, natural ingredients like the humble blueberry, a true North American gem and transforming them into something delightful. It’s a testament to how creativity in the kitchen, even with everyday staples, can lead to truly wonderful discoveries that become part of your personal food story.
Honestly, these creamy blueberry swirl yogurt bites have become such a comforting presence in my kitchen. They’re a little reminder that sometimes the simplest ingredients, combined with a bit of love, create the most memorable flavors. I genuinely hope you give them a try and find as much joy in them as I do. Whether they become your go-to snack or a secret little indulgence, I’d love to hear how they turn out for you. Happy swirling, my friend!
Frequently Asked Questions About Creamy Blueberry Swirl Yogurt Bites
- → Can I use non-dairy yogurt for these bites?
Yes, you can! I’ve tried a thick coconut yogurt, and it works, though the texture might be a little softer. Just make sure it’s a plain, unsweetened variety so you can control the sweetness for your delicious bites.
- → What if I don’t have maple syrup?
No maple syrup? No problem! Honey or agave nectar are great substitutes. I usually start with a little less than the recipe calls for and taste as I go, as their sweetness levels can vary for these treats.
- → Why do my yogurt bites sometimes stick to the parchment?
Oh, I’ve been there! Usually, it’s because they weren’t frozen solid enough. Give them an extra hour or two in the freezer. Also, a good quality parchment paper or a silicone mat really helps prevent sticking for your creamy blueberry swirl yogurt bites.
- → How long do these bites last in the freezer?
They’ll stay fresh and delicious in an airtight container in the freezer for about 2-3 weeks. I always make a big batch because they disappear quickly in my house! Just grab them straight from the freezer.
- → Can I use other fruits besides blueberries?
Absolutely! I’ve experimented with mashed raspberries, chopped strawberries, or even a mix of berries. Just make sure to mash them well and perhaps add a tiny bit of chia seeds if they’re very watery. Enjoy creating your own unique frozen yogurt bites!
Creamy Blueberry Swirl Yogurt Bites: Easy Snack Idea
- Prep Time: 15 Minutes
- Cook Time: 0 Minutes
- Total Time: 3 Hours
- Yield: 12-15 Bites 1x
- Category: Breakfasts
Description
Creamy Blueberry Swirl Yogurt Bites: your new favorite no-bake treat! Make these vibrant, simple snacks with our easy, personal recipe.
Ingredients
- Base Bites:
- 2 cups full-fat Greek yogurt
- 2–3 tablespoons maple syrup (adjust to taste)
- 1 teaspoon vanilla extract
- Blueberry Swirl:
- 1 cup fresh or frozen blueberries
- 1 teaspoon fresh lemon juice
- 1 tablespoon chia seeds
- Optional Toppings:
- 1/4 cup granola
- 2 tablespoons shredded coconut
- 2 tablespoons chopped nuts (like almonds or walnuts)
Instructions
- Prep Your Tray: First things first, grab a baking sheet and line it with parchment paper. This is where your delicious bites will get their chill on. Honestly, don’t skip the parchment; I once used foil and the bites stuck a bit, leading to some frustrating peeling. Make sure it’s nice and flat; a crinkled surface means wonky bites, and we want beautiful swirls, right? It’s a small step, but a crucial one for easy removal later.
- Mix the Yogurt Base: In a medium bowl, combine your full-fat Greek yogurt, maple syrup, and vanilla extract. Give it a good whisk until everything is super smooth and well-combined. You want it to be creamy and luscious. This is the foundation of our treat, so make sure it’s perfect. I sometimes taste it here and add a tiny bit more maple syrup if I’m feeling extra sweet – you do you!
- Craft the Blueberry Swirl: Now for the star of the show! In a separate small bowl, gently mash your blueberries with the lemon juice and chia seeds. You’re not looking for a completely smooth puree; some chunky bits are totally welcome, adding great texture to the finished bites. Let it sit for about 5 minutes; those chia seeds need a moment to work their magic and thicken things up. You’ll see it transform!
- Swirl and Dollop: Dollop spoonfuls of the yogurt mixture onto your prepared baking sheet. Don’t worry too much about perfect circles; rustic is charming! Then, take small spoonfuls of the blueberry mixture and dollop them onto the yogurt. Now, with a toothpick or a small knife, gently swirl the blueberry into the yogurt. Remember my “abstract painting” story? Go easy! We’re aiming for pretty ribbons, not a purple blob.
- Add Optional Toppings: This is where you can get creative! If you’re using granola, shredded coconut, or chopped nuts, sprinkle them over your swirled bites now. I love adding a little crunch, and it makes each bite feel a bit more special. Don’t be shy, but also don’t bury the beautiful swirl! These little additions really elevate the overall experience.
- Chill Out!: Carefully transfer your baking sheet to the freezer. Let your delicious bites chill for at least 2-3 hours, or until they’re firm enough to easily peel off the parchment paper. Patience is key here, hon! I know it’s tempting to peek, but they need that time to set up properly. Once firm, peel them off and get ready to enjoy your vibrant, creamy, and oh-so-delicious treats!

