
I remember the first time I tasted anything with Hatch green chiles. It was at a little roadside stand in New Mexico, years ago, and honestly, I didn’t expect that earthy, smoky warmth. Fast forward to a particularly chilly autumn evening, a few years back, when a craving for something comforting, something that tasted like a hug, hit me hard. That’s when this Cheesy Hatch Green Chile Dip was born. It was a happy accident of cheeses and spices, and a whole lot of green chile love. It’s the kind of dish that makes the whole house smell incredible, a warm invitation to gather ’round, even if it’s just me and my cat, Mittens, sharing a quiet evening.
[rank_math_toc]
Oh, the early days of this dip! I once tried to make it entirely in the microwave because I was feeling lazy huge mistake! The cheese separated into an oily mess, and the chiles tasted… sad. Another time, I added a whole extra can of chiles thinking ‘more flavor!’ Nope, just an overwhelmingly spicy, less-cheesy experience. Now, I stick to the recipe, mostly. Though sometimes a little extra garlic powder slips in, and honestly, I’m not mad about it. It’s all part of the kitchen adventure, right?
Ingredients
- Cream Cheese: This is the secret to that luscious, smooth texture. Don’t even think about using the low-fat stuff unless you want a watery, sad dip trust me, I tried it once and it was a regret. Full-fat all the way, let it soften on the counter, it makes a huge difference.
- Sour Cream: Adds a tangy depth and more creaminess, balancing the richness of the cheese. I usually grab a full-fat tub, but a lighter version works here if you absolutely must, though I swear by the full-fat for that classic dip mouthfeel.
- Whole Milk: Just a splash to loosen things up and prevent it from becoming a solid cheese brick. You can use half-and-half for an even richer dip, but honestly, whole milk does the trick without making it too heavy.
- Shredded Sharp Cheddar Cheese: Sharp cheddar, please! It brings that essential cheesy bite. I always shred my own because pre-shredded cheese has anti-caking agents that can make your dip a little grainy. I once forgot and used pre-shredded, and the texture wasn’t quite right, oops.
- Shredded Monterey Jack Cheese: This one is for the melt factor! It gets super gooey and stretchy, which is exactly what you want in a dip. A good quality Monterey Jack just melts like a dream.
- Canned Diced Hatch Green Chiles: The star of the show! Make sure they’re diced and drained. I prefer the mild or medium heat, but if you’re feeling adventurous, go hot! I always stock up when I see them because they add such a unique, smoky, earthy flavor that nothing else quite replicates for this Cheesy Hatch Green Chile Dip.
- Garlic Powder: Because everything is better with garlic! It adds a warm, savory background note without the sharpness of fresh garlic, which can sometimes overpower the delicate chile flavor. I probably add a little extra sometimes, shhh.
- Onion Powder: Complements the garlic and chiles, adding another layer of savory goodness. It just rounds out the flavor profile so nicely, a subtle sweetness that you’d miss without it.
- Ground Cumin: This spice just belongs with green chiles and cheese. It gives that warm, slightly earthy, southwestern vibe. Don’t skip it, it truly elevates the dip!
- Salt and Black Pepper: Essential for seasoning, obviously! Taste as you go, especially with the salt. I always start with less and add more, because you can always add, but you can’t take away. A little crack of fresh black pepper at the end is just… chef’s kiss.
Instructions
- Melt the Creamy Base:
- Grab a medium saucepan, hon, and set it over low heat. Toss in your softened cream cheese, sour cream, and whole milk. Stir this creamy trio constantly with a whisk or a rubber spatula until everything is smooth and totally lump-free. It’s a gentle process, you don’t want to rush it or let the bottom scorch I’ve been there, thinking I could walk away for a second, and came back to a sad, browned layer. Keep it moving, watch it transform into this beautiful, velvety base. You’ll smell that dairy richness starting to warm up, it’s a good sign!
- Stir in the Cheesy Goodness:
- Now for the fun part! Once your creamy base is smooth, gradually add in your shredded cheddar and Monterey Jack cheeses, a handful at a time. Keep stirring, stirring, stirring until each addition melts completely before you add the next. This prevents the cheese from clumping up, which, let’s be real, no one wants a lumpy dip. I always find this step so satisfying, watching the cheese ribbons disappear into that golden, gooey goodness. The aroma of melting cheese is truly something special, don’t you think?
- Introduce the Hatch Chile Flavor:
- Once all the cheese is melted and happy, it’s time for our star: the drained Hatch green chiles! Gently fold them into the cheesy mixture. You want them evenly distributed, so every scoop gets a bit of that smoky, earthy goodness. This is where the Cheesy Hatch Green Chile Dip really starts to come alive, visually and aromatically. I always take a deep breath here, enjoying that distinct, slightly spicy chile scent. Be gentle when stirring, we don’t want to break up those beautiful chile pieces too much.
- Season and Taste:
- Now, let’s get those flavors popping! Sprinkle in the garlic powder, onion powder, ground cumin, and a pinch of salt and black pepper. Stir everything together until the seasonings are well incorporated. This is the crucial tasting moment, my friend. Grab a spoon, let it cool just a tiny bit, and taste. Does it need more salt? More cumin? Adjust to your heart’s content! I always taste multiple times, sometimes even adding a tiny bit more garlic powder because, well, I just love garlic.
- Simmer and Thicken:
- Continue to cook the Cheesy Hatch Green Chile Dip on low heat, stirring occasionally, for about 5-7 minutes. You’re just letting all those flavors meld together beautifully and allowing the dip to thicken slightly. It should be warm, bubbly around the edges, and lusciously smooth. Don’t let it boil vigorously, just a gentle simmer. This is where the magic happens, where the chiles and cheese truly become one harmonious, comforting bite. The smell filling your kitchen right now? That’s pure happiness.
- Serve It Up Hot:
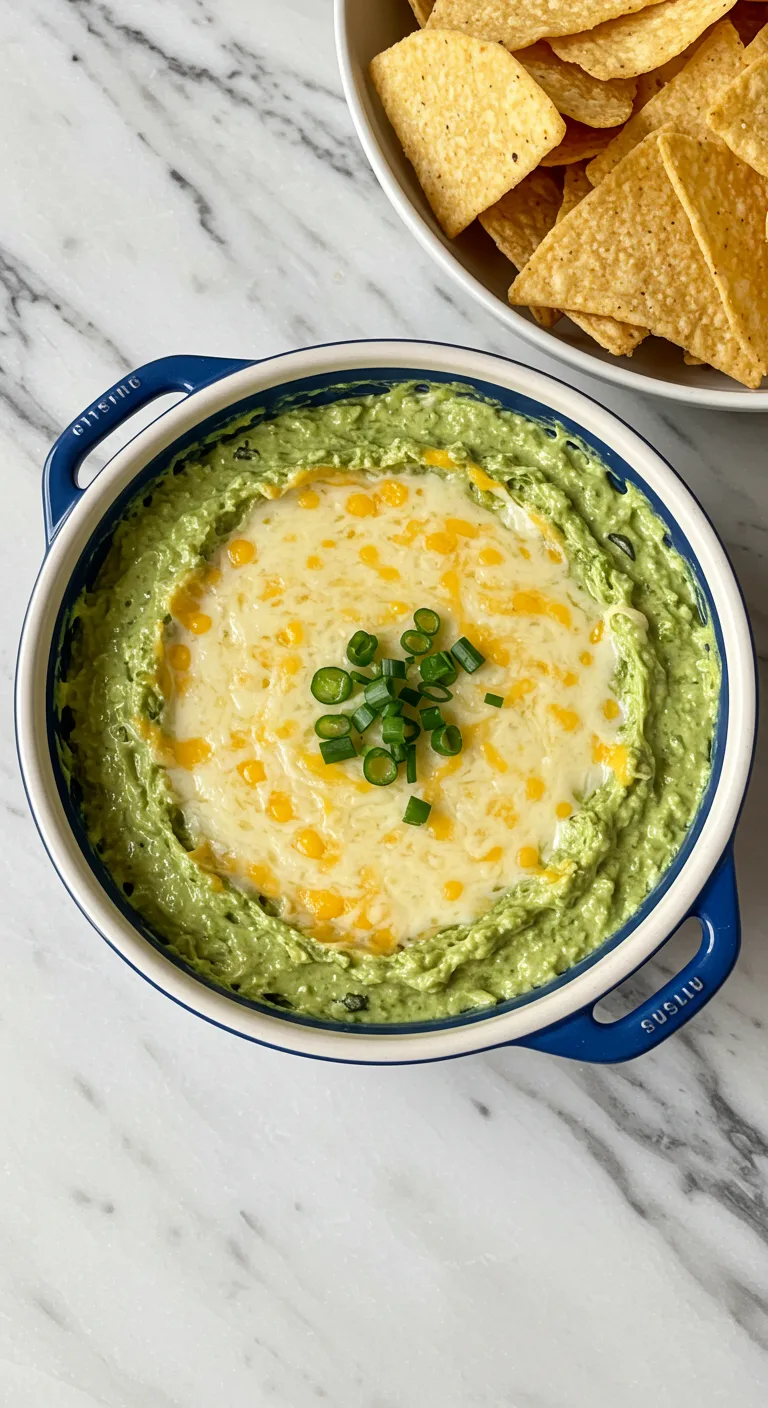
- Once your Cheesy Hatch Green Chile Dip is perfectly warmed through and gloriously gooey, carefully transfer it to a serving bowl. I love a rustic ceramic bowl for this, it just feels right. Garnish with a little extra fresh cilantro, if you’re feeling fancy, or a sprinkle of paprika for color. Serve it immediately with your favorite tortilla chips, sturdy crackers, or even some fresh veggie sticks. The steam rising from that bowl, the rich aroma… honestly, it’s irresistible. Don’t wait too long, it’s best when it’s piping hot!
Honestly, some of my favorite kitchen moments are when this Cheesy Hatch Green Chile Dip is simmering. The house fills with that incredible aroma, and it just feels… right. I remember one time, my little niece, who usually turns her nose up at anything green, devoured this dip. Her eyes went wide, and she just kept saying ‘more cheese!’ It warms my heart to see simple, honest food bring so much joy. Even if it means a little extra clean-up, it’s always worth it for those smiles and full bellies.
Storage Tips
Okay, so for storage, this Cheesy Hatch Green Chile Dip actually holds up pretty well, which is a win! Let it cool completely first trying to put hot dip straight into the fridge is just asking for condensation issues and a weird texture later. Transfer it to an airtight container. It’ll keep in the refrigerator for about 3-4 days. When reheating, I’ve found the stovetop on low heat is your best bet, stirring frequently, maybe with a splash of milk to bring back that creamy consistency. I microwaved it once, and the sauce separated into an oily mess, leaving the chiles looking sad so don’t do that lol, unless you’re in a real pinch and don’t mind the texture change. It never tastes quite as good as fresh, but it’s still a delicious leftover.

Ingredient Substitutions
Life happens, and sometimes you don’t have exactly what the recipe calls for, right? For the cheddar, I’ve tried using a sharp Colby Jack, and it worked… kinda. It wasn’t as robust in flavor, but the melt was still there. If Monterey Jack is elusive, a good mild white cheddar or even mozzarella could step in, though you’ll lose some of that classic smooth melt. As for the Hatch green chiles, if you can’t find them, a can of mild diced green chiles will work, but you’ll miss that distinct smoky, earthy flavor that makes this Cheesy Hatch Green Chile Dip so special. I’ve even tried roasting my own poblanos and dicing them once it was a bit more work, but the fresh flavor was lovely, though different. Just don’t swap out the cream cheese, that’s non-negotiable for the texture!
Serving Suggestions
Oh, the possibilities! This Cheesy Hatch Green Chile Dip is practically a party in a bowl. My absolute favorite way to serve it is with sturdy tortilla chips the kind that can really scoop up a generous amount without breaking. But honestly, it’s also incredible with fresh-cut bell pepper strips, carrot sticks, or even toasted baguette slices. For a casual dinner, I love serving it alongside simple grilled chicken or a big, fresh salad. And for a truly cozy night in, especially if I’m watching a classic rom-com, a bowl of this Cheesy Hatch Green Chile Dip, a glass of crisp white wine, and a soft blanket? Yes please! Sometimes, I even dollop a spoonful onto scrambled eggs for a breakfast treat. It’s a truly versatile delight.
Cultural Backstory
Hatch green chiles are truly a treasure, especially in New Mexico where they’re grown. Every late summer, the air in New Mexico fills with the intoxicating aroma of roasting chiles it’s a smell that just screams ‘home’ to so many. My own connection to this ingredient started during a road trip through the Southwest years ago. I was captivated by the local passion for these chiles, and I just had to bring that flavor home to my kitchen. This Cheesy Hatch Green Chile Dip is my humble tribute to that incredible experience, capturing a bit of that Southwestern warmth and hospitality. It’s a taste of tradition, brought to my table with a whole lot of love. It reminds me of sunny skies and friendly faces.
Making this Cheesy Hatch Green Chile Dip always brings a smile to my face. It’s more than just a recipe, it’s a little piece of comfort, a reminder of good times and simple pleasures. I love how it fills the kitchen with such a welcoming aroma, and how everyone always gathers ’round the bowl. It turned out just as gloriously gooey and flavorful as ever today. I hope this dip brings as much joy and warmth to your home as it does to mine. Please, share your own kitchen adventures with this dip I’d love to hear them!

Frequently Asked Questions
- → Making Cheesy Hatch Green Chile Dip Less Spicy?
Absolutely! If you’re sensitive to heat, just make sure to use mild Hatch green chiles. You can also rinse them really well after draining to remove some of the capsaicin. I once accidentally grabbed a can of hot chiles, and wow, my taste buds were tingling! Stick to mild for a gentle warmth.
- → What if I don’t have Monterey Jack for this Cheesy Hatch Green Chile Dip?
No worries, friend! While Monterey Jack is fantastic for its melt, you can swap it for another good melting cheese like a mild white cheddar or even some mozzarella. I tried a provolone blend once, and it worked okay, but it didn’t have quite the same stretch. Just avoid anything too crumbly!
- → Why did my Cheesy Hatch Green Chile Dip turn out grainy?
Ah, a common kitchen oops! Graininess often comes from overheating the cheese or using pre-shredded cheese with anti-caking agents. Make sure you’re melting the cheese slowly over low heat, stirring constantly. I learned this the hard way after a few grainy batches patience is key for smooth dip!
- → How long does Cheesy Hatch Green Chile Dip last in the fridge?
This dip keeps pretty well! Once cooled, store it in an airtight container in the refrigerator for about 3-4 days. I always make a big batch for leftovers, but it never seems to last that long in my house! Just remember to reheat it gently on the stovetop for the best texture.
- → Can I add meat to Cheesy Hatch Green Chile Dip?
Oh, you definitely can! I’ve experimented with adding cooked, crumbled sausage or seasoned ground beef to make it even heartier. It turns it into a more substantial meal, almost like a deconstructed taco dip! Just make sure the meat is fully cooked and drained before stirring it in. Delicious!

Creamy Cheesy Hatch Green Chile Dip Recipe
- Prep Time: 10 Minutes
- Cook Time: 15 Minutes
- Total Time: 25 Minutes
- Yield: 6-8 Servings 1x
- Category: 687659b5b594a79b2fa9d89d
Description
Cheesy Hatch Green Chile Dip is a warm, creamy delight. This recipe brings a flavorful, spicy kick to any gathering, perfect with chips or veggies.
Ingredients
- Creamy Base:
- 8 oz (226g) cream cheese, softened
- 1/2 cup (120g) sour cream
- 1/4 cup (60ml) whole milk
- Cheesy Goodness:
- 1 cup (113g) shredded sharp cheddar cheese
- 1 cup (113g) shredded Monterey Jack cheese
- Hatch Chile Flavor:
- 1 (4 oz) can diced Hatch green chiles, drained
- Aromatics & Seasoning:
- 1/2 tsp garlic powder
- 1/4 tsp onion powder
- 1/4 tsp ground cumin
- Salt and freshly ground black pepper, to taste
Instructions
- Melt the Creamy Base:: Grab a medium saucepan, hon, and set it over low heat. Toss in your softened cream cheese, sour cream, and whole milk. Stir this creamy trio constantly with a whisk or a rubber spatula until everything is smooth and totally lump-free. It’s a gentle process, you don’t want to rush it or let the bottom scorch – I’ve been there, thinking I could walk away for a second, and came back to a sad, browned layer. Keep it moving, watch it transform into this beautiful, velvety base. You’ll smell that dairy richness starting to warm up, it’s a good sign!
- Stir in the Cheesy Goodness:: Now for the fun part! Once your creamy base is smooth, gradually add in your shredded cheddar and Monterey Jack cheeses, a handful at a time. Keep stirring, stirring, stirring until each addition melts completely before you add the next. This prevents the cheese from clumping up, which, let’s be real, no one wants a lumpy dip. I always find this step so satisfying, watching the cheese ribbons disappear into that golden, gooey goodness. The aroma of melting cheese is truly something special, don’t you think?
- Introduce the Hatch Chile Flavor:: Once all the cheese is melted and happy, it’s time for our star: the drained Hatch green chiles! Gently fold them into the cheesy mixture. You want them evenly distributed, so every scoop gets a bit of that smoky, earthy goodness. This is where the Cheesy Hatch Green Chile Dip really starts to come alive, visually and aromatically. I always take a deep breath here, enjoying that distinct, slightly spicy chile scent. Be gentle when stirring, we don’t want to break up those beautiful chile pieces too much.
- Season and Taste:: Now, let’s get those flavors popping! Sprinkle in the garlic powder, onion powder, ground cumin, and a pinch of salt and black pepper. Stir everything together until the seasonings are well incorporated. This is the crucial tasting moment, my friend. Grab a spoon, let it cool just a tiny bit, and taste. Does it need more salt? More cumin? Adjust to your heart’s content! I always taste multiple times, sometimes even adding a tiny bit more garlic powder because, well, I just love garlic.
- Simmer and Thicken:: Continue to cook the Cheesy Hatch Green Chile Dip on low heat, stirring occasionally, for about 5-7 minutes. You’re just letting all those flavors meld together beautifully and allowing the dip to thicken slightly. It should be warm, bubbly around the edges, and lusciously smooth. Don’t let it boil vigorously, just a gentle simmer. This is where the magic happens, where the chiles and cheese truly become one harmonious, comforting bite. The smell filling your kitchen right now? That’s pure happiness.
- Serve It Up Hot:: Once your Cheesy Hatch Green Chile Dip is perfectly warmed through and gloriously gooey, carefully transfer it to a serving bowl. I love a rustic ceramic bowl for this, it just feels right. Garnish with a little extra fresh cilantro, if you’re feeling fancy, or a sprinkle of paprika for color. Serve it immediately with your favorite tortilla chips, sturdy crackers, or even some fresh veggie sticks. The steam rising from that bowl, the rich aroma… honestly, it’s irresistible. Don’t wait too long, it’s best when it’s piping hot!


