Honestly, Halloween isn’t just about the costumes for me, it’s about the treats. I remember one year, trying to make some ‘spooky’ dessert for a party, and everything just turned out… grey. A sad, sad grey. My kitchen looked like a flour bomb went off, and the results were just not it. But then, a few years back, I stumbled upon the idea of Black Velvet Cupcakes, and it was like a ghostly lightbulb went off! The deep, mysterious color, the tender crumb… it felt like magic. These aren’t just cupcakes, they’re a little piece of Halloween enchantment, reminding me that even kitchen mishaps can lead to something truly delightful. They bring that perfect balance of slightly eerie and utterly comforting, a real treat for the senses.
Oh, the first time I made these Black Velvet Cupcakes, I got a little too excited with the black gel food coloring. My hands, my counter, even my nose had little specks of black! I looked like I’d been wrestling a squid in a bakery. My husband walked in, took one look, and just started laughing. But hey, it was a messy, fun process, and the results were worth every single black smear. It’s those silly, imperfect moments that make cooking so real, right?
Ingredients
- All-Purpose Flour: This is our base, the backbone of these Black Velvet Cupcakes. Don’t try to use cake flour here unless you know what you’re doing, AP gives a lovely structure without being too delicate.
- Unsweetened Cocoa Powder: For a deep, rich flavor and to help that black color really pop. I always grab Dutch-processed cocoa powder, it’s less acidic and gives a darker hue, which is what we want for these spooky treats.
- Granulated Sugar: Sweetness, pure and simple. It balances the cocoa and keeps the cupcakes tender. I once tried to cut the sugar too much, and they were, well, not great, so stick to the recipe here!
- Black Gel Food Coloring: This is the secret to those truly dark Black Velvet Cupcakes. Honestly, don’t bother with liquid food coloring, you’ll need so much it’ll mess with the batter consistency and flavor. Gel is where it’s at!
- Buttermilk: Essential for a tender, moist crumb. The acidity reacts with the baking soda, giving our cupcakes their lift. If you don’t have buttermilk, I’ve done the milk + lemon juice trick, and it works… kinda. But real buttermilk is always better.
- Cream Cheese: For that tangy, dreamy cream cheese frosting. Make sure it’s full-fat and softened to room temperature, or you’ll have lumpy frosting, and nobody wants lumpy frosting, trust me.
- Unsalted Butter: In both the cupcakes and the frosting, for richness and flavor. Unsalted lets you control the salt content, which I appreciate. I always feel like a fancy baker when I soften butter just right.
- Powdered Sugar: The star of our frosting! Sift it, please, unless you enjoy battling lumps. I learned that the hard way, trying to rush it once, and my frosting looked like it had a bad case of acne.
- Vanilla Extract: A touch of warmth and depth for both the cupcakes and the frosting. I’m a bit heavy-handed with vanilla, honestly. I just love that smell!
- Baking Soda & Baking Powder: Our leavening agents, working together to give these Black Velvet Cupcakes their perfect rise and fluffy texture. Don’t mix them up, or you’ll have flat little pucks, which I’ve done before. Oops.
Instructions
- Mix Dry Ingredients for Black Velvet Cupcakes:
- First things first, grab a big bowl and whisk together your flour, cocoa powder, baking soda, baking powder, and salt. I always give it a good, thorough whisk to make sure everything is evenly distributed. There’s nothing worse than biting into a clump of unmixed baking soda, believe me, I’ve been there. You want this mixture light and airy, almost like a dark cloud before a storm. Set it aside for a moment, we’ll come back to it soon.
- Prepare Wet Ingredients for Black Velvet Cupcakes:
- In another bowl, cream together the softened butter and granulated sugar until it’s light and fluffy. This step is crucial for that tender crumb! Then, beat in your eggs one at a time, making sure each is fully incorporated before adding the next. Now, for the magic: add a generous amount of black gel food coloring and the vanilla extract. Mix until it’s a really deep, dark black. I always get a little thrill seeing that color develop, it’s just so dramatic!
- Combine and Add Buttermilk:
- Now we’re going to bring it all together. Gradually add your dry ingredients to the wet ingredients, alternating with the buttermilk. Start and end with the dry. Mix on low speed, just until everything is combined. Seriously, don’t overmix! Overmixing is the enemy of tender cupcakes, it makes them tough, and we want these Black Velvet Cupcakes to be soft and fluffy. A few lumps are totally fine, honestly.
- Bake Your Spooky Black Velvet Cupcakes:
- Line a 12-cup muffin tin with cupcake liners. Fill each liner about two-thirds full with your gorgeous black batter. Pop them into a preheated oven at 350°F (175°C) and bake for about 18-22 minutes. You’ll know they’re done when a toothpick inserted into the center comes out clean. My kitchen always smells incredible at this point, like a warm, chocolatey hug. Let them cool in the pan for a few minutes before transferring them to a wire rack to cool completely.
- Whip Up the Cream Cheese Frosting:
- While your Black Velvet Cupcakes are cooling, let’s make that dreamy cream cheese frosting. In a stand mixer, beat the softened cream cheese and butter together until smooth. Make sure there are no lumps! Then, gradually add the powdered sugar, a cup at a time, mixing on low until combined, then increasing speed to medium-high until it’s light and fluffy. Stir in the vanilla extract. If it’s too thick, a tiny splash of milk helps, too thin, a bit more powdered sugar. It’s all about feel sometimes, you know?
- Decorate Your Black Velvet Cupcakes:
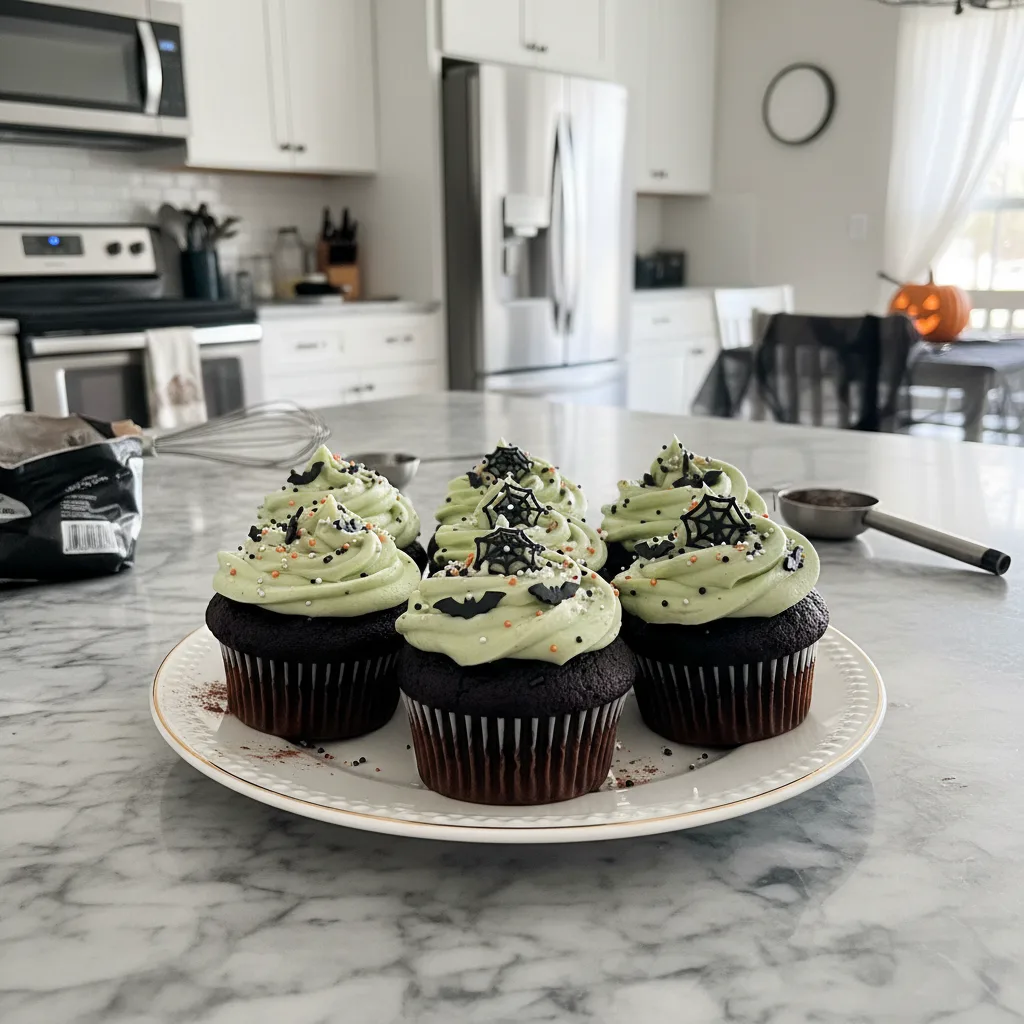
- Once the Black Velvet Cupcakes are completely cool (this is important, warm cupcakes will melt your frosting!), pipe or spread the cream cheese frosting generously on top. This is where you can get creative! I love adding a little sprinkle of black or silver edible glitter, or even some spooky sprinkles for that extra Halloween flair. Step back and admire your handiwork, they look so striking and taste even better!
I remember one time, I was trying to photograph these Black Velvet Cupcakes, and I had just finished frosting them perfectly. Then, my cat, Mittens, decided to jump onto the counter, right next to the plate! I nearly had a heart attack, but thankfully, she only sniffed them. It’s those unexpected moments in the kitchen that keep things interesting, even if they give you a fright. These cupcakes always make me smile, even after a near-cat-astrophe.
Storage Tips
So, you’ve got leftover Black Velvet Cupcakes? Lucky you! For best results, I usually store these Black Velvet Cupcakes in an airtight container in the refrigerator because of the cream cheese frosting. They’ll keep beautifully for about 3-4 days. Now, a little tip from personal experience: if you want them to be super soft and moist when you eat them, take them out of the fridge about 30 minutes to an hour before serving to let them come to room temperature. I once microwaved a frosted cupcake to “warm it up,” and the frosting got all melty and weird definitely don’t do that, lol. The cake itself freezes well unfrosted for up to a month, just wrap them tightly. Then, you can whip up fresh frosting when you’re ready to serve, which is a total game-changer for prep-ahead.

Black Velvet Cupcakes: Ingredient Substitutions
Life happens, and sometimes you just don’t have that one ingredient, right? For the buttermilk in these Black Velvet Cupcakes, if you’re in a pinch, you can make your own ‘sour milk’ by adding 1 tablespoon of white vinegar or lemon juice to a liquid measuring cup, then filling the rest with regular milk (dairy or non-dairy works) until it reaches 1 cup. Let it sit for 5-10 minutes until it slightly curdles. I’ve done this, and it works… kinda, the texture isn’t quite as tender as with real buttermilk, but it gets the job done. For the cocoa powder, I really recommend Dutch-processed for that dark color, but if you only have natural unsweetened, it’ll still taste good, just might not be as intensely black. And for the frosting, if cream cheese isn’t your jam, a simple vanilla buttercream is always a classic, though you’ll miss that lovely tang. I tried a vegan cream cheese once, it was okay, but definitely had a different flavor profile.
Black Velvet Cupcakes: Serving Suggestions
These Black Velvet Cupcakes are fantastic on their own, but I have a few ideas to make them extra special. For a truly spooky vibe, serve them on a dark platter with some dry ice (carefully, of course!) for a smoky, ethereal effect. Imagine these deep dark cupcakes emerging from a mist! They pair beautifully with a strong, dark coffee or even a rich hot chocolate, especially on a chilly Halloween evening. For a grown-up treat, a glass of a slightly sweet dessert wine or even a stout beer can be surprisingly good. For the kids, a glass of milk is always a win. I love setting them out as part of a Halloween dessert bar, maybe next to some ghost-shaped cookies. They’re so striking, they really stand out and make a statement. These Black Velvet Cupcakes are meant to be shared, preferably with good company and a fun, festive atmosphere!
Cultural Backstory
You know, the whole ‘velvet cake’ thing is fascinating. Red Velvet cake, the most famous cousin of our Black Velvet Cupcakes, has roots tracing back to the Victorian era, where cocoa was used to soften flour, giving cakes a ‘velvet’ texture. Some folks say it gained popularity during the Great Depression, using beet juice or boiled beets to enhance the red color when food dyes were scarce. My version, the Black Velvet Cupcakes, takes that classic idea and gives it a modern, spooky twist, perfect for Halloween. It’s about creating something familiar yet unexpected, playing with color and flavor to evoke a feeling. For me, it connects to that childhood wonder of Halloween, where things are a little mysterious and a lot of fun. It’s a nod to tradition, but with a playful, dark heart that just feels right this time of year.
Honestly, these Black Velvet Cupcakes always turn out so beautifully, they make me feel like a proper baker, even with all my usual kitchen shenanigans. The dark, rich cake with that tangy cream cheese frosting is just a match made in Halloween heaven. It’s a little treat that brings a lot of joy, and I really hope you give them a whirl. Don’t forget to tell me how your own spooky creations turn out!

Frequently Asked Questions
- → Can I make these Black Velvet Cupcakes less sweet?
You can try reducing the sugar in the cupcake batter by about a quarter cup, but I wouldn’t go much further, honestly. It affects the texture. For the frosting, you can definitely adjust the powdered sugar to your taste, I usually add it gradually until it tastes just right to me.
- → Question about black food coloring alternatives?
To be real, there isn’t a great natural alternative to achieve this intense black color for Black Velvet Cupcakes. Activated charcoal can be used, but I’ve found it can alter the flavor and texture a bit, and it can interact with medications, so I stick to gel food coloring for safety and best results.
- → My cupcakes came out dry, what went wrong?
Oh no, that’s a bummer! Usually, dry Black Velvet Cupcakes mean they were overbaked. Ovens can be tricky, so next time, start checking them a few minutes earlier than the recipe suggests. Another culprit could be overmixing the batter, which develops the gluten too much. Remember, just mix until combined!
- → Can I frost these Black Velvet Cupcakes ahead of time?
Absolutely! You can frost them a day in advance and store them in an airtight container in the fridge. Just remember to let them sit at room temperature for about 30 minutes before serving so the frosting softens up beautifully. I’ve done this for parties, and it saves so much stress!
- → What if I don’t have a piping bag for the frosting?
No worries at all! I often just use an offset spatula or even a butter knife to spread the frosting on my Black Velvet Cupcakes. It gives them a lovely, rustic look that’s just as charming. Or, you can snip the corner off a Ziploc bag for a makeshift piping bag works like a charm!

Dark Black Velvet Cupcakes for Halloween Night
- Prep Time: 20 Minutes
- Cook Time: 18 Minutes
- Total Time: 38 Minutes
- Yield: 12 Servings 1x
- Category: Tasty Recipes
Description
Bake rich, dark Black Velvet Cupcakes for Halloween! Nina Bakes shares her spooky, easy recipe with cream cheese frosting and personal kitchen tales.
Ingredients
- Cupcake Essentials:
- 1 ½ cups (190g) all-purpose flour
- 1 ½ teaspoons baking soda
- ½ teaspoon baking powder
- ¼ teaspoon salt
- ½ cup (113g) unsalted butter, softened
- 1 ½ cups (300g) granulated sugar
- 2 large eggs
- Velvet Color & Flavor:
- ½ cup (45g) unsweetened Dutch-processed cocoa powder
- 1 cup (240ml) buttermilk
- 1 tablespoon black gel food coloring
- 1 teaspoon vanilla extract
- Cream Cheese Frosting:
- 8 ounces (226g) cream cheese, softened
- ½ cup (113g) unsalted butter, softened
- 4 cups (480g) powdered sugar, sifted
- 1 teaspoon vanilla extract
- Spooky Decorations:
- Halloween sprinkles (optional)
- Edible glitter (optional)
Instructions
- Mix Dry Ingredients for Black Velvet Cupcakes:: First things first, grab a big bowl and whisk together your flour, cocoa powder, baking soda, baking powder, and salt. I always give it a good, thorough whisk to make sure everything is evenly distributed. There’s nothing worse than biting into a clump of unmixed baking soda, believe me, I’ve been there. You want this mixture light and airy, almost like a dark cloud before a storm. Set it aside for a moment, we’ll come back to it soon.
- Prepare Wet Ingredients for Black Velvet Cupcakes:: In another bowl, cream together the softened butter and granulated sugar until it’s light and fluffy. This step is crucial for that tender crumb! Then, beat in your eggs one at a time, making sure each is fully incorporated before adding the next. Now, for the magic: add a generous amount of black gel food coloring and the vanilla extract. Mix until it’s a really deep, dark black. I always get a little thrill seeing that color develop, it’s just so dramatic!
- Combine and Add Buttermilk:: Now we’re going to bring it all together. Gradually add your dry ingredients to the wet ingredients, alternating with the buttermilk. Start and end with the dry. Mix on low speed, just until everything is combined. Seriously, don’t overmix! Overmixing is the enemy of tender cupcakes; it makes them tough, and we want these Black Velvet Cupcakes to be soft and fluffy. A few lumps are totally fine, honestly.
- Bake Your Spooky Black Velvet Cupcakes:: Line a 12-cup muffin tin with cupcake liners. Fill each liner about two-thirds full with your gorgeous black batter. Pop them into a preheated oven at 350°F (175°C) and bake for about 18-22 minutes. You’ll know they’re done when a toothpick inserted into the center comes out clean. My kitchen always smells incredible at this point, like a warm, chocolatey hug. Let them cool in the pan for a few minutes before transferring them to a wire rack to cool completely.
- Whip Up the Cream Cheese Frosting:: While your Black Velvet Cupcakes are cooling, let’s make that dreamy cream cheese frosting. In a stand mixer, beat the softened cream cheese and butter together until smooth. Make sure there are no lumps! Then, gradually add the powdered sugar, a cup at a time, mixing on low until combined, then increasing speed to medium-high until it’s light and fluffy. Stir in the vanilla extract. If it’s too thick, a tiny splash of milk helps; too thin, a bit more powdered sugar. It’s all about feel sometimes, you know?
- Decorate Your Black Velvet Cupcakes:: Once the Black Velvet Cupcakes are completely cool (this is important, warm cupcakes will melt your frosting!), pipe or spread the cream cheese frosting generously on top. This is where you can get creative! I love adding a little sprinkle of black or silver edible glitter, or even some spooky sprinkles for that extra Halloween flair. Step back and admire your handiwork; they look so striking and taste even better!