I remember the first time I actually tried to bake apple fritters instead of frying them. It was a Saturday morning, rain was tapping on the window, and I had this sudden craving for something sweet and comforting, but also, honestly, less messy. Frying always feels like a production, you know? I had a few apples sitting on the counter, looking a little sad, and a half-eaten bag of flour. I thought, “What’s the worst that could happen?” Turns out, something pretty wonderful happened. The house filled with that incredible cinnamon-apple scent, and the kitchen, for once, didn’t smell like a fryer. This recipe for baked apple fritters with glaze became my little secret weapon for those mornings when I need a hug in food form, without the greasy aftermath.
My first attempt at these baked apple fritters involved a moment where I almost forgot the cinnamon. Can you imagine? Apple fritters without cinnamon! I had everything mixed, was about to scoop, and then caught a whiff of just… sugar and apple. A quick “oops!” later, and the cinnamon was folded in, saving the day. It just goes to show, even when you’ve made something a hundred times, those little kitchen brain-farts happen. But hey, it’s all part of the charm, right?
Ingredients for Baked Apple Fritters with Glaze
- All-Purpose Flour: This is our foundation, hon. Don’t go fancy with cake flour here, we want that sturdy, slightly chewy bite for our baked apple fritters. I once tried to use whole wheat flour, and while it was… wholesome, it just wasn’t the same. Stick to the classic for that perfect texture.
- Granulated Sugar: Just enough sweetness to balance the tart apples. You could probably get away with a little less if your apples are super sweet, but don’t skip it entirely unless you like a very plain fritter. I tried that once, and my family looked at me like I’d betrayed them.
- Baking Powder: Our lift-off agent! This is what makes these baked apple fritters light and airy, not dense and flat. Make sure yours isn’t expired, or you’ll end up with apple hockey pucks, and trust me, I’ve been there.
- Salt: A tiny pinch, but so crucial! It doesn’t make things salty, it just wakes up all the other flavors. I always forget it, then take a bite and think, “What’s missing?” It’s always the salt. Oops.
- Whole Milk: Don’t even think about skim milk here, we need that fat for tenderness and flavor. I mean, you could use almond milk, and I have in a pinch, but the richness of whole milk for these baked apple fritters is just unmatched.
- Egg: Binds everything together and adds richness. I always try to use a room temperature egg because I swear it mixes in better, though I’m usually too impatient to wait.
- Unsalted Butter (melted): Melted, of course! This adds incredible flavor and keeps our fritters moist. If you only have salted butter, just reduce the added salt in the recipe a bit. I’ve definitely done that, and it worked out fine… mostly.
- Apples (Granny Smith or Honeycrisp): These are the stars of our baked apple fritters! Granny Smiths give that lovely tartness, while Honeycrisp adds a sweet crunch. I usually do a mix. Don’t grate them too finely, or they’ll disappear, we want little chunks you can actually bite into. I once used Red Delicious thinking “apple is apple,” and it was a mushy mess. Learn from my mistakes!
- Ground Cinnamon: The essential spice for anything apple, honestly. It just smells like home. I’m a heavy-handed cinnamon user, so feel free to add a little extra if you’re like me. It just boosts the cozy factor for these baked apple fritters.
- Powdered Sugar: The base for our dreamy glaze. Sift it if you’re feeling fancy, but I usually just whisk it vigorously.
- Pure Maple Syrup: Don’t skimp here, use the real stuff! That artificial pancake syrup just won’t give you the same rich, warm flavor for your baked apple fritters with glaze. Trust me, it makes all the difference.
- Vanilla Extract: Just a tiny splash to round out the sweetness and add a little depth. I always sniff the bottle before adding, it’s just a habit.
- Milk (any kind, for glaze): Just a tiny bit to thin the glaze to the right consistency. Start with a tablespoon and add more drop by drop until it’s pourable but not watery. I’ve definitely made it too thin and had to add more powdered sugar, which is a whole thing.
Baking Your Baked Apple Fritters: The Steps
- Prep Your Apples and Oven:
- First things first, get that oven preheating to 375°F (190°C) and line a baking sheet with parchment paper. Trust me on the parchment, cleanup is a breeze! While that’s warming up, peel, core, and dice your apples into small, roughly 1/4-inch pieces. I usually aim for a size that won’t make the fritters too chunky but still gives you a good bite of apple. This is where I sometimes get a little too ambitious with my dicing, and end up with huge apple chunks. Oops.
- Whisk the Dry Stuff:
- In a big bowl, whisk together your flour, granulated sugar, baking powder, and that crucial pinch of salt. Give it a good whisk to make sure everything is evenly distributed. You don’t want a pocket of just baking powder in one fritter! This step feels simple, but it’s important for consistent baked apple fritters. I always make sure there are no lumps here.
- Mix the Wet Ingredients:
- In a separate, smaller bowl, gently whisk your egg, then add the milk and melted butter. Don’t overmix, we just want it combined. I often melt the butter in the microwave, and sometimes it gets a little too hot, so I let it cool for a minute before adding it to the egg so I don’t accidentally scramble it. Been there, done that, it’s not pretty. This ensures your baked apple fritters will be tender.
- Combine and Fold in Apples:
- Pour the wet ingredients into the dry ingredients. Mix just until combined. A few lumps are totally fine, overmixing develops the gluten, and we want tender baked apple fritters, not tough ones. Then, gently fold in your diced apples and ground cinnamon. The batter will be thick, but that’s what we’re going for! It should smell heavenly right about now, a perfect prelude to your baked apple fritters with glaze.
- Scoop and Bake:
- Using two spoons or a small cookie scoop, drop spoonfuls of the batter onto your prepared baking sheet. I usually aim for about 1.5-2 tablespoons per fritter, giving them a slightly irregular, rustic shape. Don’t crowd them too much, or they won’t brown nicely. Pop them into your preheated oven and bake for 15-20 minutes, or until golden brown and cooked through. They should feel firm to the touch.
- Whip Up the Glaze:
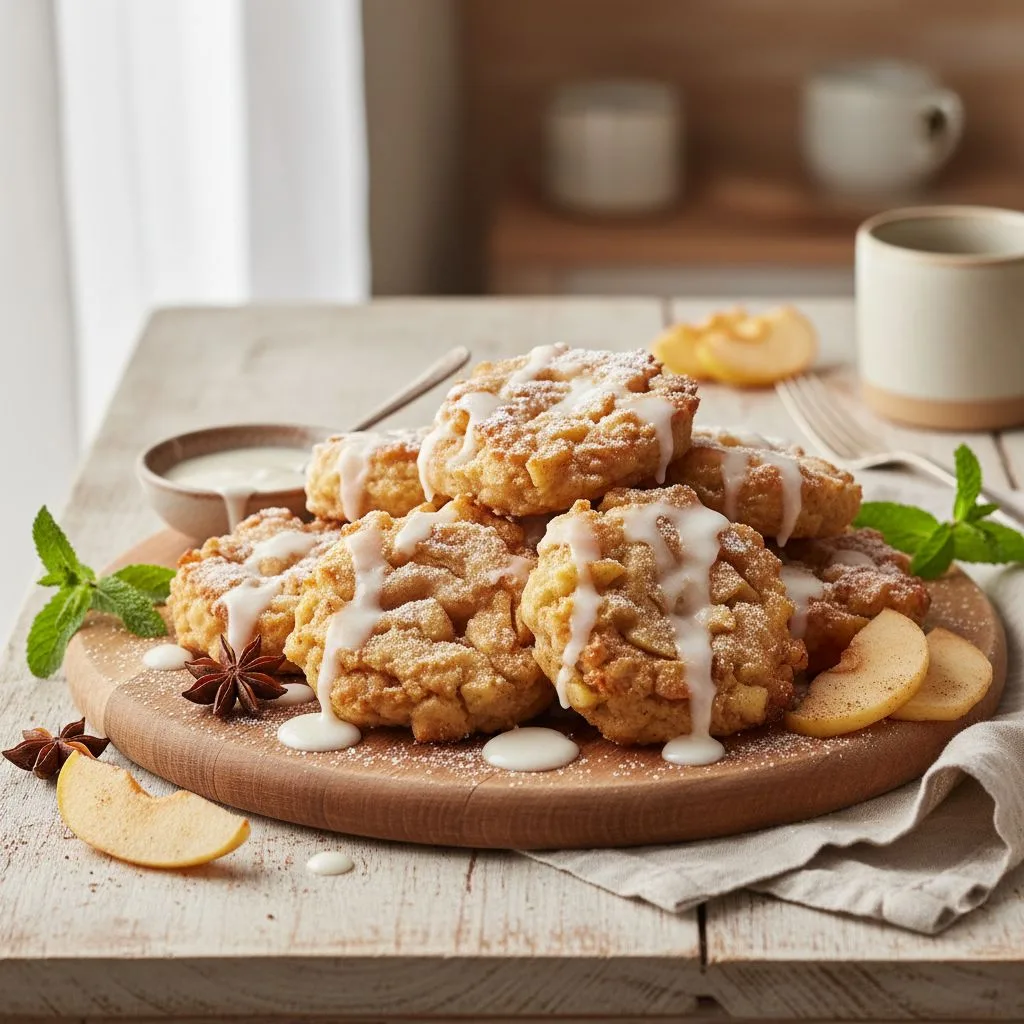
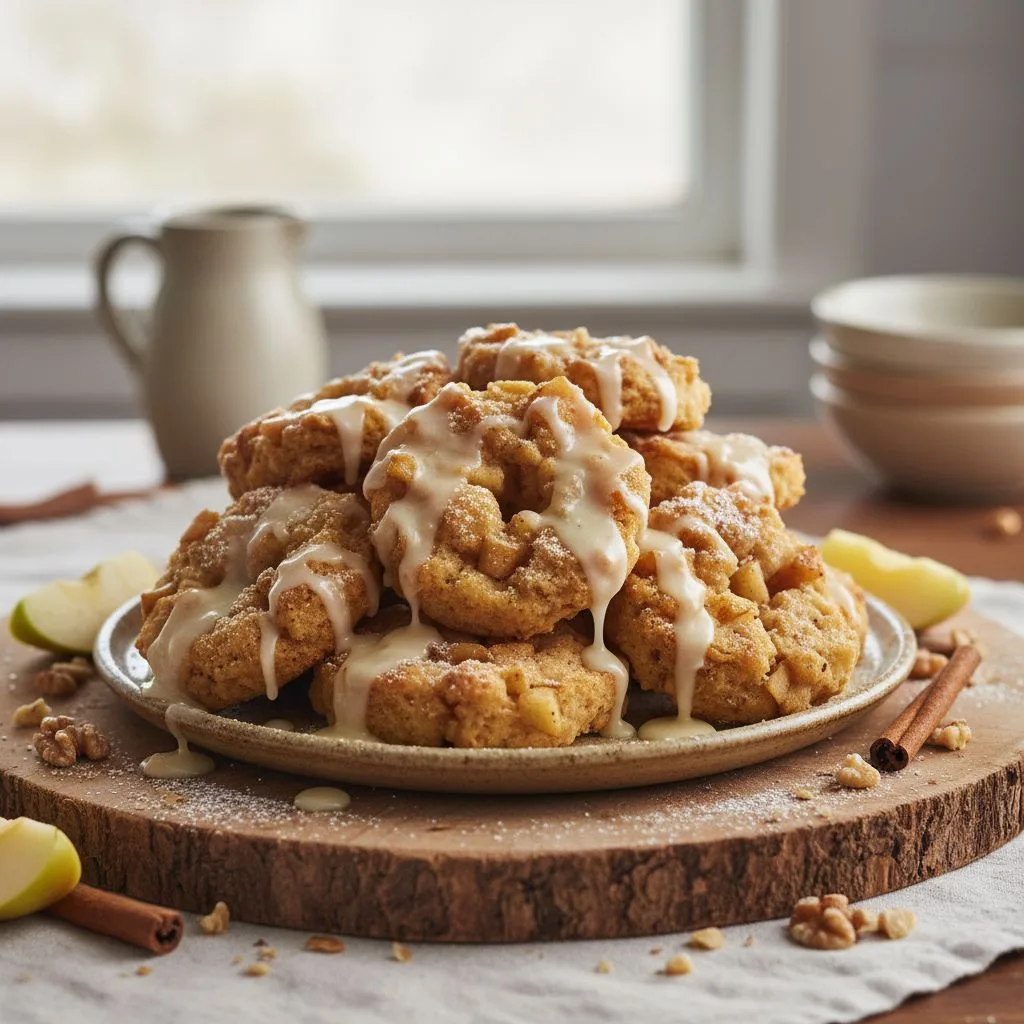
- While your baked apple fritters are cooling a bit (but still warm!), whisk together the powdered sugar, maple syrup, vanilla extract, and a tablespoon of milk in a small bowl. Add more milk, a tiny bit at a time, until you have a smooth, pourable glaze. It should be thick enough to coat the back of a spoon. Drizzle liberally over the warm fritters. This is the fun part, honestly! The glaze transforms these into true baked apple fritters with glaze.
There was this one time I was so excited for these baked apple fritters that I pulled them from the oven too soon. They looked golden on the outside, but the inside was still a bit doughy. My husband, bless his heart, still ate them, but I knew. It taught me patience, especially with baking. Now, I always give them that extra minute or two, and the difference is huge. It’s a small detail, but it makes all the difference for perfect baked apple fritters with glaze.
Baked Apple Fritters with Glaze Storage Tips
Storing these baked apple fritters with glaze is pretty straightforward, but there are a few things I’ve learned. If you’ve already glazed them, they’re best eaten the same day, honestly. The glaze can get a little sticky and absorb into the fritter, making them a bit softer than ideal. I microwaved one once the next day, and while it was warm, the glaze was a bit of a sticky mess so don’t do that lol. If you want to store them for longer, keep them unglazed in an airtight container at room temperature for up to 3 days, or in the fridge for up to 5 days. You can then warm them gently in the microwave or a toaster oven and add fresh glaze. Freezing is also an option for unglazed baked apple fritters, just let them cool completely, then freeze in a single layer on a baking sheet before transferring to a freezer-safe bag for up to a month. Thaw and glaze as desired!
Ingredient Substitutions for Baked Apple Fritters
Life happens, and sometimes you don’t have exactly what the recipe calls for. I’ve definitely been there! For the apples in these baked apple fritters, you could try firm pears I tried it once with Bosc pears, and it worked… kinda. The texture was different, a bit softer, but the flavor was lovely. If you’re out of whole milk, 2% milk will work, but you might lose a tiny bit of richness. I’ve even used unsweetened almond milk when I was dairy-free for a bit, and while the fritters were still good, they weren’t quite as tender. For the glaze, if you don’t have maple syrup, a little honey could work, but it changes the flavor profile quite a bit. Honestly, for the best baked apple fritters with glaze, stick to pure maple if you can. And if you’re out of vanilla, a tiny pinch of nutmeg can add a similar warmth, but it’s not a direct swap.
Serving Baked Apple Fritters with Glaze
Oh, the serving possibilities for these baked apple fritters with glaze are endless! My favorite way to enjoy them is still warm, fresh from the oven, with that glaze just slightly tacky. A mug of hot coffee or a spiced chai latte is the perfect pairing for a morning treat. For a more decadent dessert, I love serving them with a scoop of really good vanilla bean ice cream that melts just a little into the warm fritter pure bliss! Or, if you’re feeling extra fancy, a dollop of fresh whipped cream and an extra sprinkle of cinnamon. These fritters also make a lovely addition to a brunch spread, alongside some crispy bacon and fresh fruit. Honestly, a plate of these, a good book, and a cozy blanket? Yes please, that’s my ideal afternoon right there.
Cultural Backstory of Fritters
While my baked apple fritters with glaze might feel like a cozy, all-American treat, the concept of fritters actually has a rich and ancient history, popping up in various forms across cultures for centuries! Think about it: essentially, it’s fruit or vegetables encased in batter and fried (or, in our case, baked!). The Romans had a version, and they became popular throughout Europe during the Middle Ages, often made with apples or other seasonal fruits. They traveled with immigrants to America, evolving into the beloved apple fritters we know today. For me, they connect me to a simpler time, to the joy of using seasonal ingredients and creating something comforting from scratch. It’s a little piece of history right in my kitchen, updated for a healthier, less messy approach!
Making these baked apple fritters with glaze always brings a little calm to my kitchen, even on the most chaotic days. There’s something so grounding about the smell of cinnamon and baking apples. They might not be perfectly uniform, but that’s their charm, right? Each one is a little unique, just like us. I hope these bring as much joy and comfort to your home as they do to mine. Give them a try, and tell me how your batch of baked apple fritters turns out!
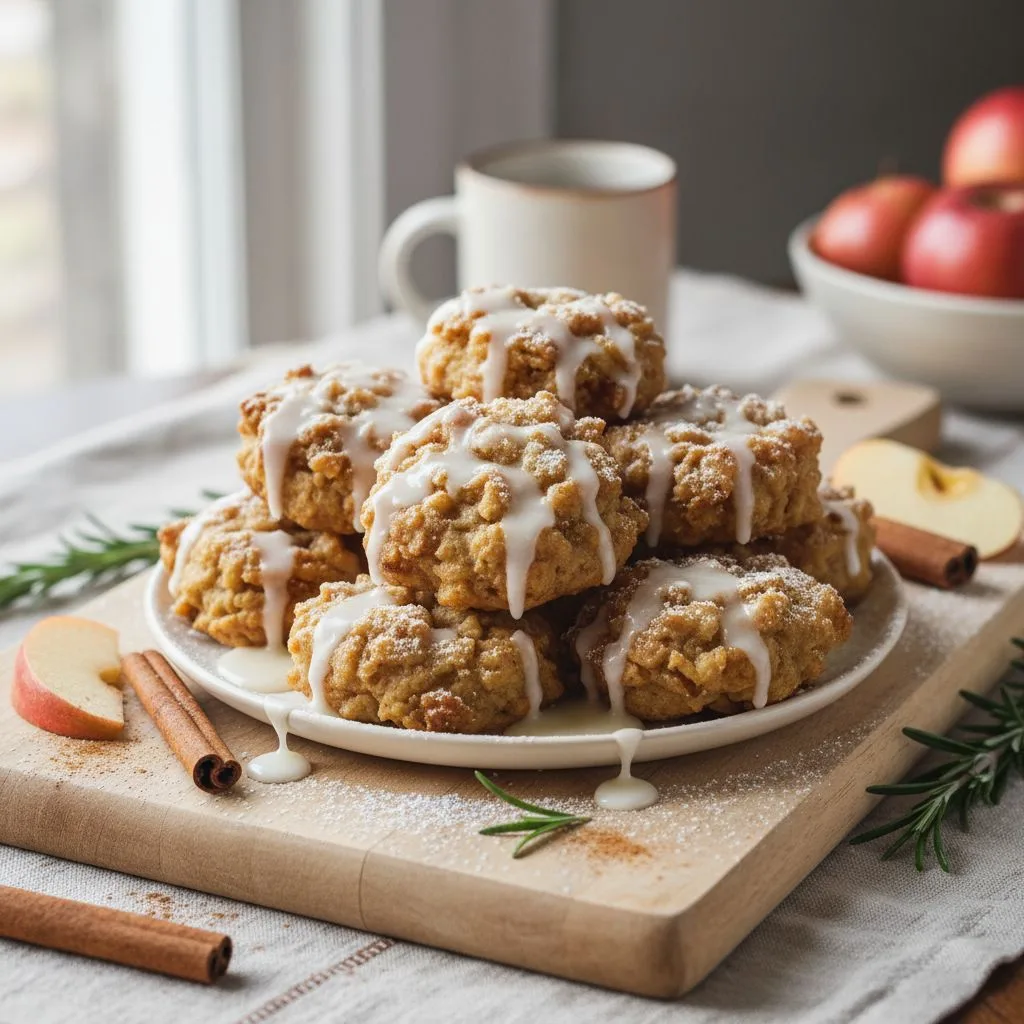
Frequently Asked Questions About Baked Apple Fritters with Glaze
- → Can I make these baked apple fritters ahead of time?
You can definitely prep the dry ingredients ahead, or even dice the apples and keep them in the fridge. For the best texture, I find baking them fresh is key. Glazed ones soften pretty quickly, honestly!
- → What kind of apples are best for baked apple fritters?
I really love a mix of Granny Smith for tartness and Honeycrisp for sweetness and crunch. I tried Red Delicious once, and they just turned to mush, so learn from my mistake!
- → My fritters came out dense, what happened?
Oh, I’ve done that! It’s usually from overmixing the batter. You want to mix just until the dry ingredients are moistened. A few lumps are totally fine and actually help keep them tender.
- → How do I store leftover baked apple fritters with glaze?
If they’re glazed, they’re best eaten the same day. Unglazed ones can be stored in an airtight container at room temperature for 2-3 days. Reheat gently, and then add fresh glaze!
- → Can I add other fruits to these baked apple fritters?
Absolutely! I’ve experimented with peaches and even berries. Just make sure the fruit isn’t too watery, or it can make the fritters soggy. Patting them dry helps a lot.
Warm Baked Apple Fritters with Maple Glaze
- Prep Time: 20 Minutes
- Cook Time: 20 Minutes
- Total Time: 40 Minutes
- Yield: 10 Servings 1x
- Category: Desserts
Description
Warm Baked Apple Fritters with Maple Glaze are a sweet, comforting treat. This recipe brings a touch of nostalgia and simple joy to your kitchen.
Ingredients
- Fritter Base:
- 1 ½ cups (180g) all-purpose flour
- ½ cup (100g) granulated sugar
- 2 teaspoons baking powder
- ½ teaspoon salt
- ½ cup (120ml) whole milk
- 1 large egg
- 2 tablespoons unsalted butter, melted
- Apple Goodness:
- 1 large (about 1 ½ cups diced) apple, peeled, cored, and diced (Granny Smith or Honeycrisp recommended)
- 1 teaspoon ground cinnamon
- Maple Glaze:
- 1 cup (120g) powdered sugar
- 2 tablespoons pure maple syrup
- ½ teaspoon vanilla extract
- 1–2 tablespoons milk (any kind), as needed
Instructions
- Prep Your Apples and Oven:: First things first, get that oven preheating to 375°F (190°C) and line a baking sheet with parchment paper. Trust me on the parchment; cleanup is a breeze! While that’s warming up, peel, core, and dice your apples into small, roughly 1/4-inch pieces. I usually aim for a size that won’t make the fritters too chunky but still gives you a good bite of apple. This is where I sometimes get a little too ambitious with my dicing, and end up with huge apple chunks. Oops.
- Whisk the Dry Stuff:: In a big bowl, whisk together your flour, granulated sugar, baking powder, and that crucial pinch of salt. Give it a good whisk to make sure everything is evenly distributed. You don’t want a pocket of just baking powder in one fritter! This step feels simple, but it’s important for consistent baked apple fritters. I always make sure there are no lumps here.
- Mix the Wet Ingredients:: In a separate, smaller bowl, gently whisk your egg, then add the milk and melted butter. Don’t overmix; we just want it combined. I often melt the butter in the microwave, and sometimes it gets a little too hot, so I let it cool for a minute before adding it to the egg so I don’t accidentally scramble it. Been there, done that, it’s not pretty. This ensures your baked apple fritters will be tender.
- Combine and Fold in Apples:: Pour the wet ingredients into the dry ingredients. Mix just until combined. A few lumps are totally fine; overmixing develops the gluten, and we want tender baked apple fritters, not tough ones. Then, gently fold in your diced apples and ground cinnamon. The batter will be thick, but that’s what we’re going for! It should smell heavenly right about now, a perfect prelude to your baked apple fritters with glaze.
- Scoop and Bake:: Using two spoons or a small cookie scoop, drop spoonfuls of the batter onto your prepared baking sheet. I usually aim for about 1.5-2 tablespoons per fritter, giving them a slightly irregular, rustic shape. Don’t crowd them too much, or they won’t brown nicely. Pop them into your preheated oven and bake for 15-20 minutes, or until golden brown and cooked through. They should feel firm to the touch.
- Whip Up the Glaze:: While your baked apple fritters are cooling a bit (but still warm!), whisk together the powdered sugar, maple syrup, vanilla extract, and a tablespoon of milk in a small bowl. Add more milk, a tiny bit at a time, until you have a smooth, pourable glaze. It should be thick enough to coat the back of a spoon. Drizzle liberally over the warm fritters. This is the fun part, honestly! The glaze transforms these into true baked apple fritters with glaze.

