I remember stumbling upon a baked fritter recipe years ago, buried in an old community cookbook. My grandmother, bless her heart, always fried hers, and and while those were legendary, my kitchen isn’t exactly set up for deep-frying chaos on a Tuesday. I wanted that same warm, spiced apple goodness, that tender bite, but without the oil splatters and the lingering smell. Honestly, I didn’t expect much from a ‘baked’ version, but the first batch of these Baked Apple Fritters with Glaze? Oh, they changed things. The smell of cinnamon and sweet apples filling the house just brings back so many memories, like wrapping up in a quilt on a crisp autumn evening. These fritters aren’t just food, they’re a hug.
My first try making these Baked Apple Fritters with Glaze was a bit of a laugh. I totally misjudged the apple-to-dough ratio, and I ended up with what looked like apple pancakes more than fritters. My little one, bless her heart, called them ‘apple blobs.’ We ate them anyway, drizzled with way too much glaze, and honestly, they were still pretty delicious! It taught me a valuable lesson about patience and precise chopping.
Baked Apple Fritters with Glaze: Ingredients
- All-Purpose Flour: This is our base, the backbone of our fritters. Don’t use anything fancy, just the standard stuff. I once tried whole wheat and it made them a bit too dense for my liking, so stick to AP for that tender texture.
- Granulated Sugar: Sweetens the dough just right. You can adjust this a little if your apples are super sweet or really tart. I tried once with brown sugar, and while it was okay, it made the fritters a bit darker and the flavor profile shifted.
- Baking Powder: Our lift! This is what makes them fluffy and light, not dense pucks. Make sure yours isn’t expired, I’ve had sad, flat fritters from old baking powder, and it’s a real bummer.
- Ground Cinnamon: This is where the magic happens, giving us that warm, comforting apple pie vibe. Honestly, I always add a tiny bit more than the recipe calls for because I just love that spicy kick.
- Salt: Don’t skip it! A tiny pinch really enhances all the other flavors, making the apples and cinnamon sing. I always forget to add salt to my baked goods, but it makes such a difference here.
- Milk: Adds moisture and richness to the dough. Whole milk gives the best texture, but 2% works too. I once used almond milk and it was fine, but a little less rich. Don’t use skim milk, just don’t.
- Egg: Acts as a binder, holding everything together. A large egg is usually what I grab. I once forgot the egg entirely and ended up with crumbly apple bits, not fritters, oops!
- Unsalted Butter (Melted): Adds fat and flavor, making the fritters tender. Make sure it’s cooled a bit before adding to the mix, hot butter can start cooking the egg.
- Vanilla Extract: Pure vanilla is the way to go here. It just rounds out all the sweet flavors so beautifully. I honestly think it’s worth splurging on good quality vanilla.
- Apples (Peeled, Cored, Diced): The star of our show! I usually go for Gala or Fuji for their sweetness and firm texture. Make sure they’re diced small, about 1/4-inch, so they cook evenly and integrate into the dough.
- Powdered Sugar: For our dreamy glaze. Sift it if you can to avoid lumps, I’ve had lumpy glaze before, and it’s just not as pretty.
Baked Apple Fritters with Glaze: How to Make Them
- Prep Your Apples and Dry Mix:
- First things first, get those apples ready! Peel, core, and dice them into small, even pieces. About 1/4-inch is what I aim for, too big and they won’t soften properly, too small and they’ll disappear. In a big bowl, whisk together your flour, granulated sugar, baking powder, cinnamon, and salt. Give it a good whisk, you want everything evenly distributed, trust me, you don’t want a pocket of just baking powder, I’ve made that mistake!
- Combine Wet Ingredients:
- In a separate, medium-sized bowl, whisk together the milk, egg, melted butter (make sure it’s cooled a bit, we don’t want scrambled eggs!), and vanilla extract. This is where the magic starts to happen, creating the base for our tender fritters. I always take a moment to really whisk it well, making sure that egg is fully incorporated. Little clumps are okay, but big ones? Not so much.
- Mix Wet into Dry & Add Apples:
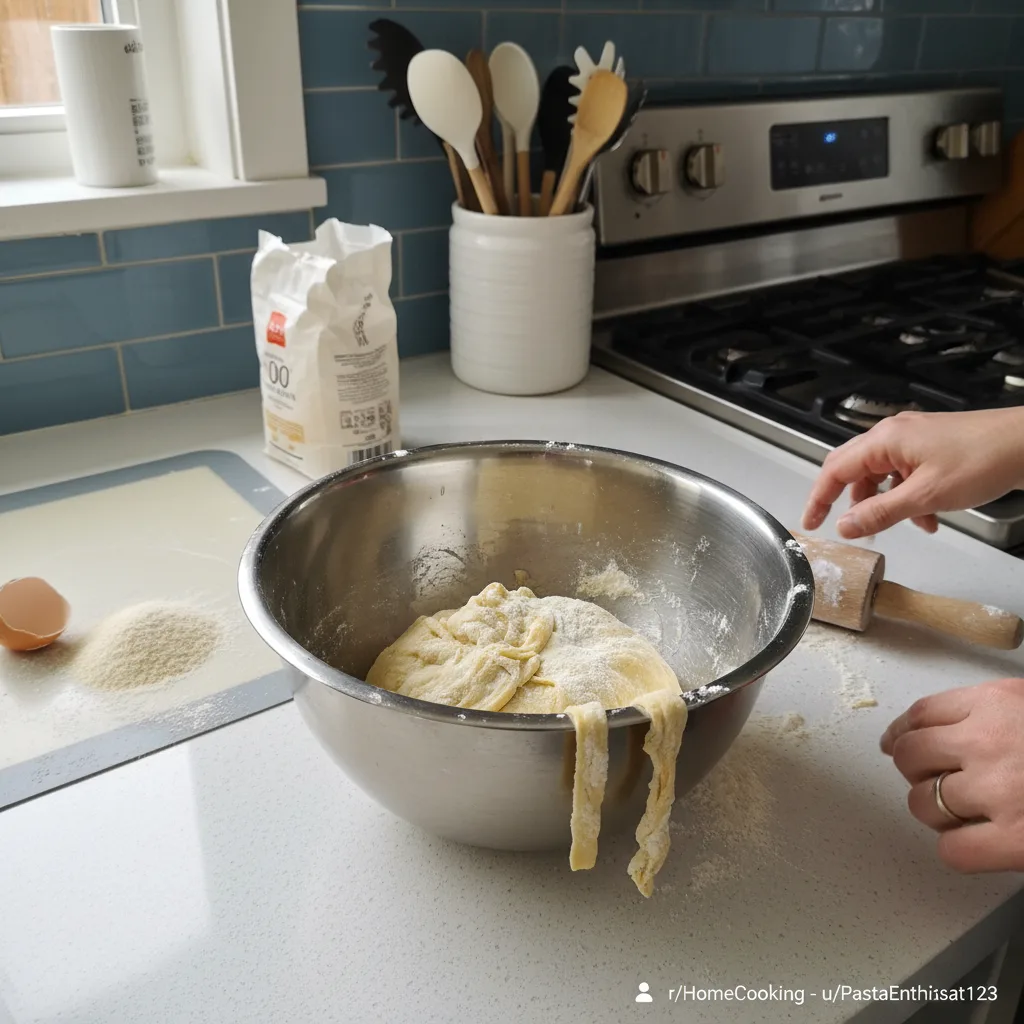
- Pour the wet mixture into the dry ingredients. Stir just until combined, a few lumps are totally fine, honestly, overmixing is the enemy of tender baked goods. Then, gently fold in your diced apples. You’re looking for a thick, shaggy dough, not a smooth batter. It’ll feel a bit messy, like organized chaos, but that’s exactly what we want for those rustic fritter vibes.
- Scoop and Bake the Fritters:
- Line a baking sheet with parchment paper. Using a large spoon or an ice cream scoop, drop irregular mounds of dough onto the prepared sheet, leaving a couple of inches between each one. Don’t worry about them being perfectly shaped, fritters are supposed to be wonderfully rustic! I usually get about 12-14. Bake in a preheated oven until golden brown and cooked through, about 15-18 minutes. The edges should look slightly crispy, and the apples inside should be tender.
- Prepare the Glaze:
- While your fritters are cooling a bit, it’s glaze time! In a small bowl, whisk together the powdered sugar, milk, and vanilla extract until smooth. You’re looking for a consistency that’s thick enough to coat a spoon but still pourable. If it’s too thick, add a tiny splash more milk, too thin, add a bit more powdered sugar. This is where I sometimes get a little heavy-handed with the milk, so add slowly!
- Glaze and Serve Your Baked Apple Fritters with Glaze:
- Once the fritters have cooled for about 5-10 minutes (they should still be warm, but not piping hot), drizzle that glorious glaze generously over each one. You can use a spoon or even dip them if you’re feeling adventurous. The glaze will set slightly as it cools, creating a sweet, crackly coating. The smell of the warm apples and sweet glaze is just divine at this stage, it truly makes the house feel like home.
There’s something so comforting about pulling a tray of these Baked Apple Fritters with Glaze from the oven. The smell fills the whole house, and honestly, sometimes I just stand there for a minute, soaking it all in. One time, I had a little kitchen helper (my niece!) and we ended up with flour on the ceiling. It was messy, but those are the moments that make cooking so special, aren’t they?
Baked Apple Fritters with Glaze: Storage Tips
Honestly, these Baked Apple Fritters with Glaze are at their absolute best fresh from the oven, still warm with that slightly gooey glaze. But, let’s be real, sometimes you have leftovers (though not often in my house!). If you do, store them in an airtight container at room temperature for up to 2 days. I’ve tried refrigerating them, but the glaze gets a little sticky and the fritters lose some of their tender texture. Reheating is best in a toaster oven or a regular oven at 300°F (150°C) for about 5-7 minutes, it helps crisp them up again. I microwaved one once and the glaze totally melted and made a mess so don’t do that, lol. They don’t freeze particularly well either, in my experience, so just make what you’ll eat!
Baked Apple Fritters with Glaze: Ingredient Substitutions
I’m all about making recipes work with what you’ve got, and these Baked Apple Fritters with Glaze are pretty forgiving. No Gala apples? Granny Smith or Honeycrisp work wonderfully too, just adjust the sugar in the dough if your apples are tarter. I tried a mix of Granny Smith and Fuji once, and it gave a lovely balance of sweet and tart. For the milk, any dairy or non-dairy milk will technically work, but whole milk truly gives the best richness. I’ve used almond milk in a pinch, and it was fine, just a slightly different texture. If you don’t have vanilla extract, a tiny pinch of nutmeg in the dough can add a different but still lovely warmth. For the glaze, if you’re out of milk, water or even a splash of apple juice can thin the powdered sugar, but milk gives it that creamy, opaque finish.
Baked Apple Fritters with Glaze: Serving Suggestions
These warm Baked Apple Fritters with Glaze are a treat on their own, but oh, they can be so much more! I love them for a weekend breakfast alongside a strong cup of coffee or a tall glass of cold milk. For a dessert vibe, try serving them with a scoop of vanilla bean ice cream that just melts into that warm fritter, or a dollop of fresh whipped cream. Honestly, a simple dusting of extra cinnamon sugar before serving is also divine. They’re also fantastic for a brunch spread, maybe with some crispy bacon or a fresh fruit salad. This dish and a good book on a rainy afternoon? Yes please. They’re really versatile for any mood or occasion, truly.
Baked Apple Fritters with Glaze: A Little History
Fritters, in their many forms, have been around for centuries, a simple way to take humble ingredients and turn them into something special. From savory vegetable fritters to sweet fruit ones, they’re found in cuisines all over the world. Apple fritters, specifically, became popular in American baking, often associated with autumn harvests and a way to preserve or enjoy an abundance of apples. Traditionally, they’re deep-fried, giving them that characteristic crispy exterior. But my love for these Baked Apple Fritters with Glaze comes from a desire for that same comforting flavor profile without the fuss of frying. It’s a modern take on a classic, a nod to tradition with a little less kitchen cleanup. It reminds me of how recipes evolve, adapting to our lives while still holding onto that heartwarming essence.
Making these Baked Apple Fritters with Glaze always feels like a little celebration in my kitchen. They turn out golden and tender, smelling absolutely heavenly. It’s funny how a simple recipe can bring so much joy, isn’t it? I hope you give them a try and find as much comfort in them as I do. And hey, if you try any fun variations, you absolutely have to tell me all about them!
Frequently Asked Questions
- → Can I make these Baked Apple Fritters with Glaze ahead of time?
Honestly, they’re best fresh, but you can mix the dry ingredients the night before. Just add the wet ingredients and apples right before baking. I tried baking them ahead once, and they lost a little of that fresh tenderness.
- → What kind of apples are best for these fritters?
I usually go for Gala or Fuji because they’re sweet and hold their shape well. Granny Smith works if you like a tarter fritter, and Honeycrisp is also a great choice. I once used a super soft apple, and it turned to mush, so avoid those!
- → My fritters aren’t getting golden, what am I doing wrong?
Usually, it’s either an oven temperature issue or you’re opening the oven too much. Make sure your oven is fully preheated, and resist peeking until the last few minutes. Also, don’t overcrowd the baking sheet, they need space to brown.
- → How do I store leftover Baked Apple Fritters with Glaze?
Keep them in an airtight container at room temperature for up to two days. Don’t refrigerate, as the glaze gets sticky and the texture changes. Reheat gently in a toaster oven for the best results, I learned that the hard way with a soggy microwave attempt!
- → Can I add other spices to the fritter dough?
Absolutely! I’ve played around with a tiny pinch of nutmeg or allspice, and they add a lovely depth. Just be careful not to overpower the cinnamon and apple. Experimentation is half the fun, honestly!
Golden Baked Apple Fritters with Glaze Recipe
- Prep Time: 20 Minutes
- Cook Time: 15 Minutes
- Total Time: 35 Minutes
- Yield: 12 Servings 1x
- Category: Baking Recipes
Description
Baked Apple Fritters with Glaze are your new favorite! Get my easy recipe for tender, spiced, oven-baked treats topped with a sweet vanilla glaze.
Ingredients
- Fritter Base:
- 2 cups (240g) all-purpose flour
- 1/2 cup (100g) granulated sugar
- 2 teaspoons baking powder
- 1 teaspoon ground cinnamon
- 1/2 teaspoon salt
- Wet Ingredients:
- 1/2 cup (120ml) milk
- 1 large egg
- 1/4 cup (56g) unsalted butter, melted and cooled
- 1 teaspoon vanilla extract
- Flavor & Texture Boosters:
- 2 medium apples (about 1.5 cups), peeled, cored, and finely diced (Gala, Fuji, or Honeycrisp work well)
- Sweet Glaze:
- 1 cup (120g) powdered sugar, sifted
- 2 tablespoons milk
- 1/2 teaspoon vanilla extract
- Optional Extras:
- A pinch of nutmeg or allspice for extra warmth
- Toasted pecans or walnuts for garnish
Instructions
- Prep Your Apples and Dry Mix: First things first, get those apples ready! Peel, core, and dice them into small, even pieces. About 1/4-inch is what I aim for; too big and they won’t soften properly, too small and they’ll disappear. In a big bowl, whisk together your flour, granulated sugar, baking powder, cinnamon, and salt. Give it a good whisk; you want everything evenly distributed, trust me, you don’t want a pocket of just baking powder, I’ve made that mistake!
- Combine Wet Ingredients: In a separate, medium-sized bowl, whisk together the milk, egg, melted butter (make sure it’s cooled a bit, we don’t want scrambled eggs!), and vanilla extract. This is where the magic starts to happen, creating the base for our tender fritters. I always take a moment to really whisk it well, making sure that egg is fully incorporated. Little clumps are okay, but big ones? Not so much.
- Mix Wet into Dry & Add Apples: Pour the wet mixture into the dry ingredients. Stir just until combined; a few lumps are totally fine, honestly, overmixing is the enemy of tender baked goods. Then, gently fold in your diced apples. You’re looking for a thick, shaggy dough, not a smooth batter. It’ll feel a bit messy, like organized chaos, but that’s exactly what we want for those rustic fritter vibes.
- Scoop and Bake the Fritters: Line a baking sheet with parchment paper. Using a large spoon or an ice cream scoop, drop irregular mounds of dough onto the prepared sheet, leaving a couple of inches between each one. Don’t worry about them being perfectly shaped; fritters are supposed to be wonderfully rustic! I usually get about 12-14. Bake in a preheated oven until golden brown and cooked through, about 15-18 minutes. The edges should look slightly crispy, and the apples inside should be tender.
- Prepare the Glaze: While your fritters are cooling a bit, it’s glaze time! In a small bowl, whisk together the powdered sugar, milk, and vanilla extract until smooth. You’re looking for a consistency that’s thick enough to coat a spoon but still pourable. If it’s too thick, add a tiny splash more milk; too thin, add a bit more powdered sugar. This is where I sometimes get a little heavy-handed with the milk, so add slowly!
- Glaze and Serve Your Baked Apple Fritters with Glaze: Once the fritters have cooled for about 5-10 minutes (they should still be warm, but not piping hot), drizzle that glorious glaze generously over each one. You can use a spoon or even dip them if you’re feeling adventurous. The glaze will set slightly as it cools, creating a sweet, crackly coating. The smell of the warm apples and sweet glaze is just divine at this stage, it truly makes the house feel like home.

