I remember my seventh birthday party like it was yesterday mostly because of the epic Ice Cream Cake my grandma, bless her heart, tried to make. It was a beautiful, slightly lopsided tower of chocolate and vanilla, melting a little too fast under the summer sun. Honestly, it was a glorious mess, and it tasted like pure joy. That’s the feeling I chase every time I whip up a Homemade Ice Cream Cake. It’s not about perfection, it’s about that sweet, cold, crunchy, creamy magic that just screams celebration. This recipe is my ode to those chaotic, wonderful childhood memories.
My first attempt at a Homemade Ice Cream Cake on my own was… an adventure. I thought I could just layer everything and pop it back in the freezer. Nope! The ice cream was too soft, the cookies floated away, and it looked more like a dessert soup. Oops! I learned then and there that patience and a proper freeze between layers are key. This recipe is the result of many, many “oops” moments, so you don’t have to make my mistakes!
Ingredients
Crust & Base
- Oreo Cookies: Honestly, don’t skimp here. The classic chocolate sandwich cookie gives you that perfect dark, slightly bitter crunch. I usually grab a family-size pack, you’ll need about 30 cookies.
- Unsalted Butter: Melted, of course. This binds the cookie crumbs together. I tried using salted butter once and it was… interesting. Stick to unsalted for better flavor control, trust me.
Ice Cream Layers
- Vanilla Ice Cream: Go for good quality, hon. This is a Homemade Ice Cream Cake, so the star needs to shine! I like a rich, full-fat vanilla bean for that classic flavor. Avoid anything “light” or “low-fat”, it just doesn’t freeze the same.
- Chocolate Ice Cream: Another essential. A dark, creamy chocolate is what you’re after. I’ve experimented with mint chip, but the classic chocolate and vanilla combo just hits different for this cake.
Toppings & Finish
- Hot Fudge Sauce: The gooey, decadent layer that pulls it all together. I usually warm mine up slightly so it spreads easily. I once tried to use cold fudge and it tore up the ice cream. Learn from my mistakes!
- Whipped Topping: Like Cool Whip or homemade whipped cream. It’s the fluffy crown on your Homemade Ice Cream Cake. I prefer Cool Whip here because it holds its shape better when frozen, but a stabilized homemade whipped cream works too.
Optional Swirls
- Caramel Sauce: Just a little drizzle for an extra layer of sweetness and a hint of saltiness. It really elevates the flavor. I didn’t expect that it would add so much, but it does!
- Chocolate Sprinkles: Because sprinkles just make everything a party! I always have a container on hand. They add a fun texture and a pop of color.
Instructions
- Crush and Press the Crust:
- First things first, get those Oreos crushed! I usually toss them in my food processor until they’re fine crumbs, but a Ziploc bag and a rolling pin work just as well and it’s a great stress reliever, honestly. Melt your butter and mix it into the crumbs until it looks like wet sand. Press this mixture firmly into the bottom of a 9-inch springform pan. This is where I always make sure it’s super compact, otherwise, the crust gets crumbly. Pop it in the freezer for at least 20 minutes to set while you get the ice cream ready.
- Soften and Layer Vanilla:
- Take your vanilla ice cream out of the freezer about 15-20 minutes before you want to use it. You want it softened enough to spread, but not melted. This is a delicate balance, I tell ya! Spoon the softened vanilla ice cream over your chilled cookie crust, spreading it evenly with an offset spatula. Smooth it out as best you can. I always try to get it perfectly flat, but a little bumpiness is fine. Back into the freezer it goes for at least an hour, or until firm. Don’t rush this, or your layers will bleed!
- Add the Hot Fudge Layer:
- Once that vanilla layer is solid, grab your hot fudge sauce. If it’s too thick, warm it gently in the microwave for about 30 seconds. Pour it over the firm vanilla ice cream layer and spread it quickly but carefully. It’s going to chill down fast, so work fast! This step smells so good, that rich chocolatey goodness! I honestly didn’t expect how much this layer would add. Back to the freezer for another 30-60 minutes until the fudge is firm.
- Layer the Chocolate Ice Cream:
- Now for the chocolate! Soften your chocolate ice cream just like you did the vanilla. Spread it carefully over the set fudge layer. This part can be a bit tricky if your fudge isn’t totally firm, so make sure it’s ready. Smooth it out, making sure to reach the edges of the pan. I once got impatient and ended up with a swirly mess, which was tasty but not what I was going for. Freeze for at least 2-3 hours, or until rock solid.
- Crown with Whipped Topping:
- Once your Homemade Ice Cream Cake is completely frozen and firm, it’s time for the grand finale! Carefully spread your whipped topping over the top chocolate layer. You can make it smooth or create pretty swirls with your spatula. This is where I sometimes get a little messy, but it always looks good in the end. Don’t worry about perfection, just have fun with it! Pop the whole cake back into the freezer for at least another hour to firm up the topping.
- Garnish and Serve Your Homemade Ice Cream Cake:
- Before serving, run a knife around the edge of the springform pan, then carefully release the sides. This is a nervous moment for me every time, but it always works out! Now for the fun part: garnish with chocolate sprinkles and a drizzle of caramel sauce, if you’re feeling fancy. The finished Homemade Ice Cream Cake should look like a glorious, layered masterpiece. Slice with a warm knife for clean cuts a little trick I learned the hard way and serve immediately. Enjoy your creation!
Making this Homemade Ice Cream Cake always brings a little chaos and a lot of joy to my kitchen. There was one time I totally forgot to buy sprinkles and had to improvise with crushed chocolate chips it still tasted good, but it wasn’t the same! It’s those little moments, the unexpected twists, that make home cooking so real and special. This cake is a labor of love, a sweet reminder of simpler times.
Storage Tips for Your Homemade Ice Cream Cake
Storing your Homemade Ice Cream Cake properly is key to keeping it fresh and delicious. Once assembled, I always wrap the entire springform pan (or the cake itself, once removed from the pan) really tightly in several layers of plastic wrap, then a layer of aluminum foil. This helps prevent freezer burn and keeps any funky freezer smells at bay. I microwaved a slice once after it had been poorly wrapped, and the ice cream had a weird, icy crust so don’t do that lol. It’ll keep beautifully in the freezer for up to 2 weeks. For best results, take it out about 10-15 minutes before serving to let it soften just a tiny bit, making it easier to slice. Leftover slices can be individually wrapped and stored the same way for a quick treat later!
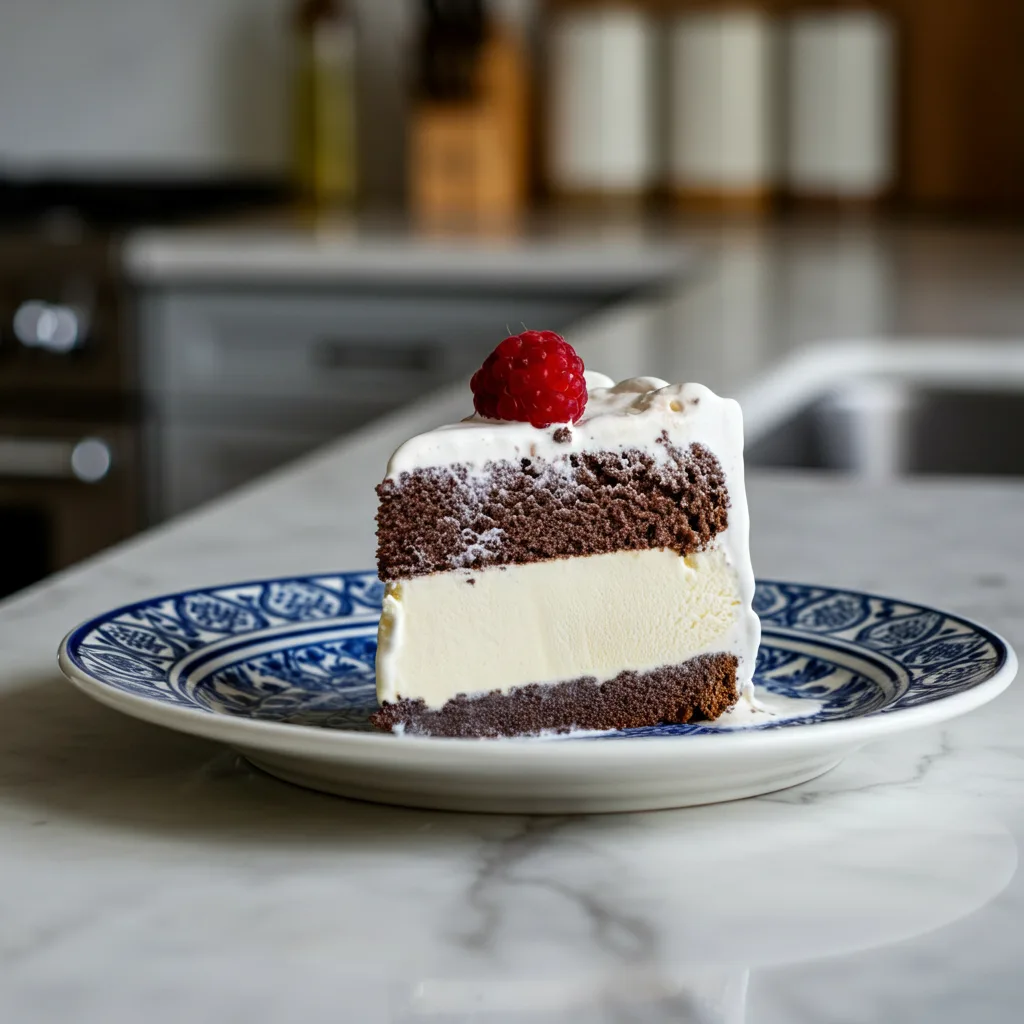
Homemade Ice Cream Cake Ingredient Substitutions
I’ve definitely played around with ingredient swaps for this Homemade Ice Cream Cake, and some worked better than others! For the crust, graham cracker crumbs mixed with a little sugar and butter work well if you’re not an Oreo fan I tried it once, and it worked… kinda, it was a bit sweeter. You could also use crushed chocolate chip cookies for a different flavor profile. As for the ice cream, feel free to get creative! Coffee ice cream instead of chocolate is a favorite of mine, or even strawberry for a fruity twist. I’ve even done a cookies and cream layer. Just make sure your chosen ice cream flavors complement each other. For the topping, homemade stabilized whipped cream is a wonderful substitute for store-bought whipped topping, though it does take a little more effort. Don’t be afraid to experiment!
Serving Your Homemade Ice Cream Cake
This Homemade Ice Cream Cake is a celebration in itself, but a few serving suggestions can make it extra special. For a party, I love to serve it alongside a platter of fresh berries the tartness of raspberries or strawberries is a lovely contrast to the sweet, creamy cake. A small bowl of extra hot fudge or caramel sauce on the side lets people add more if they wish. And honestly, this cake and a good movie on a Friday night? Yes please! It’s also fantastic with a cup of strong coffee or a mug of hot cocoa, especially if you’re cutting into it on a cooler evening. It’s versatile enough for any mood or occasion, truly.
The Backstory of Homemade Ice Cream Cake
Ice cream cakes have a pretty cool history, evolving from simple layered ice cream desserts to the elaborate creations we see today. They really gained popularity in the mid-20th century, especially in America, becoming a staple for birthdays and celebrations. For me, making a Homemade Ice Cream Cake connects me to those classic, joyful moments. It’s not some fancy, complicated patisserie dessert, it’s pure, unadulterated fun, a dessert that everyone can get excited about. It reminds me of summer backyard barbecues, school graduations, and just simple family gatherings. It’s a taste of nostalgia, a sweet tradition I love to keep alive in my own kitchen.
There’s something so satisfying about pulling a Homemade Ice Cream Cake out of the freezer, knowing you created something so delicious with your own hands. It might not always be perfect, with a little ice cream smudge here or a slightly uneven layer there, but it’s real. It’s a testament to the joy of home baking, and the sweet rewards of a little kitchen effort. I hope you give this recipe a whirl and make some sweet memories of your own!
Frequently Asked Questions
- → How do I stop my Homemade Ice Cream Cake layers from melting?
Honestly, speed is your friend here! Work quickly when spreading each ice cream layer and pop it back into the freezer as fast as possible. I learned the hard way that a warm kitchen and slow hands lead to a soupy mess!
- → Can I use different cookie crumbs for the crust?
Absolutely! I’ve tried graham cracker crumbs and even shortbread cookies. Just make sure they’re finely crushed and mixed well with the butter. It might change the flavor a bit, but that’s part of the fun of experimenting!
- → What’s the best way to get clean slices of Homemade Ice Cream Cake?
Oh, this is a game-changer! Heat a long, sharp knife under hot running water for a few seconds, wipe it dry, then slice. Reheat and wipe between each cut. It prevents the ice cream from sticking and gives you beautiful, clean portions.
- → How long does Homemade Ice Cream Cake last in the freezer?
If you wrap it up really well with plastic wrap and then foil, it’ll keep for up to two weeks. I’ve definitely kept slices longer, but the texture starts to get a bit icy after that. It’s usually gone before then in my house, though!
- → Can I add fresh fruit to my Homemade Ice Cream Cake?
You totally can, but I’d recommend adding fresh fruit as a garnish right before serving rather than layering it into the cake. Freezing fruit can make it too hard or icy, and it might release water as it thaws, affecting the cake’s texture. A fresh berry topping is always a win!
Creamy Homemade Ice Cream Cake: A Nostalgic Treat
- Prep Time: 30 Minutes
- Cook Time: 0 Minutes
- Total Time: 5 Hours
- Yield: 12 Servings 1x
- Category: Dinners
Description
Homemade Ice Cream Cake brings back sweet memories. Layered with rich ice cream and crunchy cookie crust, it’s a simple, delightful dessert for any celebration.
Ingredients
- Crust & Base:
- 30 Oreo Cookies (about 1 package)
- 1/2 cup (113g) unsalted butter, melted
- Ice Cream Layers:
- 1.5 quarts good quality vanilla ice cream, softened
- 1.5 quarts good quality chocolate ice cream, softened
- Toppings & Finish:
- 1 cup hot fudge sauce, slightly warmed
- 8 ounces whipped topping (like Cool Whip), thawed
- Optional Swirls:
- 2 tablespoons caramel sauce, for drizzling
- 2 tablespoons chocolate sprinkles, for garnish
Instructions
- Crush and Press the Crust:: First things first, get those Oreos crushed! I usually toss them in my food processor until they’re fine crumbs, but a Ziploc bag and a rolling pin work just as well – and it’s a great stress reliever, honestly. Melt your butter and mix it into the crumbs until it looks like wet sand. Press this mixture firmly into the bottom of a 9-inch springform pan. This is where I always make sure it’s super compact, otherwise, the crust gets crumbly. Pop it in the freezer for at least 20 minutes to set while you get the ice cream ready.
- Soften and Layer Vanilla:: Take your vanilla ice cream out of the freezer about 15-20 minutes before you want to use it. You want it softened enough to spread, but not melted. This is a delicate balance, I tell ya! Spoon the softened vanilla ice cream over your chilled cookie crust, spreading it evenly with an offset spatula. Smooth it out as best you can. I always try to get it perfectly flat, but a little bumpiness is fine. Back into the freezer it goes for at least an hour, or until firm. Don’t rush this, or your layers will bleed!
- Add the Hot Fudge Layer:: Once that vanilla layer is solid, grab your hot fudge sauce. If it’s too thick, warm it gently in the microwave for about 30 seconds. Pour it over the firm vanilla ice cream layer and spread it quickly but carefully. It’s going to chill down fast, so work fast! This step smells so good, that rich chocolatey goodness! I honestly didn’t expect how much this layer would add. Back to the freezer for another 30-60 minutes until the fudge is firm.
- Layer the Chocolate Ice Cream:: Now for the chocolate! Soften your chocolate ice cream just like you did the vanilla. Spread it carefully over the set fudge layer. This part can be a bit tricky if your fudge isn’t totally firm, so make sure it’s ready. Smooth it out, making sure to reach the edges of the pan. I once got impatient and ended up with a swirly mess, which was tasty but not what I was going for. Freeze for at least 2-3 hours, or until rock solid.
- Crown with Whipped Topping:: Once your Homemade Ice Cream Cake is completely frozen and firm, it’s time for the grand finale! Carefully spread your whipped topping over the top chocolate layer. You can make it smooth or create pretty swirls with your spatula. This is where I sometimes get a little messy, but it always looks good in the end. Don’t worry about perfection, just have fun with it! Pop the whole cake back into the freezer for at least another hour to firm up the topping.
- Garnish and Serve Your Homemade Ice Cream Cake:: Before serving, run a knife around the edge of the springform pan, then carefully release the sides. This is a nervous moment for me every time, but it always works out! Now for the fun part: garnish with chocolate sprinkles and a drizzle of caramel sauce, if you’re feeling fancy. The finished Homemade Ice Cream Cake should look like a glorious, layered masterpiece. Slice with a warm knife for clean cuts – a little trick I learned the hard way – and serve immediately. Enjoy your creation!


