
Honestly, Halloween at our house always feels like a whirlwind of glitter, cobwebs, and last-minute costume adjustments. But one tradition that never, ever gets skipped? These delightful Oreo Graveyard Halloween Dirt Cups. I remember the first time I stumbled upon a version of these, probably in some old community cookbook, and thought, ‘Chocolate, cookies, and worms? My kids will go wild!’ And they did. The kitchen was a glorious mess of crushed Oreos flying everywhere, little hands eagerly tearing open gummy worm bags, and me, trying to keep the whipped cream from disappearing directly into mouths. It wasn’t perfect, but it was ours, and that’s why these dirt cups hold such a special, slightly chaotic, place in my heart.
Oh, the chaos! One year, I was trying to make a double batch of the pudding base, and in my haste, I grabbed the wrong size bowl. Picture this: me, whisking away, feeling very accomplished, only for the entire mixture to slosh over the sides, splattering chocolate pudding across the counter, the floor, and, yes, even a little on the dog. He was thrilled, I was less so, but honestly, it just added to the Halloween spirit, didn’t it? These Oreo Graveyard Halloween Dirt Cups always seem to come with a memorable kitchen moment.
Ingredients
- Oreo Cookies: These are your ‘dirt,’ so don’t skimp on the crunch! I usually go for the classic, but double-stuffed works beautifully too. Crush them up real good, but leave a few bigger chunks for texture, you know?
- Instant Chocolate Pudding Mix: The real star, honestly. Don’t try to make it from scratch when you’re in a hurry like I did once total disaster, took forever! Stick to instant for ease and speed.
- Whole Milk: Trust me, whole milk is where it’s at for that creamy, rich texture. Skim just doesn’t hit the same, and the pudding won’t set as nicely.
- Cream Cheese: This adds a lovely tang and extra creaminess to the pudding layer, making it feel a bit more substantial than just plain pudding. Make sure it’s softened!
- Unsalted Butter: Just a touch of melted butter mixed with the cream cheese and sugar really enhances the richness of the base.
- Powdered Sugar: For sweetness, of course! It dissolves so smoothly, giving you that silky texture without any grittiness.
- Vanilla Extract: A little splash of vanilla just warms up all those chocolatey flavors. I always add a tiny bit more than the recipe calls for, it just feels right.
- Whipped Topping (like Cool Whip): This lightens up the pudding mixture beautifully, making it airy and fluffy. I’ve tried making my own whipped cream, but for this, the stability of whipped topping is a winner.
- Gummy Worms: These are the creepy crawlies! The more, the merrier, honestly. My kids always try to sneak a few before they even make it into the cups.
- Milano Cookies or Pirouette Cookies: Perfect for tombstones, obviously! They’re sturdy enough to stand up and provide a nice, elegant touch to your spooky scene.
- Halloween Candy (candy corn, candy pumpkins): For extra graveyard flair! These are totally optional, but they add a pop of color and extra Halloween fun.
- Green Food Coloring (optional): If you want some mossy grass vibes around your tombstones, a few drops mixed into a bit of whipped topping works wonders.
Crafting Your Oreo Graveyard Halloween Dirt Cups
- Crush the ‘Dirt’:
- First things first, let’s get that ‘dirt’ ready for your Oreo Graveyard Halloween Dirt Cups! Grab those Oreos and either pop them in a food processor for a fine crumb or, my personal favorite, put them in a zip-top bag and smash them with a rolling pin. Honestly, this is where the kids usually jump in, making a joyful, crumbly mess. I always leave a few bigger chunks, it gives the ‘dirt’ a more authentic, rustic feel, you know? You’ll smell that familiar chocolatey goodness filling the air, a sign of good things to come!
- Whip Up the Cream Cheese Base:
- Now for the creamy, dreamy base. In a large bowl, beat the softened cream cheese with the melted butter and powdered sugar until it’s super smooth and fluffy. This is where I almost always forget to soften the cream cheese, and then I’m frantically microwaving it in short bursts, trying not to melt it completely. Don’t be like me! Softened cream cheese is key for no lumps. You want it light and airy, almost cloud-like, it makes such a difference in the final texture.
- Mix the Pudding Magic:
- In a separate bowl, whisk together the instant chocolate pudding mix with the cold milk. Whisk it well, for about 2 minutes, until it starts to thicken. This is your arm workout for the day, haha! I used to under-whisk and end up with runny pudding, which is just sad. Once it’s thick, gently fold in the cream cheese mixture and then the whipped topping. Be gentle here, you want to keep that fluffiness. It’ll smell sweet and chocolaty, making your kitchen smell like a dessert wonderland.
- Layering Your Graveyard:
- Time to assemble your Oreo Graveyard Halloween Dirt Cups! Grab your clear cups they really show off those layers. Start with a layer of crushed Oreos at the bottom, then a generous dollop of your creamy pudding mixture. Repeat, creating layers of ‘dirt’ and ‘mud.’ I always try to make my layers somewhat even, but honestly, a little wonkiness just adds to the charm. This is where I sometimes get a bit messy, dropping crumbs outside the cup, but hey, that’s part of the fun!
- Adding the Creepy Crawlies:
- Now for the fun part: the gummy worms! Stick them into the pudding layers, letting some peek out of the ‘dirt’ like they’re just emerging from the ground. Don’t be shy, load ’em up! I love seeing the kids’ faces when they discover a worm peeking out. You can even snip some worms in half to make them look like they’re burrowing. It’s all about that spooky, playful vibe.
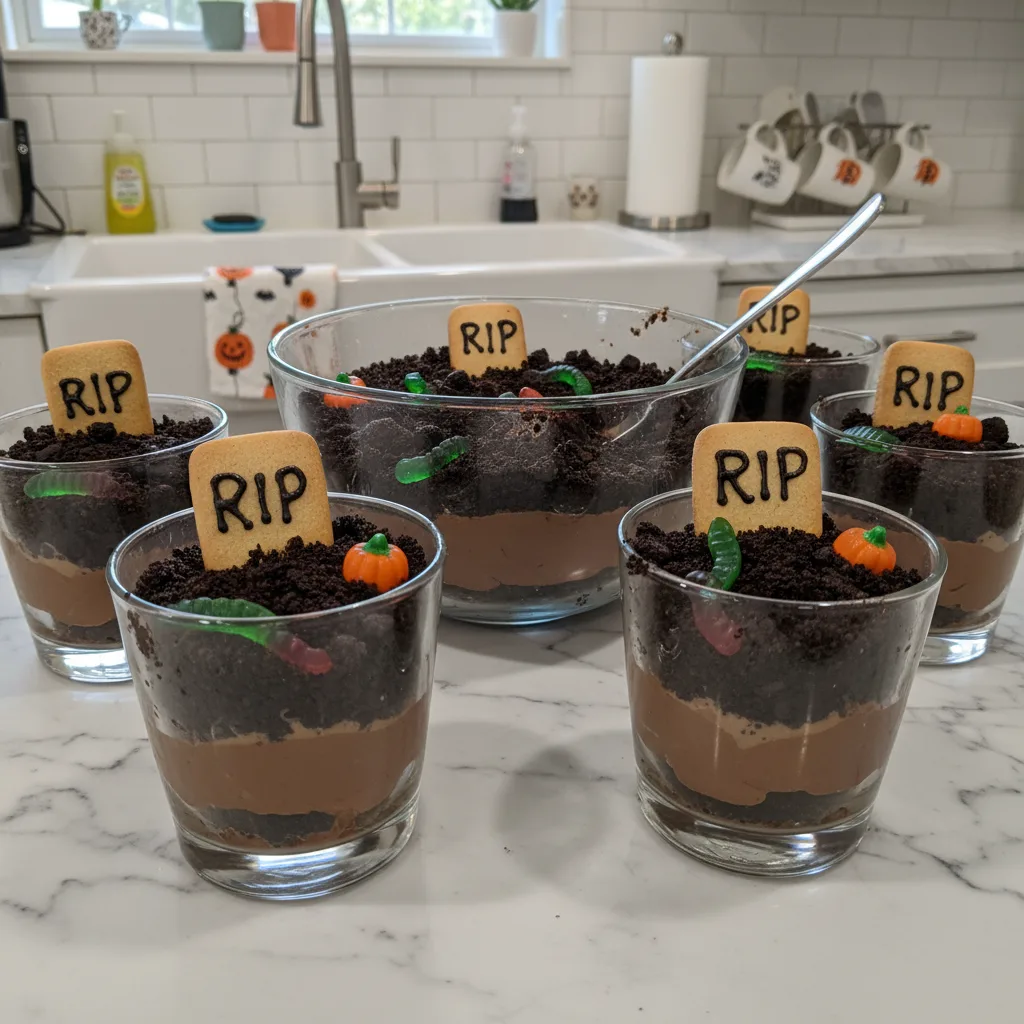
- Decorate Your Graveyard:
- Finally, the finishing touches for your Oreo Graveyard Halloween Dirt Cups. Take your Milano cookies and use a food-safe marker to write ‘RIP’ or spooky names on them for tombstones. Gently press them into the top layer of ‘dirt.’ Add candy pumpkins or corn around the tombstones. If you’re feeling extra fancy, mix a tiny bit of green food coloring into some whipped topping for ‘moss’ around the tombstones. Chill these beauties for at least an hour before serving, it lets all those flavors meld and sets everything nicely. They’ll look perfectly spooky and taste even better!
Honestly, some of my favorite kitchen memories involve these dirt cups. One year, my youngest decided he needed to ‘taste test’ every single gummy worm before they went into the cups. I didn’t expect that! By the time we were done, half the worms were gone, and he had a serious sugar high. It’s those little, imperfect moments that make cooking so much more than just following a recipe, especially with something as fun as these Oreo Graveyard Halloween Dirt Cups.
Oreo Graveyard Halloween Dirt Cups Storage Tips
So, you’ve made these incredible Oreo Graveyard Halloween Dirt Cups, and now you’re wondering how to keep them fresh? Good question! I’ve learned a few things the hard way. These cups hold up really well in the fridge, covered tightly with plastic wrap, for about 3-4 days. The Oreos might soften a bit by day three, but honestly, they still taste pretty great a little less crunchy, more cake-like. I microwaved one once, thinking it would warm up nicely, and the pudding base became a weird, soupy mess so don’t do that lol! If you’re making them ahead for a party, I’d suggest assembling them the day before. This gives the pudding plenty of time to set and the flavors to meld. Just make sure to add the tombstone cookies right before serving so they don’t get soggy and fall over. Trust me, nobody wants a fallen tombstone in their graveyard!

Oreo Graveyard Halloween Dirt Cups: Creative Swaps
I’ve definitely experimented with ingredient substitutions for these Oreo Graveyard Halloween Dirt Cups, sometimes out of necessity, sometimes just for fun! For the ‘dirt,’ if you’re not an Oreo fan, chocolate graham crackers or even chocolate wafer cookies crushed up work pretty well, I tried that once, and it worked… kinda, the flavor was a bit different but still good. If you can’t find instant chocolate pudding, vanilla pudding with a tablespoon of cocoa powder added can give you a similar vibe, though the chocolate won’t be as deep. For the whipped topping, real homemade whipped cream is lovely, but it tends to deflate quicker, so for make-ahead, I stick with the store-bought stuff. And for tombstones? Graham crackers cut into rectangles or even shortbread cookies can be decorated with icing or a food-safe marker. It’s all about having fun and using what you have!
Serving Your Spooky Oreo Graveyard Halloween Dirt Cups
These Oreo Graveyard Halloween Dirt Cups are practically begging to be part of a spooky celebration! Honestly, serving them alongside a classic Halloween movie marathon is my favorite. Think ‘Hocus Pocus’ or ‘Beetlejuice’ with a cozy blanket and a cup of these pure bliss! They pair wonderfully with a simple glass of milk, or for the grown-ups, a warm mug of spiked cider. For a full dessert spread, I sometimes put out a platter of ghost-shaped sugar cookies or some caramel apples. The contrast of the creamy, chocolatey dirt cups with something crisp and fruity is just lovely. They’re also fantastic for school parties or neighborhood potlucks, they always disappear fast! Just make sure you have enough gummy worms, because those are always the first to go.
The Fun Backstory of Halloween Dirt Cups
While these Oreo Graveyard Halloween Dirt Cups don’t have a centuries-old cultural backstory like some recipes, they’ve become a modern Halloween classic in home kitchens across the world. I remember first seeing versions of ‘dirt cake’ or ‘dirt pudding’ pop up in the 80s and 90s, usually at school bake sales or church potlucks. It was such a clever, playful idea turning simple ingredients into something that looked like actual dirt! When Halloween rolled around, it was a natural fit to add gummy worms and tombstone cookies, transforming a fun dessert into a truly spooky spectacle. For me, it became a staple because it was something my mom would make, and now I get to carry on that fun, slightly messy, tradition with my own kids. It’s a testament to how food can create new traditions and bring so much joy.
And there you have it, folks! Our beloved Oreo Graveyard Halloween Dirt Cups. Every time I make them, I’m reminded of sticky fingers, happy squeals, and that wonderfully chaotic energy of Halloween. They might not be gourmet, but they’re pure joy in a cup, and honestly, sometimes that’s exactly what you need. I hope you give them a whirl and make some wonderfully messy memories of your own. Don’t forget to share your spooky creations with me I love seeing what you cook up!

Frequently Asked Questions
- → Can I make Oreo Graveyard Halloween Dirt Cups ahead of time?
Absolutely! I always make these the day before a party. It gives the pudding plenty of time to set up nicely, and the flavors really get to know each other. Just add your tombstone cookies right before serving so they don’t get soggy.
- → What if I don’t have Milano cookies for the tombstones?
No worries! I’ve used graham crackers cut into rectangles and even shortbread cookies before. You can decorate them with a food-safe marker or just drizzle some melted chocolate on them. It worked, kinda, but still looked spooky!
- → My pudding isn’t setting, what went wrong?
Oh, I’ve been there! Usually, it’s because the milk wasn’t cold enough or it wasn’t whisked long enough. Make sure to use really cold milk and whisk vigorously for the full 2 minutes. Sometimes, I’ve even popped it in the freezer for 10 minutes to help it along.
- → How long do these dirt cups last in the fridge?
They’re good for about 3-4 days when covered tightly in the fridge. The Oreo ‘dirt’ might soften a bit, but honestly, they still taste delicious. I wouldn’t recommend freezing them, though, the texture gets a bit weird after thawing.
- → Can I use a different flavor of pudding for these Oreo Graveyard Halloween Dirt Cups?
You totally can! Vanilla pudding works great, or even white chocolate pudding for a lighter look. I even tried banana pudding once for a ‘swamp monster’ theme, and it was surprisingly fun. Experiment and see what spooky flavors you like!

Oreo Graveyard Halloween Dirt Cups: Spooky Fun Treat
- Prep Time: 20 Minutes
- Cook Time: 0 Minutes
- Total Time: 2 Hours 20 Minutes
- Yield: 8 Servings 1x
- Category: Dinners
Description
Oreo Graveyard Halloween Dirt Cups bring spooky fun! Layer crushed Oreos, creamy pudding, and gummy worms for an easy, chilling treat. Perfect for parties!
Ingredients
- Dirt & Base:
- 1 (14.3 oz) package Oreo Cookies, crushed
- 3 cups cold Whole Milk
- 2 (3.9 oz) packages Instant Chocolate Pudding Mix
- 1 (8 oz) container Whipped Topping, thawed
- Flavor & Creaminess:
- 1 (8 oz) package Cream Cheese, softened
- 1/2 cup (1 stick) Unsalted Butter, melted
- 1 cup Powdered Sugar
- 1 teaspoon Vanilla Extract
- Graveyard Decorations:
- 1 (5 oz) package Gummy Worms
- 8–10 Milano Cookies or Pirouette Cookies (for tombstones)
- Halloween Candy (candy corn, candy pumpkins), optional
- Optional Spooky Touches:
- Green Food Coloring (for mossy grass)
Instructions
- Crush the ‘Dirt’: First things first, let’s get that ‘dirt’ ready for your Oreo Graveyard Halloween Dirt Cups! Grab those Oreos and either pop them in a food processor for a fine crumb or, my personal favorite, put them in a zip-top bag and smash them with a rolling pin. Honestly, this is where the kids usually jump in, making a joyful, crumbly mess. I always leave a few bigger chunks; it gives the ‘dirt’ a more authentic, rustic feel, you know? You’ll smell that familiar chocolatey goodness filling the air, a sign of good things to come!
- Whip Up the Cream Cheese Base: Now for the creamy, dreamy base. In a large bowl, beat the softened cream cheese with the melted butter and powdered sugar until it’s super smooth and fluffy. This is where I almost always forget to soften the cream cheese, and then I’m frantically microwaving it in short bursts, trying not to melt it completely. Don’t be like me! Softened cream cheese is key for no lumps. You want it light and airy, almost cloud-like; it makes such a difference in the final texture.
- Mix the Pudding Magic: In a separate bowl, whisk together the instant chocolate pudding mix with the cold milk. Whisk it well, for about 2 minutes, until it starts to thicken. This is your arm workout for the day, haha! I used to under-whisk and end up with runny pudding, which is just sad. Once it’s thick, gently fold in the cream cheese mixture and then the whipped topping. Be gentle here; you want to keep that fluffiness. It’ll smell sweet and chocolaty, making your kitchen smell like a dessert wonderland.
- Layering Your Graveyard: Time to assemble your Oreo Graveyard Halloween Dirt Cups! Grab your clear cups – they really show off those layers. Start with a layer of crushed Oreos at the bottom, then a generous dollop of your creamy pudding mixture. Repeat, creating layers of ‘dirt’ and ‘mud.’ I always try to make my layers somewhat even, but honestly, a little wonkiness just adds to the charm. This is where I sometimes get a bit messy, dropping crumbs outside the cup, but hey, that’s part of the fun!
- Adding the Creepy Crawlies: Now for the fun part: the gummy worms! Stick them into the pudding layers, letting some peek out of the ‘dirt’ like they’re just emerging from the ground. Don’t be shy; load ’em up! I love seeing the kids’ faces when they discover a worm peeking out. You can even snip some worms in half to make them look like they’re burrowing. It’s all about that spooky, playful vibe.
- Decorate Your Graveyard: Finally, the finishing touches for your Oreo Graveyard Halloween Dirt Cups. Take your Milano cookies and use a food-safe marker to write ‘RIP’ or spooky names on them for tombstones. Gently press them into the top layer of ‘dirt.’ Add candy pumpkins or corn around the tombstones. If you’re feeling extra fancy, mix a tiny bit of green food coloring into some whipped topping for ‘moss’ around the tombstones. Chill these beauties for at least an hour before serving; it lets all those flavors meld and sets everything nicely. They’ll look perfectly spooky and taste even better!


