
Honestly, I can still smell the cinnamon and nutmeg from the first time I ever made these pumpkin bars. It was a chilly autumn evening, years ago, and I was trying to impress my new neighbors. I’d seen a recipe for something similar in an old cookbook, dog-eared and stained, and thought, “Why not?” My kitchen was a bit of a disaster zone, flour everywhere, but the aroma… oh, the aroma! These aren’t just any pumpkin bars, they’re a hug in dessert form, topped with the most incredible warm maple glaze and spices that just sing of fall. Every bite brings me back to that messy, hopeful kitchen, and honestly, they’ve been a staple ever since.
I remember one time, I was so distracted by a podcast while mixing the batter that I almost forgot the pumpkin puree! I caught myself just in time, but for a moment, I pictured sad, pale bars. Oops! That’s my kitchen chaos for you. But even with my occasional mishaps, these pumpkin bars with warm maple glaze always turn out beautifully, a testament to how forgiving and delicious this recipe is.
Ingredients for Pumpkin Bars with Maple Glaze
- All-Purpose Flour: This is the structure, the backbone of our pumpkin bars. Don’t go trying any fancy gluten-free blends unless you know what you’re doing, I tried once, and let’s just say the texture was… unexpected.
- Granulated Sugar & Brown Sugar: We need both for that deep sweetness and moisture. The brown sugar adds a lovely molasses note that just pairs so well with pumpkin. Honestly, don’t skimp on this, it’s dessert after all!
- Pumpkin Puree: The star of these pumpkin bars! Make sure it’s 100% pure pumpkin, not pumpkin pie filling. I made that mistake once, and my bars were overly spiced and a bit too sweet. Read the label, hon!
- Large Eggs: Binds everything together and adds richness. I always try to use room temperature eggs, I swear they incorporate better, though I’ve definitely thrown in cold ones in a pinch and it worked… kinda.
- Vegetable Oil: Keeps these pumpkin bars incredibly moist. You can use canola oil too, I find they both work equally well for texture. Butter’s great, but for moisture in bars, oil is my secret weapon.
- Baking Soda & Baking Powder: Our leavening agents! They give the pumpkin bars that perfect rise. Make sure yours isn’t expired, or you’ll end up with dense little bricks, I’ve been there!
Flavor Boosters for Pumpkin Bars
- Ground Cinnamon: Essential for that classic autumn warmth. I’m a bit heavy-handed with cinnamon, I think it just makes everything better.
- Ground Nutmeg: A little goes a long way, but it’s crucial for that authentic pumpkin spice flavor. Freshly grated is next level, honestly.
- Ground Ginger: Adds a subtle zing that brightens up the whole dish.
- Ground Cloves: Just a tiny pinch for depth. It really ties all the spices together in these pumpkin bars.
- Salt: Don’t forget it! It balances the sweetness and enhances all those lovely spice flavors.
Maple Glaze Goodies
- Powdered Sugar: The base for our glorious warm maple glaze. Sift it if you’ve got lumps, makes for a smoother glaze, trust me.
- Maple Syrup: Use real maple syrup, not pancake syrup! The flavor difference for these pumpkin bars is night and day. I always splurge a little here.
- Milk (or cream): Just a splash to get the glaze to the right consistency. Whole milk or even a touch of heavy cream makes it extra rich.
- Vanilla Extract: A dash brightens the glaze. I often use a tiny bit more than the recipe calls for because I love that vanilla warmth.
Finishing Touches
- Chopped Pecans (optional): Adds a lovely crunch and nutty flavor if you’re into that. Toasted pecans are even better!
Baking Your Pumpkin Bars with Maple Glaze
- Prep the Pan and Dry Ingredients:
- First things first, let’s get that oven preheating to 350°F (175°C). Then, grab a 13×9 inch baking pan and give it a good spray with cooking spray, or grease and flour it if you’re old-school like me. In a big bowl, whisk together your flour, both sugars, baking soda, baking powder, cinnamon, nutmeg, ginger, cloves, and salt. Make sure there are no lumpy bits of sugar or spice you want everything well combined so the pumpkin bars bake evenly. I always give it an extra whisk, just to be sure.
- Combine Wet Ingredients:
- In a separate, smaller bowl, whisk together your pumpkin puree, eggs, and vegetable oil until it’s all smooth and beautifully orange. This is where the magic starts to happen, you can almost smell the fall! Be sure to really get those eggs incorporated, I’ve had a few times where I rushed this part and ended up with streaks in my batter, oops. Just take your time, it’s worth it for moist pumpkin bars.
- Mix Batter and Bake:
- Pour the wet ingredients into the dry ingredients. Mix everything together with a spatula or wooden spoon until just combined. Don’t overmix, that’s a cardinal sin in baking! Overmixing develops gluten, making your pumpkin bars tough, and nobody wants that. Spread the batter evenly into your prepared pan. It’s going to look thick, but trust the process. Pop it into the preheated oven for 25-30 minutes.
- Check for Doneness:
- You’ll know your pumpkin bars are ready when a toothpick inserted into the center comes out clean, or with just a few moist crumbs attached. The top will be golden brown and springy to the touch. Honestly, sometimes I get impatient and pull them out a minute too early, but resist the urge! Let them bake fully for that perfect texture. You want them just right for the warm maple glaze.
- Cool the Bars:
- Once baked, take the pan out of the oven and let the pumpkin bars cool completely on a wire rack. This step is crucial before adding the warm maple glaze. If you try to glaze them while they’re still hot, the glaze will just melt right off, and we don’t want a sticky puddle, do we? I’ve made that mistake more times than I care to admit, honestly.
- Prepare and Glaze:
- While the bars cool, whisk together your powdered sugar, maple syrup, milk, and vanilla extract until you have a smooth, pourable warm maple glaze. If it’s too thick, add a tiny bit more milk, too thin, add a touch more powdered sugar. Once the pumpkin bars are completely cool, drizzle that glorious warm maple glaze and spices evenly over the top. If you’re using pecans, sprinkle them on now. Slice and serve! The smell alone is enough to make you swoon, I swear.
There’s something so comforting about pulling a pan of these pumpkin bars from the oven, the smell filling every corner of the house. I remember one crisp Saturday, my little one came running into the kitchen, drawn by the aroma. We ended up decorating them together, a little messy, a lot of laughter. It’s moments like those that make these pumpkin bars with warm maple glaze and spices more than just a recipe, they’re memories.
Storage for Your Pumpkin Bars
Okay, so storing these pumpkin bars with warm maple glaze is pretty straightforward, but I’ve definitely learned a few things. Once they’re completely cool and the glaze has set, you can store them in an airtight container at room temperature for up to 3 days. Honestly, they rarely last that long in my house! If you want them to last a bit longer, pop them in the fridge for up to a week. I once left a batch out too long in humid weather, and the glaze got a bit sticky, so keep that in mind. For longer storage, you can freeze the unglazed bars wrapped tightly in plastic wrap and foil for up to 2 months. Thaw them, then whip up a fresh batch of warm maple glaze and spices when you’re ready to serve. Trust me, it’s worth the extra step for fresh glaze.

Ingredient Substitutions for Pumpkin Bars
I’m all about using what you have, and I’ve tried a few swaps with these pumpkin bars. For the oil, melted butter works, but honestly, the bars come out a bit denser, I prefer the oil for moisture. If you don’t have all the individual spices, a good quality pumpkin pie spice blend can totally work just use about 2-3 teaspoons for the bars. I tried that once when I was out of ginger, and it worked… kinda, but I missed that distinct ginger kick. For the warm maple glaze, if you’re out of maple syrup, a touch of honey could work, but the flavor won’t be quite the same. And for milk in the glaze? Any milk, dairy or non-dairy, will do, though whole milk makes it extra creamy. Don’t be afraid to experiment, that’s how you find your favorites!
Serving Pumpkin Bars with Maple Glaze
These pumpkin bars with warm maple glaze and spices are pretty fantastic all on their own, but I have some favorite ways to serve them. A dollop of fresh whipped cream or a scoop of vanilla bean ice cream takes them to another level, especially if the bars are still slightly warm from the oven that warm-cold contrast is just dreamy. For a cozy evening, I love them with a hot cup of spiced chai or a simple black coffee. Honestly, they’re the perfect companion to a good book and a comfy blanket. They also make a fantastic addition to any fall potluck or holiday dessert spread. They’re hearty enough to feel substantial but light enough not to weigh you down, making them a crowd-pleaser for sure.
Cultural Backstory of Pumpkin Bars
While pumpkin pie has deep roots in American culinary history, especially around Thanksgiving, pumpkin bars are a more modern, casual take on those classic flavors. They really gained popularity as a simpler, often sheet-pan friendly way to enjoy pumpkin desserts, making them super accessible for home bakers like me. For me, these pumpkin bars with warm maple glaze evoke memories of autumn fairs and school bake sales, always a favorite. It’s that blend of familiar spices and comforting texture that makes them feel like a piece of home. They might not have centuries of tradition, but they carry the warmth of countless family gatherings and simple, sweet moments. It’s a taste of fall, reimagined for easy sharing.
Honestly, these pumpkin bars with warm maple glaze and spices have a special spot in my recipe box. They’ve seen me through quiet evenings, lively parties, and even a few kitchen mishaps. Every time I bake them, that familiar scent fills my kitchen, and I just know good things are coming. I hope you give them a try and let them become a part of your own kitchen stories. Don’t forget to share your own versions!

Frequently Asked Questions About Pumpkin Bars with Maple Glaze
- → Can I use fresh pumpkin instead of canned puree?
You totally can! I’ve done it, but make sure it’s properly roasted and pureed smooth. It needs to be thick, not watery, otherwise your pumpkin bars might turn out a bit too moist. It’s extra work, but the flavor is amazing.
- → What if my warm maple glaze is too thin or too thick?
Oh, I’ve been there! If it’s too thin, gradually whisk in a little more powdered sugar until it reaches your desired consistency. If it’s too thick, add milk a teaspoon at a time. It’s all about finding that perfect drizzle point for your pumpkin bars.
- → Can I make these pumpkin bars gluten-free?
I haven’t personally perfected a gluten-free version, but a 1:1 gluten-free baking flour blend might work. Just be aware the texture could be a bit different. I’d suggest doing a small test batch first, honestly, to avoid disappointment.
- → How long do these pumpkin bars last?
If stored in an airtight container at room temperature, they’re good for about 3 days. In the fridge, they’ll last up to a week. Mine rarely make it past day two, if I’m being real! The warm maple glaze holds up surprisingly well.
- → Can I add nuts or chocolate chips to the pumpkin bars?
Absolutely! I often throw in a handful of chopped pecans or walnuts, or even mini chocolate chips, into the batter for extra texture and flavor. Just fold them in gently right before pouring into the pan. It’s a fun way to customize your pumpkin bars!

Rich Pumpkin Bars with Warm Maple Glaze and Spices
- Prep Time: 20 Minutes
- Cook Time: 30 Minutes
- Total Time: 1 Hour 50 Minutes
- Yield: 16 Servings 1x
- Category: Breakfasts
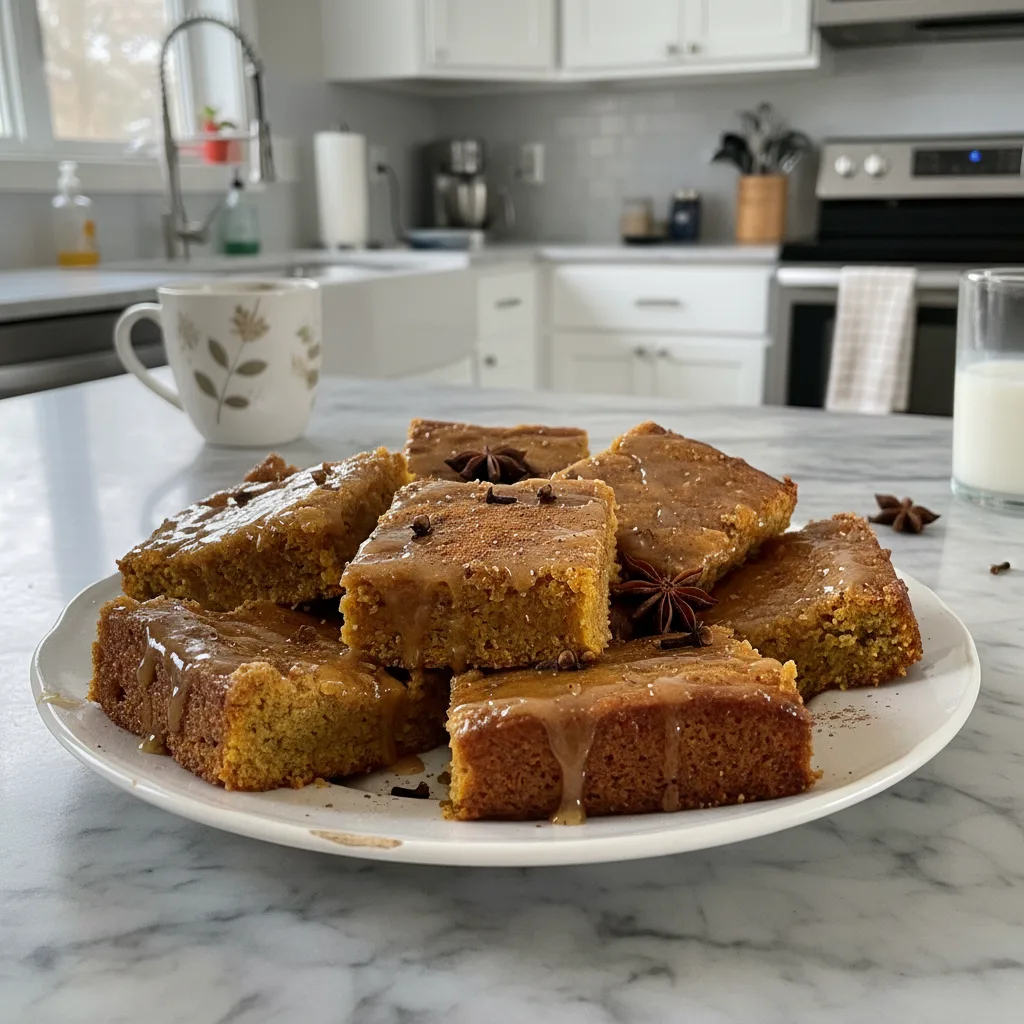
Description
Bake these moist Pumpkin Bars with Warm Maple Glaze and Spices. A comforting dessert, perfect for fall, featuring real pumpkin and cozy autumn flavors.
Ingredients
- Pumpkin Bar Base:
- 2 cups (240g) all-purpose flour
- 1 cup (200g) granulated sugar
- ½ cup (100g) packed light brown sugar
- 1 teaspoon baking soda
- ½ teaspoon baking powder
- 1 (15 oz) can pumpkin puree (not pie filling)
- 2 large eggs
- ½ cup (120ml) vegetable oil
- Flavor Boosters for Pumpkin Bars:
- 2 teaspoons ground cinnamon
- 1 teaspoon ground nutmeg
- ½ teaspoon ground ginger
- ¼ teaspoon ground cloves
- ½ teaspoon salt
- Maple Glaze Goodies:
- 2 cups (240g) powdered sugar, sifted
- ¼ cup (60ml) real maple syrup
- 2–3 tablespoons milk (or heavy cream)
- 1 teaspoon vanilla extract
- Finishing Touches:
- ¼ cup chopped pecans (optional)
Instructions
- Prep the Pan and Dry Ingredients:: First things first, let’s get that oven preheating to 350°F (175°C). Then, grab a 13×9 inch baking pan and give it a good spray with cooking spray, or grease and flour it if you’re old-school like me. In a big bowl, whisk together your flour, both sugars, baking soda, baking powder, cinnamon, nutmeg, ginger, cloves, and salt. Make sure there are no lumpy bits of sugar or spice—you want everything well combined so the pumpkin bars bake evenly. I always give it an extra whisk, just to be sure.
- Combine Wet Ingredients:: In a separate, smaller bowl, whisk together your pumpkin puree, eggs, and vegetable oil until it’s all smooth and beautifully orange. This is where the magic starts to happen, you can almost smell the fall! Be sure to really get those eggs incorporated; I’ve had a few times where I rushed this part and ended up with streaks in my batter, oops. Just take your time, it’s worth it for moist pumpkin bars.
- Mix Batter and Bake:: Pour the wet ingredients into the dry ingredients. Mix everything together with a spatula or wooden spoon until just combined. Don’t overmix, that’s a cardinal sin in baking! Overmixing develops gluten, making your pumpkin bars tough, and nobody wants that. Spread the batter evenly into your prepared pan. It’s going to look thick, but trust the process. Pop it into the preheated oven for 25-30 minutes.
- Check for Doneness:: You’ll know your pumpkin bars are ready when a toothpick inserted into the center comes out clean, or with just a few moist crumbs attached. The top will be golden brown and springy to the touch. Honestly, sometimes I get impatient and pull them out a minute too early, but resist the urge! Let them bake fully for that perfect texture. You want them just right for the warm maple glaze.
- Cool the Bars:: Once baked, take the pan out of the oven and let the pumpkin bars cool completely on a wire rack. This step is crucial before adding the warm maple glaze. If you try to glaze them while they’re still hot, the glaze will just melt right off, and we don’t want a sticky puddle, do we? I’ve made that mistake more times than I care to admit, honestly.
- Prepare and Glaze:: While the bars cool, whisk together your powdered sugar, maple syrup, milk, and vanilla extract until you have a smooth, pourable warm maple glaze. If it’s too thick, add a tiny bit more milk; too thin, add a touch more powdered sugar. Once the pumpkin bars are completely cool, drizzle that glorious warm maple glaze and spices evenly over the top. If you’re using pecans, sprinkle them on now. Slice and serve! The smell alone is enough to make you swoon, I swear.


