
Remember that time I tried to bake a pie, and the crust just… disintegrated? Yeah, kitchen chaos is my middle name sometimes. But then there are those recipes that just click, you know? This Warm Oat and Honey Apple Crisp is one of those. I first stumbled upon a version of it during a particularly blustery autumn afternoon, craving something sweet but not too fussy. The smell of cinnamon and apples baking just pulled me in. It’s not just a dessert, it’s a feeling, a memory of warmth and comfort, without all the pie-crust drama, thank goodness.
I remember one time, I was so excited to get this Warm Oat and Honey Apple Crisp into the oven, I completely forgot to add the honey to the apples! I realized it halfway through baking, and for a moment, I thought it was ruined. But a quick drizzle over the top after it came out, and honestly, it was still pretty fantastic. Sometimes, happy accidents happen, or you learn a new trick. That’s real kitchen life, right?
Warm Oat and Honey Apple Crisp Ingredients
- Apples (6-8 medium, about 3 lbs): Use a mix of sweet and tart, like Honeycrisp and Granny Smith. The tart ones keep things from being too sweet, and the sweet ones add depth. Don’t use mushy apples, you want them to hold their shape.
- Lemon Juice (1 tablespoon): A little splash of lemon juice is crucial. It brightens the apple flavor and keeps them from browning too much. I tried skipping it once, and the apples looked a bit sad, to be real.
- Honey (1/4 cup + 2 tablespoons): This is where the ‘honey’ in Warm Oat and Honey Apple Crisp comes in! It adds a lovely, nuanced sweetness that granulated sugar just doesn’t quite capture. Use local honey if you can, it makes a difference, I swear.
- Light Brown Sugar (1/2 cup for filling, 1/2 cup for topping): Brown sugar brings that caramel-y depth. I once used dark brown sugar by mistake, and it was a bit too intense, so stick with light for this one.
- All-Purpose Flour (2 tablespoons for filling, 1/2 cup for topping): The flour in the filling helps thicken the apple juices, creating a lovely sauce. In the topping, it’s essential for that crumble texture.
- Ground Cinnamon (1 teaspoon for filling, 1/2 teaspoon for topping): You can’t have Warm Oat and Honey Apple Crisp without cinnamon! It’s the warming spice that makes everything feel right. Freshly ground is nice, but honestly, a good quality pre-ground works just fine.
- Ground Nutmeg (1/4 teaspoon for filling): Just a pinch, it really enhances the apple and cinnamon. Don’t go overboard, a little goes a long way.
- Old-Fashioned Rolled Oats (1 cup): These are the star of our crunchy topping. Don’t use instant oats, they’ll turn to mush. We want texture, people!
- Unsalted Butter (1/2 cup, 1 stick, cold and cubed): Cold butter is key for a truly crumbly topping. It creates those little pockets of deliciousness. I learned that the hard way when I tried melted butter once oops, it just made a paste.
- Pinch of Salt (1/4 teaspoon for topping): A tiny bit of salt balances the sweetness and makes all the other flavors pop. It’s a secret weapon, honestly.
Crafting Your Warm Oat and Honey Apple Crisp
- Prep the Apples:
- First things first, get those apples ready. I usually peel, core, and slice them into about 1/4-inch thick pieces. I’m not super precise, to be honest, some chunky bits add character! Toss them into a large bowl with the lemon juice right away. This keeps them from turning brown while you’re slicing the rest. It’s a small step, but it makes a visual difference for your Warm Oat and Honey Apple Crisp.
- Mix the Filling:
- Now for the good stuff! Add the 1/4 cup honey, 1/2 cup brown sugar, 2 tablespoons flour, 1 teaspoon cinnamon, and 1/4 teaspoon nutmeg to your apples. Give it a good stir, making sure every apple slice is coated in that lovely, sweet mixture. I sometimes use my hands for this, it just feels right and ensures everything is evenly distributed. You’ll start to smell those amazing spices already, which is always a good sign.
- Make the Topping for Warm Oat and Honey Apple Crisp:
- In a separate medium bowl, combine the 1 cup rolled oats, 1/2 cup flour, 1/2 cup brown sugar, 1/2 teaspoon cinnamon, and a pinch of salt. Now, add your cold, cubed butter. This is where the magic happens! Use your fingers, a pastry blender, or even a fork to cut the butter into the dry ingredients until you have a crumbly mixture, like coarse sand with some pea-sized butter pieces. Don’t overmix, we want that texture!
- Assemble Your Crisp:
- Pour the apple filling into a 9×13 inch baking dish. Try to spread it out evenly. Then, sprinkle that glorious oat topping all over the apples. Make sure it’s fairly even, covering most of the apples. I usually pat it down just a little bit, but don’t compact it too much. You want air pockets for that truly crisp texture. This is where your Warm Oat and Honey Apple Crisp starts to look like a real dessert!
- Bake to Golden Perfection:
- Pop your dish into a preheated oven at 375°F (190°C) and bake for 40-50 minutes. You’ll know it’s ready when the topping is golden brown and the apple filling is bubbling around the edges. Oh, and your kitchen? It’ll smell absolutely heavenly. Honestly, the waiting is the hardest part, but it’s so worth it for this Warm Oat and Honey Apple Crisp.
- Rest and Serve:
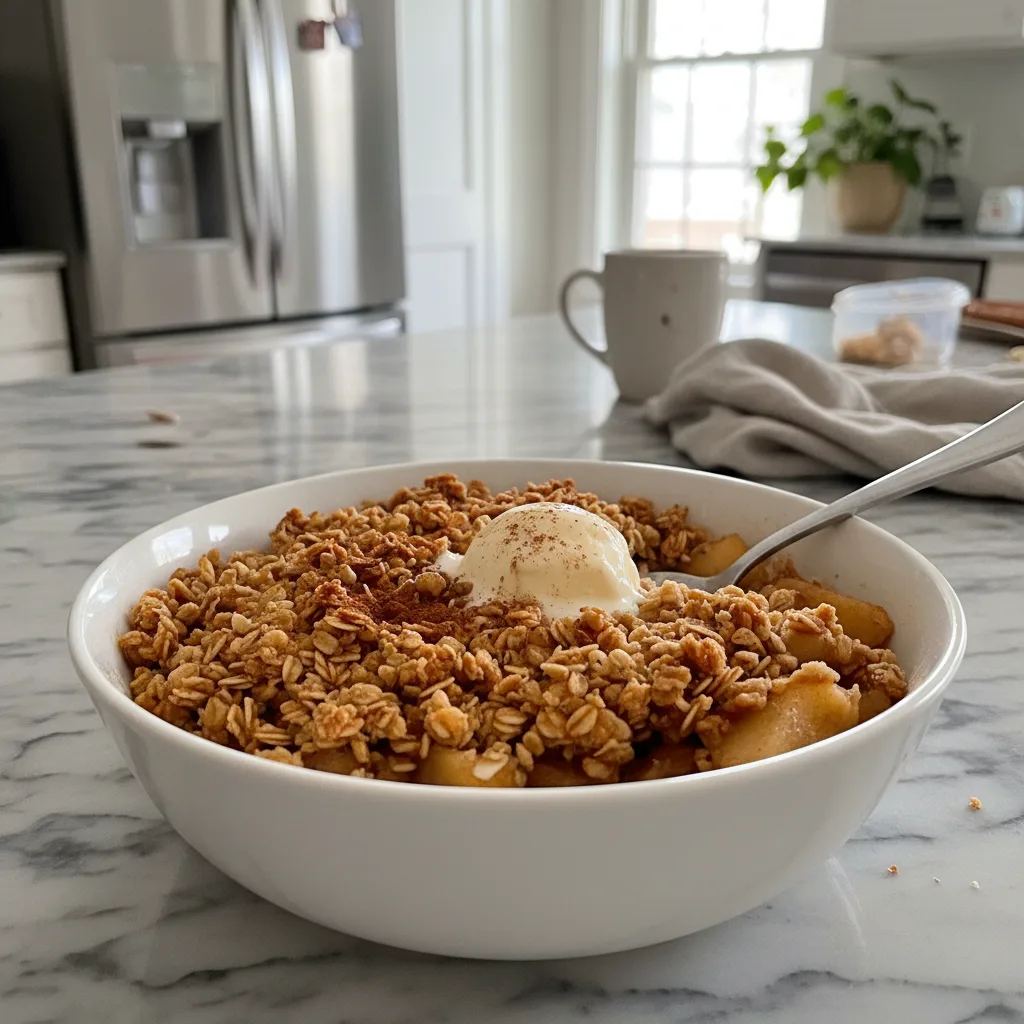
- Once it’s out of the oven, let your Warm Oat and Honey Apple Crisp rest for about 10-15 minutes. This allows the filling to set a bit, preventing it from being too runny when you scoop it. Plus, it’ll still be wonderfully warm. Scoop it into bowls, and if you’re feeling extra, a dollop of vanilla ice cream or whipped cream is a must. Enjoy!
There’s something so satisfying about pulling this Warm Oat and Honey Apple Crisp out of the oven, all bubbly and golden. It always reminds me of my grandma’s kitchen, even though she made a different version. The kitchen always smells like home when this is baking, and honestly, that’s what cooking is all about for me creating those warm, fuzzy feelings, even if I leave a trail of flour in my wake.
Storage Tips
So, you’ve got leftover Warm Oat and Honey Apple Crisp? Lucky you! Once it’s completely cooled, cover the baking dish tightly with plastic wrap or transfer individual servings to airtight containers. It keeps well in the fridge for up to 3-4 days. I’ve tried freezing it before, and while it’s okay, the topping can lose a bit of its crispness when thawed. Reheating is best done gently in the oven at 300°F (150°C) for about 15-20 minutes to revive that crisp topping. Microwaving works in a pinch, but the topping won’t be as crunchy. I once nuked it too long, and the apples turned a bit soggy so don’t do that, lol.

Warm Oat and Honey Apple Crisp Ingredient Substitutions
Life happens, and sometimes you don’t have exactly what the recipe calls for. For the apples, you can absolutely use pears, or a mix of apples and pears, I tried that once, and it worked, kinda, with a slightly different texture but still delicious. If you’re out of honey, maple syrup is a fantastic substitute for that warm, sweet flavor in this Warm Oat and Honey Apple Crisp. For the topping, if you don’t have all-purpose flour, a gluten-free all-purpose blend usually works well, but sometimes the texture is a little different. And if you’re dairy-free, a good quality plant-based butter can be swapped for the unsalted butter in the topping.
Serving Suggestions for Warm Oat and Honey Apple Crisp
Honestly, a warm slice of this Warm Oat and Honey Apple Crisp on its own is a dream. But if you want to elevate the experience, a scoop of really good vanilla bean ice cream is non-negotiable for me. The cold creaminess against the warm, tender apples and crunchy topping? Perfection! A dollop of freshly whipped cream also works wonders, or even a drizzle of extra honey. I’ve even had it for breakfast with a spoonful of Greek yogurt, and honestly, it felt like a little treat. This dish and a good book or a cozy movie? Yes please.
Cultural Backstory of Apple Crisps
Apple crisps, or crumbles, have a heartwarming history, often associated with wartime rationing when pie crust ingredients were scarce. They offered a simpler, more accessible way to enjoy baked fruit. While the exact origins are a bit hazy, they gained popularity in both Britain and America as a comforting, economical dessert. For me, this Warm Oat and Honey Apple Crisp connects me to a sense of resourcefulness and simple pleasures. It’s a reminder that sometimes the most straightforward dishes are the ones that bring the most joy and comfort, carrying on a tradition of home baking that spans generations.
So there you have it, my take on a truly comforting Warm Oat and Honey Apple Crisp. It’s a dish that’s seen its share of my kitchen antics, but always comes out smelling and tasting like pure happiness. I hope you give it a try and make it your own. Let me know what little tweaks you discover, I’m always curious about how others enjoy their favorite bakes!

Frequently Asked Questions
- → Can I use different fruits in this Warm Oat and Honey Apple Crisp?
Absolutely! I’ve tried it with a mix of apples and pears, and it was lovely. You could also try berries or peaches when they’re in season, though the baking time might vary a bit. Experimentation is half the fun!
- → What kind of oats are best for the topping?
Old-fashioned rolled oats are what you want for that perfect chew and crisp. Quick oats tend to get too soft, and steel-cut oats are too tough for this recipe. I learned that the hard way, honestly.
- → How do I know when the Warm Oat and Honey Apple Crisp is done baking?
You’re looking for a golden-brown topping and bubbling juices around the edges of the dish. If the topping is browning too fast, you can loosely cover it with foil for the last 10-15 minutes. Trust your nose, too, it’ll smell amazing!
- → Can I prepare this Warm Oat and Honey Apple Crisp ahead of time?
Yes, you can! You can assemble the whole crisp, cover it tightly, and refrigerate it for up to 24 hours before baking. Just add an extra 5-10 minutes to the baking time since it’ll be going into the oven cold.
- → What if I don’t have fresh lemons for the apple filling?
You can use bottled lemon juice in a pinch, about 1 tablespoon. It won’t have quite the same bright zing as fresh, but it’ll do the job of preventing browning and adding a little tang. I’ve done it, and it still works!

Warm Oat and Honey Apple Crisp: Hearty Rustic Bake
- Prep Time: 20 Minutes
- Cook Time: 45 Minutes
- Total Time: 65 Minutes
- Yield: 6 Servings
- Category: Tasty Recipes
Description
Warm Oat and Honey Apple Crisp delivers tender apples baked under a crunchy oat topping. A simple dessert that feels like a hug on chilly evenings.
Ingredients
- For the Apple Heart:
- Apples (6-8 medium, about 3 lbs)
- Lemon Juice (1 tablespoon)
- Honey (1/4 cup)
- Light Brown Sugar (1/2 cup)
- All-Purpose Flour (2 tablespoons)
- Ground Cinnamon (1 teaspoon)
- Ground Nutmeg (1/4 teaspoon)
- For the Crunchy Oat Topping:
- Old-Fashioned Rolled Oats (1 cup)
- All-Purpose Flour (1/2 cup)
- Light Brown Sugar (1/2 cup)
- Unsalted Butter (1/2 cup, 1 stick, cold and cubed)
- Ground Cinnamon (1/2 teaspoon)
- Pinch of Salt (1/4 teaspoon)
- Optional Finishing Touches:
- Vanilla ice cream
- Whipped cream
- Extra Honey (2 tablespoons, for drizzling)
Instructions
- Prep the Apples:: First things first, get those apples ready. I usually peel, core, and slice them into about 1/4-inch thick pieces. I’m not super precise, to be honest; some chunky bits add character! Toss them into a large bowl with the lemon juice right away. This keeps them from turning brown while you’re slicing the rest. It’s a small step, but it makes a visual difference for your Warm Oat and Honey Apple Crisp.
- Mix the Filling:: Now for the good stuff! Add the 1/4 cup honey, 1/2 cup brown sugar, 2 tablespoons flour, 1 teaspoon cinnamon, and 1/4 teaspoon nutmeg to your apples. Give it a good stir, making sure every apple slice is coated in that lovely, sweet mixture. I sometimes use my hands for this; it just feels right and ensures everything is evenly distributed. You’ll start to smell those amazing spices already, which is always a good sign.
- Make the Topping for Warm Oat and Honey Apple Crisp:: In a separate medium bowl, combine the 1 cup rolled oats, 1/2 cup flour, 1/2 cup brown sugar, 1/2 teaspoon cinnamon, and a pinch of salt. Now, add your cold, cubed butter. This is where the magic happens! Use your fingers, a pastry blender, or even a fork to cut the butter into the dry ingredients until you have a crumbly mixture, like coarse sand with some pea-sized butter pieces. Don’t overmix; we want that texture!
- Assemble Your Crisp:: Pour the apple filling into a 9×13 inch baking dish. Try to spread it out evenly. Then, sprinkle that glorious oat topping all over the apples. Make sure it’s fairly even, covering most of the apples. I usually pat it down just a little bit, but don’t compact it too much. You want air pockets for that truly crisp texture. This is where your Warm Oat and Honey Apple Crisp starts to look like a real dessert!
- Bake to Golden Perfection:: Pop your dish into a preheated oven at 375°F (190°C) and bake for 40-50 minutes. You’ll know it’s ready when the topping is golden brown and the apple filling is bubbling around the edges. Oh, and your kitchen? It’ll smell absolutely heavenly. Honestly, the waiting is the hardest part, but it’s so worth it for this Warm Oat and Honey Apple Crisp.
- Rest and Serve:: Once it’s out of the oven, let your Warm Oat and Honey Apple Crisp rest for about 10-15 minutes. This allows the filling to set a bit, preventing it from being too runny when you scoop it. Plus, it’ll still be wonderfully warm. Scoop it into bowls, and if you’re feeling extra, a dollop of vanilla ice cream or whipped cream is a must. Enjoy!


