
Honestly, every autumn, as soon as the leaves start turning that brilliant orange and crisp air rolls in, my mind immediately jumps to Halloween. And with Halloween, of course, comes the annual tradition of baking ghost cookies. I still remember the first time I tried this ghost cookies recipe years ago. It was a disaster, to be real. My “ghosts” looked more like melted blobs, and the icing ran everywhere. I truly didn’t expect that much chaos from a simple cookie! But there was something so endearing about those lopsided, sugary spirits. The smell of vanilla and baking butter just filled the kitchen, creating this warm, slightly spooky vibe. It’s become a comforting ritual, a way to usher in the festive season, even if I still manage to make a mess.
Oh, the stories these ghost cookies could tell! One year, I was so proud of my perfectly piped little ghost faces. I set them out to dry on the counter, feeling like a baking queen. Then, my cat, Mittens, decided it was the perfect moment to jump onto the counter, knocking half of them onto the floor. It was a sugary, crumbly catastrophe! I just stood there, staring at the carnage, then started laughing. You just have to roll with the punches in the kitchen, right?
Ingredients for Your Ghost Cookies Recipe
Cookie Base
- Unsalted Butter (1 cup, softened): Seriously, use unsalted. It gives you control over the salt content, and honestly, butter is the soul of a good cookie. I tried margarine once, and the texture was just… off. Never again!
- Granulated Sugar (1 cup): This gives our ghost cookies that lovely sweetness and helps with browning. Don’t skimp, it’s a treat!
Large Egg (1): Binds everything together. Make sure it’s at room temperature for a smoother batter, I always forget this and end up doing a quick warm water bath.
Vanilla Extract (1 tsp): Pure vanilla, please! It adds such a depth of flavor. I’m a bit heavy-handed with it, always adding an extra splash because, well, vanilla just makes everything better, doesn’t it?
Dry Mix & Leavening
- All-Purpose Flour (2 ¾ cups): The structure of our spooky friends. Measure it correctly too much and they’re dry, too little and they spread like crazy. I learned that one the hard way with flat ghost cookies.
- Baking Powder (1 tsp): Gives our ghosts a little lift, making them soft and tender.
- Salt (½ tsp): Balances the sweetness and enhances all the flavors. Don’t skip it, it’s a flavor booster!
Icing Essentials & Decoration
- Powdered Sugar (3 cups): The base for our royal icing. Sift it, trust me. Clumps in icing are the worst, and I speak from experience!
- Meringue Powder (3 tbsp): This is the magic ingredient for stable royal icing that dries hard. Don’t try to substitute it with egg whites unless you’re a pro, I tried once, and it was a runny mess.
- Warm Water (6-8 tbsp): Adjust as needed for icing consistency. It’s a delicate balance, too much and it’s soup, too little and it’s cement.
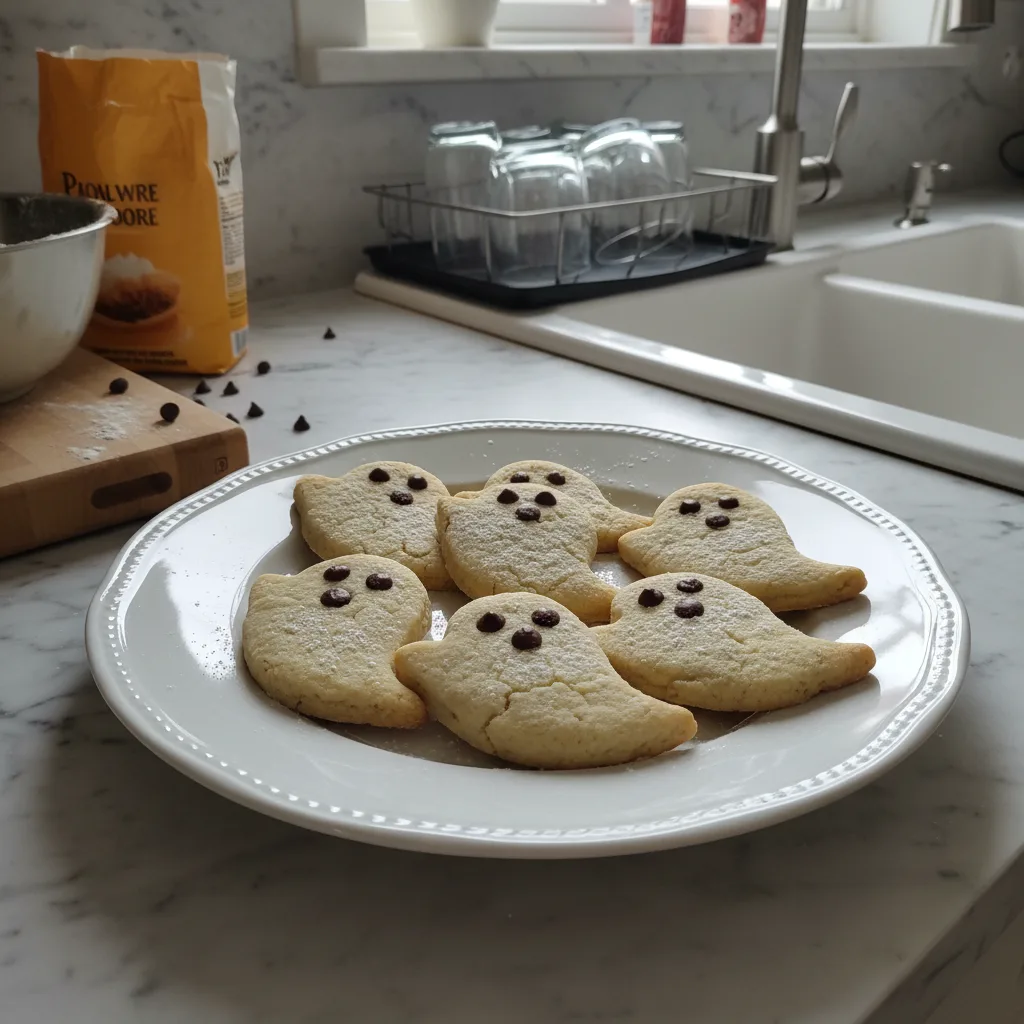
- Black Food Gel (a few drops): For those adorable little ghost eyes and mouths. Gel gives the best color without thinning the icing. Liquid food coloring just doesn’t hit the same.
Making Your Ghost Cookies Recipe: Step-by-Step
- Cream It Good:
- First things first, grab that softened butter and granulated sugar. I always use my stand mixer for this because my arm gets tired, honestly! Cream them together until they’re light and fluffy, almost pale in color. This usually takes about 3-5 minutes, and you’ll really see the texture change. It’s where the magic starts to happen for a tender ghost cookies recipe. I once rushed this step, and my cookies weren’t as airy as I wanted, so take your time here. You’ll smell that sweet, buttery aroma filling your kitchen, and it’s just the best start!
- Wet Ingredients In:
- Next, crack in that large egg and pour in the vanilla extract. Beat them into the creamed butter and sugar until everything is just combined. Be careful not to overmix here, we’re just aiming for a smooth, homogenous mixture. Sometimes I get a little overzealous with the mixer, and the batter separates a bit, but a quick scrape down of the bowl usually fixes it. This step is crucial for the overall texture of our ghost cookies, ensuring they’re soft and chewy, not tough.
- Combine the Dry:
- In a separate bowl, whisk together your all-purpose flour, baking powder, and salt. This ensures all the leavening and seasoning are evenly distributed throughout the dry mix. Then, gradually add the dry ingredients to the wet ingredients, mixing on low speed until just combined. Stop as soon as you see no more streaks of flour. Overmixing develops gluten, and we want tender ghost cookies, not hockey pucks! The dough will be soft but shouldn’t be too sticky.
- Chill & Roll for Perfect Ghost Cookies:
- Divide your dough in half, wrap each half in plastic wrap, and chill for at least 30 minutes. Honestly, don’t skip this part! It makes the dough much easier to handle and prevents your ghosts from spreading too much in the oven. Once chilled, flour your surface lightly and roll out one portion of the dough to about ¼-inch thickness. Use your ghost-shaped cookie cutter to cut out as many spooky shapes as you can. Gather the scraps, re-roll, and cut more! I always manage to get flour everywhere during this step, it’s just part of the fun.
- Bake Your Spooky Shapes:
- Carefully transfer your cut-out ghost cookies to baking sheets lined with parchment paper. Leave a little space between them, just in case they decide to expand a bit. Bake in a preheated oven at 375°F (190°C) for 7-9 minutes, or until the edges are lightly golden. You want them soft, so don’t let them get too brown! When you pull them out, they’ll smell heavenly, like pure vanilla and butter. Let them cool on the baking sheet for a few minutes before moving them to a wire rack to cool completely. Patience is key here for decorating later!
- Icing the Ghost Cookies:
- Now for the fun part: the decorating! In a large bowl, whisk together the powdered sugar and meringue powder. Gradually add the warm water, a tablespoon at a time, until you reach a smooth, pipeable consistency. It should be thick enough to hold its shape but thin enough to flow smoothly. Transfer about two-thirds of the icing to a piping bag with a small round tip. Outline and flood your cooled ghost cookies, letting the white base dry completely. Then, with a tiny bit of black food gel mixed into a small portion of icing, pipe on those adorable little eyes and mouths. It’s so satisfying seeing those blank white shapes transform into cute little ghosts!
Honestly, baking these ghost cookies always feels a bit like a playful art project. I get so focused on piping those tiny eyes, sometimes I forget I’m even baking! The kitchen usually looks like a flour bomb went off, and there’s always a stray blob of icing on my cheek, but it’s worth it. Seeing those little ghost faces come to life just makes me smile. It’s a sweet, simple joy that brings a bit of lighthearted spookiness to the home.
Storing Your Ghost Cookies Recipe Treats
So, you’ve baked a glorious batch of ghost cookies, and now you want to keep them fresh. Honestly, these cookies store pretty well if you’re careful. Once the royal icing is completely dry (and I mean completely dry give it at least 6-8 hours, or even overnight, especially if it’s humid), you can store them in an airtight container at room temperature. I made the mistake once of stacking them too soon, and all the cute faces smudged together. What a mess, lol! They’ll stay fresh for about 5-7 days. If you want to keep them longer, you can freeze the un-iced cookies for up to 3 months. Just thaw them completely before decorating. Freezing the decorated ones can sometimes make the icing a bit fragile, so I usually avoid that if I can help it.

Variations on this Ghost Cookies Recipe
I love playing around with recipes, and this ghost cookies recipe is no exception! I once tried adding a tiny pinch of cinnamon to the dough, and it gave them a really warm, autumnal flavor. It worked, kinda, but I still prefer the pure vanilla for these. For a fun twist, you could color a small portion of the royal icing with orange or purple food gel to make little pumpkin or bat shapes on the side of your ghosts. Or, if you’re feeling extra fancy, try adding a drop of peppermint extract to a small batch of icing for a minty surprise. I’ve also seen people use mini chocolate chips for eyes, which is super cute and less fussy than piping if you’re in a hurry. Just pop them on the warm cookies right after they come out of the oven so they melt slightly and stick.
Serving Your Ghost Cookies Recipe
These ghost cookies are honestly the star of any Halloween gathering! I love arranging them on a spooky-themed platter alongside some homemade hot chocolate that combo just hits different on a chilly October evening. For a kids’ party, they’re always a hit, especially if you let the little ones help pipe the faces (prepare for delightful chaos!). I also think they’re perfect with a glass of milk or a simple mug of apple cider. Sometimes, I’ll even package a few up in little cellophane bags with a ribbon to give to neighbors or friends. It’s a sweet, simple gesture, and everyone always appreciates a homemade treat. They just scream “happy Halloween” in the most delicious way!
The Sweet Backstory of Ghost Cookies
While the idea of decorating cookies into shapes is pretty universal, these ghost cookies really shine during Halloween. It’s a holiday steeped in ancient traditions, often linked to warding off spirits or celebrating the harvest. For me, making these cookies connects me to that long history of communal celebration and the simple joy of creating something festive. I remember my grandma telling me stories about making simple sugar cookies for all sorts of holidays, and I think these ghost cookies are a modern take on that timeless tradition. It’s about more than just sugar and flour, it’s about making memories, sharing a laugh, and honestly, embracing a little bit of playful spookiness in the kitchen. They’ve become a staple in my home, a comforting nod to the season.
Honestly, these ghost cookies are more than just a sweet treat, they’re a little piece of Halloween magic. Every year, seeing those silly, sweet faces emerge from the oven just makes my heart happy. It’s a reminder that even with a few kitchen mishaps, the joy of baking and sharing something homemade is what truly matters. I hope you give this ghost cookies recipe a try and create your own sweet, spooky memories. Don’t forget to share your ghost cookie adventures with me!

Frequently Asked Questions About Ghost Cookies Recipe
- → Can I make the ghost cookies dough ahead of time?
Oh, absolutely! I do this all the time. You can wrap the dough tightly in plastic wrap and keep it in the fridge for up to 3 days. It actually makes it even easier to roll out, in my experience. Just let it sit out for 10-15 minutes before rolling to soften it slightly.
- → What if I don’t have meringue powder for the royal icing?
Honestly, meringue powder is key for stable royal icing. I’ve tried using fresh egg whites once, and it was a bit of a gamble with consistency and safety. If you don’t have it, you could try a simple glaze with powdered sugar, milk, and vanilla, but it won’t dry hard like royal icing. It kinda works for a softer cookie.
- → My ghost cookies spread too much in the oven, what went wrong?
I’ve been there! Usually, it’s either the butter was too soft (or melted a bit), you didn’t chill the dough enough, or you might have too much leavening. Make sure your butter is just softened, not greasy, and truly give that dough its fridge time. It makes a huge difference, trust me!
- → How do I store leftover ghost cookies to keep them fresh?
Once the royal icing is completely dry (this is critical!), store them in an airtight container at room temperature. They’ll stay fresh for about a week. I once put them in the fridge, and they got a bit stale faster, so room temp is definitely the way to go for these spooky treats.
- → Can I use different cookie cutters for this ghost cookies recipe?
Of course! This is a fantastic base for any cut-out cookie. I’ve used bat shapes, pumpkins, even little witch hats with this same dough. Just adjust your baking time slightly if the shapes are much smaller or larger. It’s super versatile, so get creative with your spooky designs!

Spooky Soft Ghost Cookies: A Simple Halloween Treat
- Prep Time: 60 Minutes
- Cook Time: 10 Minutes
- Total Time: 2 Hours 30 Minutes
- Yield: 24 Servings
- Category: Breakfasts
Description
Whip up our easy ghost cookies recipe this Halloween! These soft, sweet treats with royal icing are a fun project, even with a little kitchen chaos.
Ingredients
- Cookie Base:
- Unsalted Butter (1 cup, softened)
- Granulated Sugar (1 cup)
- Large Egg (1)
- Vanilla Extract (1 tsp)
- Dry Mix & Leavening:
- All-Purpose Flour (2 ¾ cups)
- Baking Powder (1 tsp)
- Salt (½ tsp)
- Icing Essentials & Decoration:
- Powdered Sugar (3 cups)
- Meringue Powder (3 tbsp)
- Warm Water (6-8 tbsp)
- Black Food Gel (a few drops)
Instructions
- Cream It Good:: First things first, grab that softened butter and granulated sugar. I always use my stand mixer for this because my arm gets tired, honestly! Cream them together until they’re light and fluffy, almost pale in color. This usually takes about 3-5 minutes, and you’ll really see the texture change. It’s where the magic starts to happen for a tender ghost cookies recipe. I once rushed this step, and my cookies weren’t as airy as I wanted, so take your time here. You’ll smell that sweet, buttery aroma filling your kitchen, and it’s just the best start!
- Wet Ingredients In:: Next, crack in that large egg and pour in the vanilla extract. Beat them into the creamed butter and sugar until everything is just combined. Be careful not to overmix here; we’re just aiming for a smooth, homogenous mixture. Sometimes I get a little overzealous with the mixer, and the batter separates a bit, but a quick scrape down of the bowl usually fixes it. This step is crucial for the overall texture of our ghost cookies, ensuring they’re soft and chewy, not tough.
- Combine the Dry:: In a separate bowl, whisk together your all-purpose flour, baking powder, and salt. This ensures all the leavening and seasoning are evenly distributed throughout the dry mix. Then, gradually add the dry ingredients to the wet ingredients, mixing on low speed until just combined. Stop as soon as you see no more streaks of flour. Overmixing develops gluten, and we want tender ghost cookies, not hockey pucks! The dough will be soft but shouldn’t be too sticky.
- Chill & Roll for Perfect Ghost Cookies:: Divide your dough in half, wrap each half in plastic wrap, and chill for at least 30 minutes. Honestly, don’t skip this part! It makes the dough much easier to handle and prevents your ghosts from spreading too much in the oven. Once chilled, flour your surface lightly and roll out one portion of the dough to about ¼-inch thickness. Use your ghost-shaped cookie cutter to cut out as many spooky shapes as you can. Gather the scraps, re-roll, and cut more! I always manage to get flour everywhere during this step, it’s just part of the fun.
- Bake Your Spooky Shapes:: Carefully transfer your cut-out ghost cookies to baking sheets lined with parchment paper. Leave a little space between them, just in case they decide to expand a bit. Bake in a preheated oven at 375°F (190°C) for 7-9 minutes, or until the edges are lightly golden. You want them soft, so don’t let them get too brown! When you pull them out, they’ll smell heavenly, like pure vanilla and butter. Let them cool on the baking sheet for a few minutes before moving them to a wire rack to cool completely. Patience is key here for decorating later!
- Icing the Ghost Cookies:: Now for the fun part: the decorating! In a large bowl, whisk together the powdered sugar and meringue powder. Gradually add the warm water, a tablespoon at a time, until you reach a smooth, pipeable consistency. It should be thick enough to hold its shape but thin enough to flow smoothly. Transfer about two-thirds of the icing to a piping bag with a small round tip. Outline and flood your cooled ghost cookies, letting the white base dry completely. Then, with a tiny bit of black food gel mixed into a small portion of icing, pipe on those adorable little eyes and mouths. It’s so satisfying seeing those blank white shapes transform into cute little ghosts!


