
Oh, hon, let me tell you about these Patriotic Cheesecake Bars. I first stumbled upon a version of these years ago, back when my kitchen was less ‘organized chaos’ and more ‘actual disaster zone.’ I was trying to whip up something festive for a neighborhood potluck, and everything felt like it was going sideways. Flour on the ceiling, a smoke detector screaming its head off from a burnt something-or-other… it was a scene! But then, I tried these cheesecake bars, and the vibrant reds and blues just sang. They rescued my afternoon, and honestly, they’ve been a staple for every summer celebration since. They’re just so bright, cheerful, and creamy, a total crowd-pleaser.
I remember one time I was making a batch of these Patriotic Cheesecake Bars, and I got a little too enthusiastic with the berry swirl. I thought, “More swirl, more fun!” and ended up with a slightly muddy-looking top. It tasted incredible, mind you, but visually, it was an “oops” moment. My kids still tease me about my “abstract art cheesecake.” Lesson learned: sometimes less is more when it comes to the swirls, but the flavor is always there.
Ingredients
Crust Essentials
- Graham Cracker Crumbs: These form the sturdy, buttery base. Honestly, don’t try to use stale cookies, just get the real deal. It makes a difference!
- Unsalted Butter (melted): It binds the crust together, giving it that rich flavor. I always use unsalted so I can control the salt level myself.
- Granulated Sugar: Just a touch for sweetness in the crust.
Creamy Filling
- Cream Cheese (full-fat, room temp): This is the star of the show. Please, please use full-fat and make sure it’s softened. Cold cream cheese means lumps, and nobody wants lumpy cheesecake, hon.
- Granulated Sugar: Sweetens the creamy filling perfectly.
- Large Eggs: They help set the cheesecake. I tried making it once without enough eggs, and it was a wobbly mess.
- Sour Cream: This is my secret for that extra tang and super smooth texture. It cuts through the richness beautifully.
- Vanilla Extract: Pure vanilla, always. It just adds that warm, comforting note.
- Lemon Zest: A little bright burst that really makes the flavors pop. Don’t skip it!
Berry Swirl
- Fresh Strawberries (diced): For that beautiful red swirl. I love how the little bits burst with flavor.
- Fresh Blueberries: The patriotic blue! They add a lovely tartness.
- Granulated Sugar: To sweeten the berries just right.
- Cornstarch: Thickens the berry sauce so it doesn’t make the cheesecake watery.
- Water: Just a splash to help the sauce come together.
Finishing Touches
- Extra Fresh Berries: For garnish, because they make everything look pretty and taste even fresher!
Crafting Your Patriotic Cheesecake Bars
- Crush and Press the Crust:
- First things first, let’s get that crust ready! Take your graham cracker crumbs, melted butter, and a tiny bit of sugar, then mix them up in a bowl until they look like wet sand. Now, press this mixture firmly into the bottom of a 9×13 inch baking pan lined with parchment paper. This is where I always get a little too aggressive, honestly, but a good firm press means a sturdy crust. Pop it into a 350°F (175°C) oven for about 10 minutes. You’ll smell that lovely buttery graham cracker aroma, it’s a good sign!
- Whip Up the Creamy Filling:
- While the crust is doing its thing, grab your softened cream cheese and beat it with sugar until it’s light and fluffy. This is crucial for smooth Patriotic Cheesecake Bars! I once tried to rush this step, and I ended up with tiny cream cheese lumps, which was a bummer. Beat in the eggs one at a time, making sure each is fully incorporated before adding the next. Then, gently fold in the sour cream, vanilla extract, and that wonderful lemon zest. Don’t overmix here, just combine until smooth and creamy.
- Prepare the Vibrant Berry Swirl:
- In a small saucepan, combine your diced strawberries, blueberries, sugar, cornstarch, and water. Cook this over medium heat, stirring often, until the berries soften and the mixture thickens into a glossy sauce. This usually takes about 5-7 minutes. It’ll smell so sweet and summery! Let it cool slightly before you use it. You want it warm, not hot, so it doesn’t cook the cheesecake filling when you swirl.
- Assemble and Swirl Your Patriotic Cheesecake Bars:
- Pour the creamy cheesecake filling over your cooled graham cracker crust. Now for the fun part! Dollop spoonfuls of the berry sauce over the cheesecake filling. Take a knife or a skewer and gently swirl the berry sauce into the cheesecake. Don’t overmix, or you’ll lose those distinct red and blue streaks. I’ve been there, thinking I could make it “more swirly,” and just ended up with a purple blob. Go easy, hon!
- Bake and Chill to Perfection:
- Carefully place your pan into the preheated oven and bake for 30-35 minutes, or until the edges are set but the center still has a slight jiggle. It’s like a little dance! Once baked, turn off the oven, crack the door, and let the cheesecake cool in there for about an hour. This helps prevent cracking. Then, remove it, let it cool completely on a wire rack, and finally, transfer it to the fridge to chill for at least 3-4 hours, or even better, overnight. I know, the waiting is the hardest part!
- Slice and Serve Your Festive Bars:
- Once your Patriotic Cheesecake Bars are perfectly chilled and firm, use the parchment paper overhang to lift the entire cheesecake out of the pan. Place it on a cutting board. Now, for the cleanest slices, warm your knife under hot water and wipe it clean between each cut. It really makes a difference for those crisp, clean edges. Garnish with extra fresh berries if you’re feeling fancy, and serve up a slice of pure joy!
Honestly, these Patriotic Cheesecake Bars always remind me of summer evenings, backyard barbecues, and laughter. There’s something so satisfying about pulling them out of the fridge, perfectly chilled, with those beautiful swirls. One time, my little niece saw them and gasped, “It’s like a flag cake, but better!” and that, my friends, is why I keep making them. They just bring a smile to everyone’s face.
Storing Patriotic Cheesecake Bars
You know, these bars are pretty forgiving when it comes to storage, which is a huge win for a busy home cook like me. Once they’re completely cooled, I pop my Patriotic Cheesecake Bars into an airtight container. They’ll happily hang out in the fridge for up to 4-5 days. I usually tuck a piece of parchment paper between layers if I stack them, just to prevent any squishing or sticking learned that one the hard way, trust me. I tried microwaving a leftover piece once, thinking it would warm up nicely, but the texture got a little weird and the crust lost its crispness. So, best enjoyed chilled, straight from the fridge! If you want to prep ahead, they also freeze beautifully for about a month. Just wrap individual slices tightly in plastic wrap, then foil, and thaw in the fridge when you’re ready for a treat.

Swapping Ingredients for Your Patriotic Cheesecake Bars
Life happens, and sometimes you just don’t have exactly what the recipe calls for, right? I’ve been there! Ran out of graham crackers once, so I tried using Nilla wafers for the crust. It worked, kinda! It was a bit sweeter and had a different texture, but still delicious for Patriotic Cheesecake Bars. You could also try shortbread cookies if you prefer a richer, buttery base. For the berries, feel free to use frozen if fresh aren’t in season, just thaw them first and drain any excess liquid. I’ve even done a mixed berry blend with raspberries and blackberries before, and it was lovely, though the colors weren’t quite as patriotic. Just be mindful of the sweetness if you’re swapping berries, as some are tarter than others.
Serving Your Festive Patriotic Cheesecake Bars
These Patriotic Cheesecake Bars are already a showstopper on their own, but a few little touches can make them extra special. I love to serve them alongside a scoop of vanilla bean ice cream, especially on a warm summer evening. The cold ice cream with the creamy bar? Oh, it’s a dream! For drinks, a tall glass of sparkling lemonade or even a crisp, chilled rosé wine pairs beautifully. Honestly, these bars and a good rom-com on the couch after a long week? Yes please! They’re versatile enough for a fancy gathering or a casual family dessert. Sometimes, I’ll even add a tiny sprig of fresh mint on top for a pop of green and a fresh aroma, making them even more inviting.
A Bit of Backstory for These Bars
While cheesecake itself has ancient roots, these specific Patriotic Cheesecake Bars, with their vibrant red, white, and blue, really gained popularity as a festive dessert for American holidays. Think Fourth of July, Memorial Day, Labor Day any time we gather to celebrate. For me, they connect to childhood memories of big family picnics where everyone brought their signature dish. My Aunt Carol, bless her heart, always brought something similar, and it was the first thing to disappear from the dessert table. It’s more than just a recipe, it’s a symbol of togetherness, summer fun, and that feeling of community. I think that’s why they resonate so much with me, they just embody joy and shared moments around the table.
So there you have it, my take on these delightful Patriotic Cheesecake Bars. They’re more than just a dessert, they’re a little slice of summer, full of memories and happy moments. I hope you give them a try and make some wonderful memories of your own. Don’t be afraid to get a little messy in the kitchen, and remember, the best recipes are the ones made with a whole lot of love and maybe a few “oops” moments along the way. I can’t wait to hear how yours turn out!

Frequently Asked Questions
- → Can I make these Patriotic Cheesecake Bars ahead of time?
Absolutely! These bars are fantastic for making a day or two in advance. They actually taste even better after a good chill in the fridge, giving all those flavors time to meld. It’s my go-to for parties to save stress!
- → What if I don’t have fresh berries for the swirl?
No worries! You can definitely use frozen berries. Just thaw them completely and drain any excess liquid before simmering them for the sauce. I’ve done it many times, and it works great for these Patriotic Cheesecake Bars.
- → My cheesecake cracked during cooling. What happened?
Oh, I’ve been there! Cracks usually happen from sudden temperature changes. Try letting your Patriotic Cheesecake Bars cool slowly in the oven with the door slightly ajar for an hour after baking, then on the counter. It helps a lot!
- → How long do these Patriotic Cheesecake Bars last in the fridge?
When stored in an airtight container, these bars stay fresh and delicious for about 4 to 5 days. I always find they’re best within the first three, but they’re still wonderful after that!
- → Can I use a different type of crust for these bars?
You sure can! While graham crackers are classic for Patriotic Cheesecake Bars, Nilla wafers or even shortbread cookies make a lovely substitute. Just make sure to adjust the butter amount if needed to get that perfect crumbly-but-pressable texture.

Patriotic Cheesecake Bars: A Berry Swirl Delight
- Prep Time: 30 Minutes
- Cook Time: 35 Minutes
- Total Time: 4 Hours 5 Minutes
- Yield: 12 Servings 1x
- Category: Desserts
Description
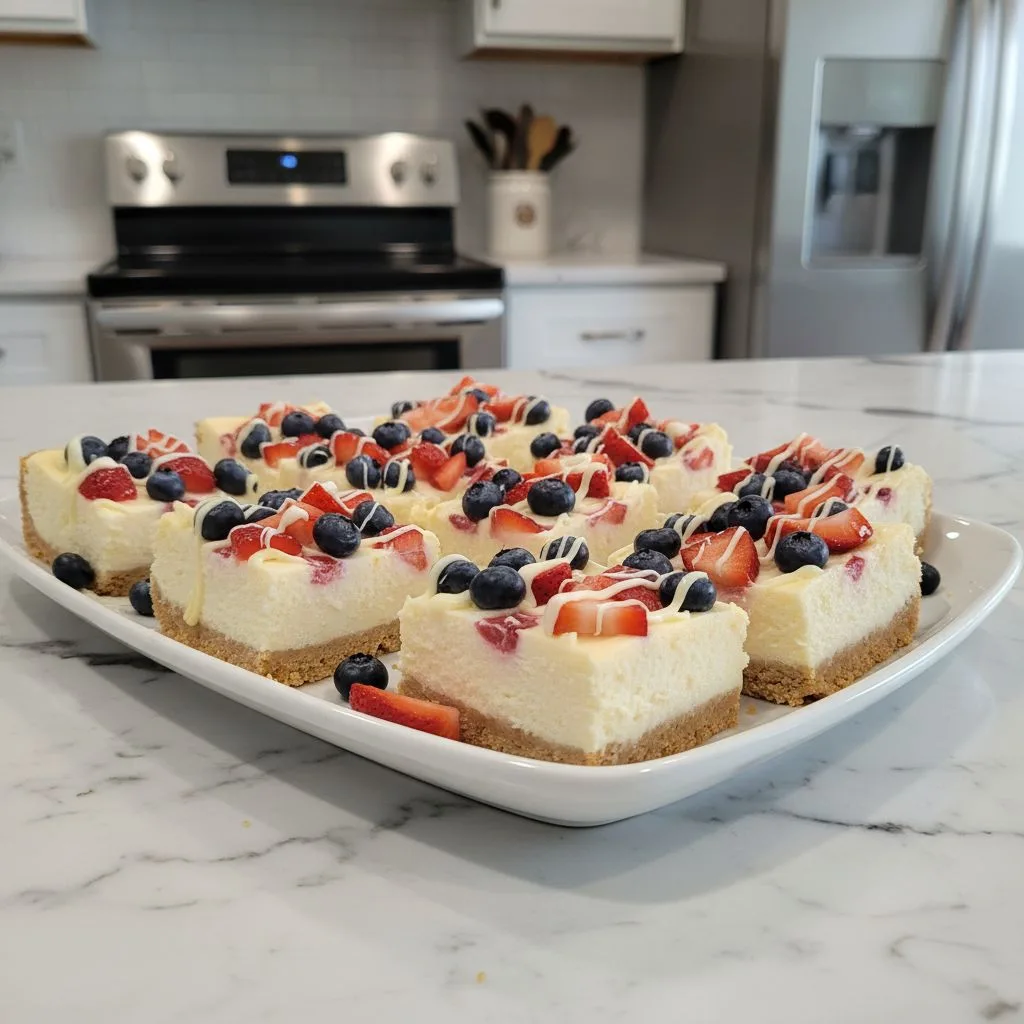
Creamy Patriotic Cheesecake Bars with a vibrant berry swirl. Perfect for summer gatherings, these easy no-bake bars bring a sweet, tangy burst of flavor.
Ingredients
- Crust Essentials:
- 2 cups graham cracker crumbs (about 14–16 full graham cracker sheets)
- 1/2 cup unsalted butter, melted
- 1/4 cup granulated sugar
- Creamy Filling:
- 24 oz (3 blocks) full-fat cream cheese, softened to room temperature
- 1 cup granulated sugar
- 3 large eggs
- 1/2 cup sour cream
- 1 teaspoon vanilla extract
- 1 teaspoon lemon zest
- Berry Swirl:
- 1 cup fresh strawberries, diced
- 1/2 cup fresh blueberries
- 1/4 cup granulated sugar
- 1 tablespoon cornstarch
- 2 tablespoons water
- Finishing Touches:
- Extra fresh berries (strawberries, blueberries) for garnish
Instructions
- Crush and Press the Crust:: First things first, let’s get that crust ready! Take your graham cracker crumbs, melted butter, and a tiny bit of sugar, then mix them up in a bowl until they look like wet sand. Now, press this mixture firmly into the bottom of a 9×13 inch baking pan lined with parchment paper. This is where I always get a little too aggressive, honestly, but a good firm press means a sturdy crust. Pop it into a 350°F (175°C) oven for about 10 minutes. You’ll smell that lovely buttery graham cracker aroma; it’s a good sign!
- Whip Up the Creamy Filling:: While the crust is doing its thing, grab your softened cream cheese and beat it with sugar until it’s light and fluffy. This is crucial for smooth Patriotic Cheesecake Bars! I once tried to rush this step, and I ended up with tiny cream cheese lumps, which was a bummer. Beat in the eggs one at a time, making sure each is fully incorporated before adding the next. Then, gently fold in the sour cream, vanilla extract, and that wonderful lemon zest. Don’t overmix here, just combine until smooth and creamy.
- Prepare the Vibrant Berry Swirl:: In a small saucepan, combine your diced strawberries, blueberries, sugar, cornstarch, and water. Cook this over medium heat, stirring often, until the berries soften and the mixture thickens into a glossy sauce. This usually takes about 5-7 minutes. It’ll smell so sweet and summery! Let it cool slightly before you use it. You want it warm, not hot, so it doesn’t cook the cheesecake filling when you swirl.
- Assemble and Swirl Your Patriotic Cheesecake Bars:: Pour the creamy cheesecake filling over your cooled graham cracker crust. Now for the fun part! Dollop spoonfuls of the berry sauce over the cheesecake filling. Take a knife or a skewer and gently swirl the berry sauce into the cheesecake. Don’t overmix, or you’ll lose those distinct red and blue streaks. I’ve been there, thinking I could make it “more swirly,” and just ended up with a purple blob. Go easy, hon!
- Bake and Chill to Perfection:: Carefully place your pan into the preheated oven and bake for 30-35 minutes, or until the edges are set but the center still has a slight jiggle. It’s like a little dance! Once baked, turn off the oven, crack the door, and let the cheesecake cool in there for about an hour. This helps prevent cracking. Then, remove it, let it cool completely on a wire rack, and finally, transfer it to the fridge to chill for at least 3-4 hours, or even better, overnight. I know, the waiting is the hardest part!
- Slice and Serve Your Festive Bars:: Once your Patriotic Cheesecake Bars are perfectly chilled and firm, use the parchment paper overhang to lift the entire cheesecake out of the pan. Place it on a cutting board. Now, for the cleanest slices, warm your knife under hot water and wipe it clean between each cut. It really makes a difference for those crisp, clean edges. Garnish with extra fresh berries if you’re feeling fancy, and serve up a slice of pure joy!


