
You know, some recipes just transport you. For me, Sunset Glow Candy Apples take me straight back to those hazy, golden-hour evenings at the county fair. I remember watching the candy apple vendors, mesmerized by the vibrant, glossy sheen, thinking, “How do they do that?” Honestly, I always thought they were some kind of magical, impossible creation. Turns out, it’s a bit of kitchen magic, yes, but totally doable in your own home. The first time I tried, my kitchen looked like a sticky crime scene, but the taste? Pure joy. These aren’t just apples, they’re nostalgia on a stick, making any ordinary day feel a little more festive.
My first attempt at candy apples was… an adventure. I didn’t have a candy thermometer, because who needs one, right? “Eyeball it,” I thought. Big mistake. The first batch was a sticky, gooey mess that slid right off the apples. My counter was coated, my hair probably had sugar strands in it. My husband just laughed. But hey, we ate the sticky sugar off a spoon, and it was still delicious. Lesson learned: sometimes, kitchen tools are your friend!
Ingredients for Sunset Glow Candy Apples
Apple Base
- 6 small-medium firm apples (like Granny Smith or Fuji): You need apples that can stand up to a hot candy coating. Granny Smiths give a nice tart contrast, which I love. Don’t use anything mushy, or you’ll have a sad, soggy candy apple.
Candy Coating Essentials
- 3 cups granulated sugar: This is the star of the show, obviously! Don’t try to skimp or substitute here, it’s what gives us that beautiful, hard shell.
- 1 cup light corn syrup: Keeps the sugar from crystallizing, which is super important for a smooth, glossy finish. I didn’t expect it to make such a difference, but trust me, it does.
- 1 cup water: Just plain old water, helps dissolve the sugar.
Flavor & Color Boosters
- 1 teaspoon red liquid food coloring: This gives us that fiery, sunset red hue. Honestly, use a good quality one for vibrant color. I tried gel once, and it was harder to blend evenly.
- 1/2 teaspoon yellow liquid food coloring: To get that “glow” in our candy apples, a touch of yellow is key. It adds depth and warmth to the red, making it less flat.
- 1 teaspoon vanilla extract: A little flavor boost! It really rounds out the sweetness and makes these candy apples taste even better. Don’t skip it, it just adds that little something extra.
Finishing Touches
- 6 wooden candy apple sticks: Essential for holding your beautiful creations! Make sure they’re sturdy.
Crafting Your Sunset Glow Candy Apples
- Prep Your Apples:
- First things first, wash those apples really well. Like, scrub them. Most store-bought apples have a waxy coating, and if you don’t get it off, your candy won’t stick. I learned this the hard way when my first batch of candy apples looked like they were shedding their skin. Dry them completely, then firmly insert a wooden stick into the stem end of each apple. Set them aside on a parchment-lined baking sheet you’ll thank me later for this parchment tip!
- Make the Candy Syrup:
- In a heavy-bottomed saucepan, combine the sugar, corn syrup, and water. Stir it gently over medium heat until the sugar dissolves. Don’t stir too vigorously once it starts boiling, or you risk crystallization a common mistake I used to make! Once it’s boiling, insert your candy thermometer. This is where patience is key. Let it boil, undisturbed, until it reaches 300°F (149°C), also known as the “hard crack” stage. Seriously, this thermometer is non-negotiable for perfect Sunset Glow Candy Apples.
- Add Color and Flavor:
- Once your syrup hits 300°F, immediately remove it from the heat. Stir in the red and yellow liquid food coloring, along with the vanilla extract. Be quick but gentle. The color will transform into that gorgeous, fiery sunset hue right before your eyes it’s honestly pretty magical to watch! This is the moment your plain sugar syrup becomes the vibrant coating for your Sunset Glow Candy Apples. Work fast, as the syrup will start to cool and thicken.
- Dip Your Sunset Glow Candy Apples:
- Now for the fun part! Tilt your saucepan slightly to create a deeper pool of syrup. Carefully dip each apple into the hot candy mixture, rotating it to coat completely. Let any excess drip off back into the pan. I usually give it a little swirl and a tap against the side of the pan. Don’t let it pool too much at the bottom, or you’ll have thick, uneven spots another oops moment I’ve had! This step really makes your Sunset Glow Candy Apples shine.
- Cool and Set:
- As soon as each apple is coated, place it stick-side up on your prepared parchment-lined baking sheet. Make sure they aren’t touching each other, or they’ll stick together while cooling. Let them sit at room temperature for at least 30 minutes, or until the candy shell is completely hardened and glossy. Honestly, it’s hard to wait, but that crisp, satisfying crunch is worth it. You’ll hear a little “tap, tap” if you gently knock on the hardened shell of your candy apples.
- Enjoy Your Creation:
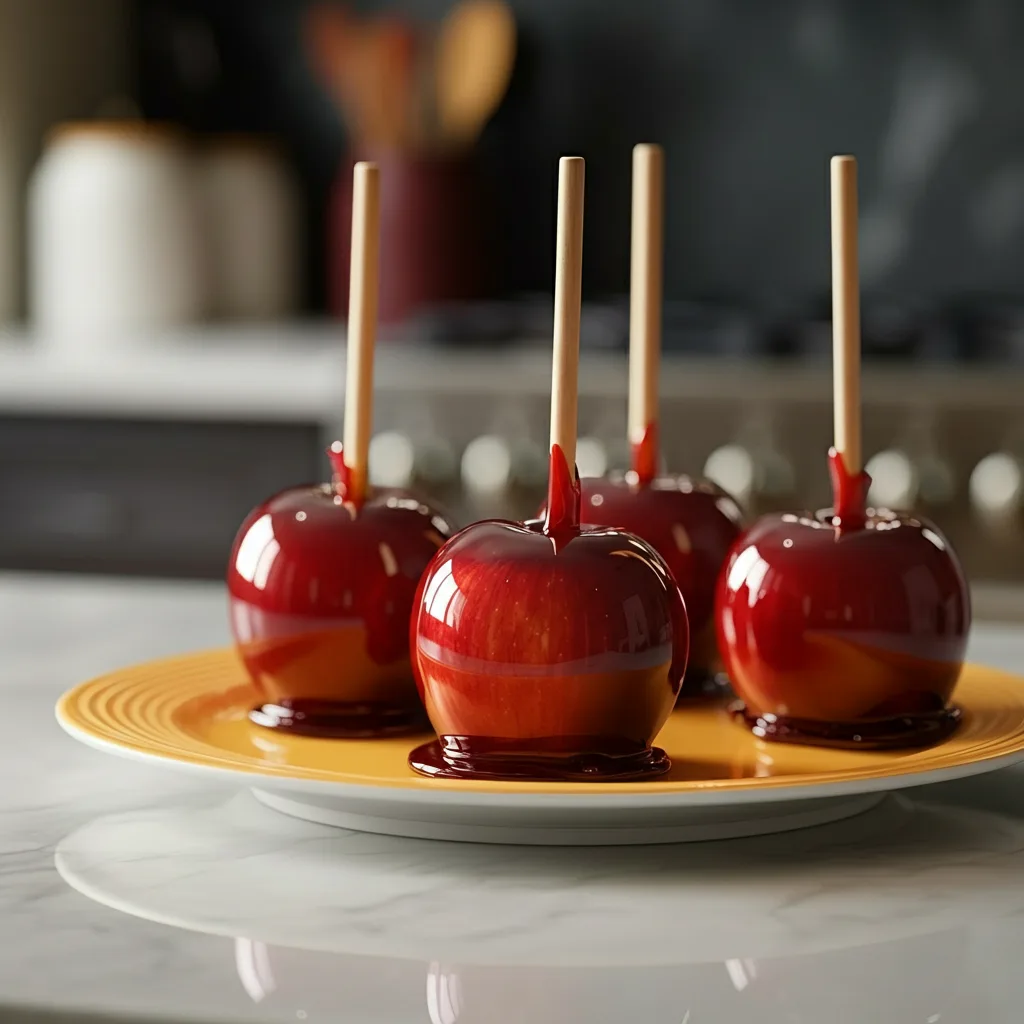
- Once fully cooled and hardened, your beautiful Sunset Glow Candy Apples are ready to be devoured! The shell should be perfectly crisp and shiny, almost like glass. I love seeing the vibrant red and orange hues reflecting the light. It’s such a satisfying sight after all that careful work. Share them with friends, or hoard them all to yourself I won’t tell! They’re a truly special treat that brings smiles.
There was this one time, I was so proud of my perfectly glossy candy apples, I left them on the counter to cool. My curious dog, bless his heart, decided to investigate. Luckily, he only licked one before I caught him, but it was a sticky, funny mess. It just goes to show, kitchen chaos is always lurking, even with the prettiest treats!
Storage Tips for Sunset Glow Candy Apples
Okay, so storing these treats is a bit of an art. The absolute best way to keep them is at room temperature, individually wrapped in cellophane or a plastic bag. I tried putting them in the fridge once, thinking it would keep them fresh, and the humidity made them weep and get all sticky so don’t do that, lol. They’ll lose that glorious hard crack and become a gooey mess. Honestly, they’re best enjoyed within 1-2 days for that perfect crunch. Any longer, and even at room temp, they start to get a little softer. If you’re making them for a party, plan to make them the day of or the evening before for optimal freshness. No one wants a sticky candy apple!

Sunset Glow Candy Apples: Ingredient Substitutions
When it comes to the core ingredients for these candy apples, there aren’t a ton of direct substitutions for the sugar, corn syrup, and water these are the backbone of the candy shell. However, you can play with the apples! While Granny Smith offers a lovely tart contrast, I’ve tried Fuji and Honeycrisp, and they work beautifully too, offering a sweeter bite. Just make sure they’re firm. For coloring, you can experiment with different liquid food colorings to create your own “glow” effect maybe a deep purple and blue for a “midnight sky” candy apple? I once tried a tiny bit of cinnamon extract instead of vanilla, and it gave a warm, spicy twist to my candy apples, which was surprisingly good! Just remember, the sugar-syrup ratio is pretty sacred here.
Sunset Glow Candy Apples: Serving Suggestions
Honestly, these treats are a showstopper all on their own! They don’t really need much else to shine. But if you’re feeling extra, I love serving them as part of a dessert spread alongside some homemade caramel corn for a full carnival experience. A mug of hot apple cider (spiked or not!) or a simple vanilla milkshake would be a dreamy pairing the cold creaminess against the hard, sweet crunch is just chef’s kiss. They’re also fantastic as a vibrant centerpiece for a fall gathering or a kid’s birthday party. Just imagine a platter of these glowing beauties, perhaps with a dusting of edible glitter for extra magic! They make any occasion feel a little more special, especially when you’re celebrating with loved ones.
The Sweet History of Candy Apples and My Sunset Glow Candy Apples
Candy apples, or to be more specific, the concept of a fruit coated in a sweet, hardened syrup, has been around for centuries in various forms. But the modern candy apple as we know it, often linked to fairs and carnivals, is commonly attributed to William W. Kolb, a confectioner in Newark, New Jersey, back in 1908. He dipped apples in red cinnamon candy for a Christmas display, and they were a hit! For me, these treats always bring back memories of local fairs and autumn festivals, a simple pleasure that marks the changing seasons. My “Sunset Glow” take on these classic candy apples is just my way of adding a little extra warmth and vibrancy to that beloved tradition, making them feel like a personal homage to those golden-hour memories. It’s a little piece of history, made new again in my kitchen.
Making these candy apples always feels like a little victory in my kitchen. From the sticky mishaps to the glossy, vibrant finish, it’s a journey, and honestly, so rewarding. There’s something truly special about creating a treat that brings so much joy and a touch of childhood wonder. I hope you give them a try and find your own sweet memories in every crunchy bite. Let me know how your batch turns out!

Frequently Asked Questions About Sunset Glow Candy Apples
- → What kind of apples are best for Sunset Glow Candy Apples?
I always reach for firm, crisp apples like Granny Smith, Fuji, or Honeycrisp. Their texture holds up really well to the hot candy coating, and a tart apple provides a nice balance to the sweetness. Honestly, I find softer apples just get mushy.
- → Can I use gel food coloring for these candy apples?
You can, but I personally find liquid food coloring blends more smoothly into the hot syrup for these treats. Gel can sometimes be a bit clumpy, and you want that perfectly even, glossy finish. I tried gel once, and it worked, but not as flawlessly.
- → Why did my candy coating turn sticky on my candy apples?
Ah, the sticky dilemma! This usually happens if the syrup didn’t reach the “hard crack” stage (300°F/149°C) or if there’s too much humidity. A candy thermometer is your best friend here. I’ve had many sticky batches before I learned my lesson!
- → How long do these candy apples last?
They’re really best enjoyed within 1-2 days for that ideal crisp shell. Store them individually wrapped at room temperature. Don’t put them in the fridge, I tried that once, and they got super sticky and lost their shine, lol.
- → Can I add other flavors to my candy apples?
Absolutely! I’ve experimented with a tiny dash of cinnamon extract for a warmer flavor, or even a hint of raspberry extract for a different fruity twist. Just be mindful not to add too much liquid, as it can affect the candy’s consistency for your glowing treats.

Crispy Sunset Glow Candy Apples: Classic Fair Treat
- Prep Time: 20 Minutes
- Cook Time: 25 Minutes
- Total Time: 45 Minutes
- Yield: 6 Servings 1x
- Category: Baking Recipes
Description
Sunset Glow Candy Apples are easier than you think! Learn my personal tips, tricks, and “oops” moments for these vibrant, crunchy treats.
Ingredients
- Apple Base:
- 6 small-medium firm apples (like Granny Smith or Fuji)
- Candy Coating Essentials:
- 3 cups granulated sugar
- 1 cup light corn syrup
- 1 cup water
- Flavor & Color Boosters:
- 1 teaspoon red liquid food coloring
- 1/2 teaspoon yellow liquid food coloring
- 1 teaspoon vanilla extract
- Finishing Touches:
- 6 wooden candy apple sticks
Instructions
- Prep Your Apples:: First things first, wash those apples really well. Like, scrub them. Most store-bought apples have a waxy coating, and if you don’t get it off, your candy won’t stick. I learned this the hard way when my first batch of candy apples looked like they were shedding their skin. Dry them completely, then firmly insert a wooden stick into the stem end of each apple. Set them aside on a parchment-lined baking sheet – you’ll thank me later for this parchment tip!
- Make the Candy Syrup:: In a heavy-bottomed saucepan, combine the sugar, corn syrup, and water. Stir it gently over medium heat until the sugar dissolves. Don’t stir too vigorously once it starts boiling, or you risk crystallization – a common mistake I used to make! Once it’s boiling, insert your candy thermometer. This is where patience is key. Let it boil, undisturbed, until it reaches 300°F (149°C), also known as the “hard crack” stage. Seriously, this thermometer is non-negotiable for perfect Sunset Glow Candy Apples.
- Add Color and Flavor:: Once your syrup hits 300°F, immediately remove it from the heat. Stir in the red and yellow liquid food coloring, along with the vanilla extract. Be quick but gentle. The color will transform into that gorgeous, fiery sunset hue right before your eyes – it’s honestly pretty magical to watch! This is the moment your plain sugar syrup becomes the vibrant coating for your Sunset Glow Candy Apples. Work fast, as the syrup will start to cool and thicken.
- Dip Your Sunset Glow Candy Apples:: Now for the fun part! Tilt your saucepan slightly to create a deeper pool of syrup. Carefully dip each apple into the hot candy mixture, rotating it to coat completely. Let any excess drip off back into the pan. I usually give it a little swirl and a tap against the side of the pan. Don’t let it pool too much at the bottom, or you’ll have thick, uneven spots – another oops moment I’ve had! This step really makes your Sunset Glow Candy Apples shine.
- Cool and Set:: As soon as each apple is coated, place it stick-side up on your prepared parchment-lined baking sheet. Make sure they aren’t touching each other, or they’ll stick together while cooling. Let them sit at room temperature for at least 30 minutes, or until the candy shell is completely hardened and glossy. Honestly, it’s hard to wait, but that crisp, satisfying crunch is worth it. You’ll hear a little “tap, tap” if you gently knock on the hardened shell of your candy apples.
- Enjoy Your Creation:: Once fully cooled and hardened, your beautiful Sunset Glow Candy Apples are ready to be devoured! The shell should be perfectly crisp and shiny, almost like glass. I love seeing the vibrant red and orange hues reflecting the light. It’s such a satisfying sight after all that careful work. Share them with friends, or hoard them all to yourself – I won’t tell! They’re a truly special treat that brings smiles.


